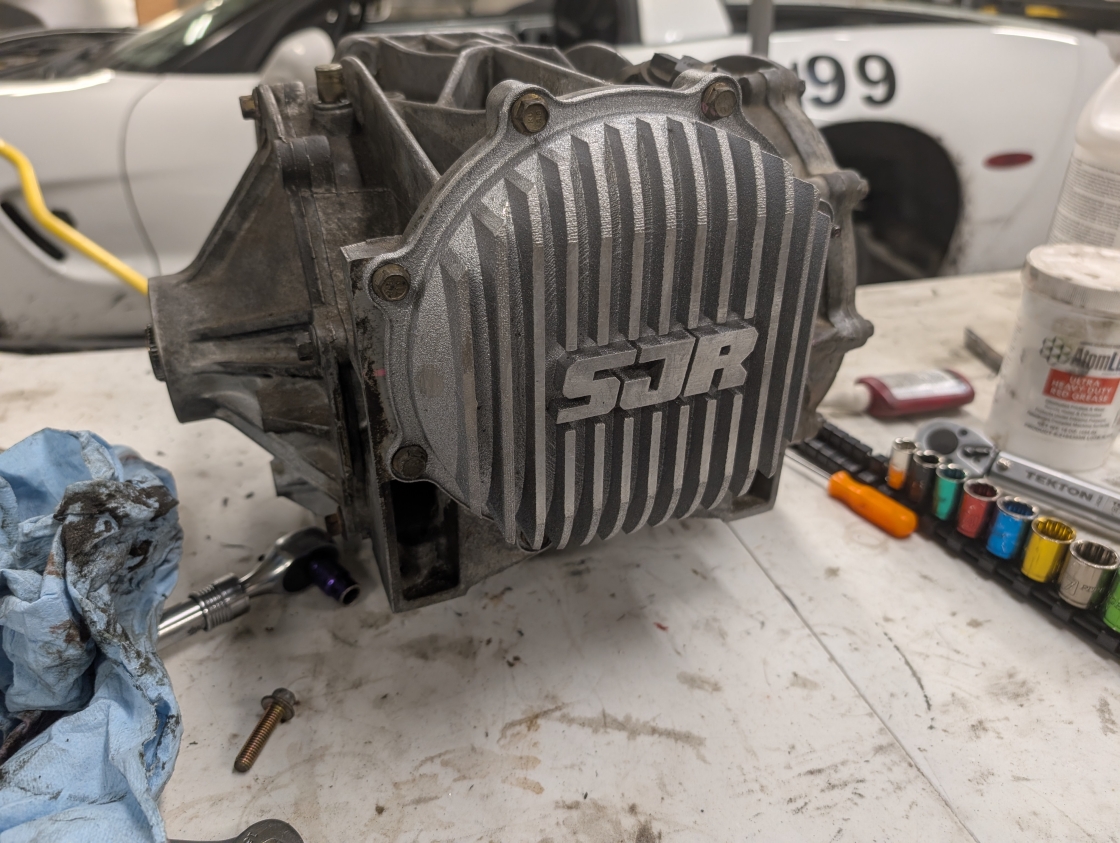
The C5 Corvette is an amazing machine. It features a lot of components that can take users well beyond what the car was ever originally intended to do are other folks covet to swap into their own cars... but there are a few shortcomings. The harmonic balancer, the ABS/EBCM woes, the guibos in the torque tube... there's things that just weren't going to hold up for 25+ years of life, let alone the abuse a lot of enthusiasts are throwing at these cars.
One area that is near guaranteed to have issues on the C5 Corvette is the differential. Most folks and/or mechanics will start to hear their diff giving them grief in the form of "gear whine" most commonly associated with increased NVH when putting in solid mounts in the rear of their C5 and think the bearings are going bad. Then everyones mind goes right to thinking the whole thing needs a rebuild with a lot of expensive parts and unique tools most folks don't have... but take a few deep breaths and chill out because that's rarely the case! The vast majority of differentials just need a simple refresh of a few key internals the majority of DIY folks can handle replacing, and we've got the low down on just what you'll need to do.
Before Even Turning a Wrench: Stop & Assess
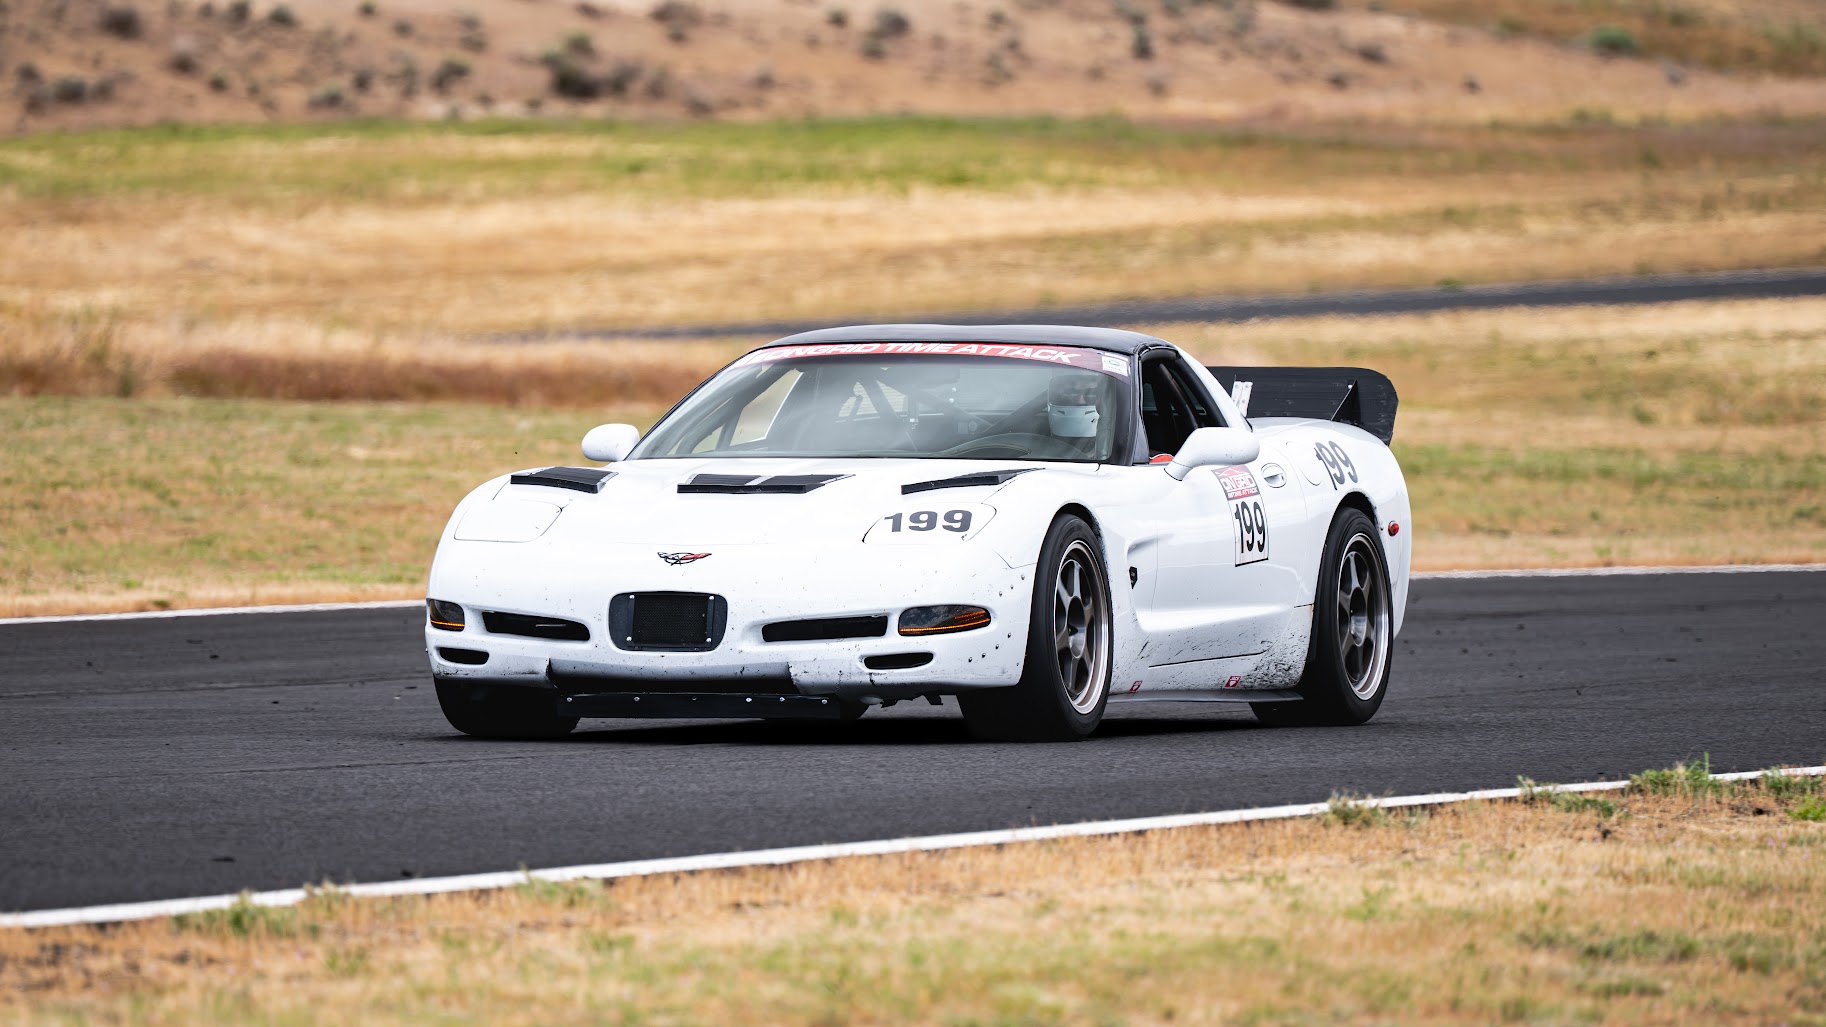
Before you even start buying parts, stop and take a quick breath. Now that you've slowed down a bit, you're going to want to honestly assess what you've even got on with your C5 Corvette. Knowing what you currently have and how it relates to your goals, current setup, and future plans is key to determining what will actually work for you and your C5 Corvette
If you're running a sub 500 wheel horsepower and are not constantly hard launching your car with drag slicks... odds are greatly in your favor that you don't need to change anything differential Just refresh it with easy to reinstall parts. You can take a deep breath and just keep reading for the sake of knowing.
The vast majority of C5 Corvette owners don't need an apocalypse proof differential. Even a significant chunk of boosted C5 Corvette folks knocking on the door of 500-600 whp will spin their street tires long before they hook and cause damage. Still, be realistic. Just what do you have going on? If it's not anything we warned you about, skip to the next section.
So now on the off chance you are pushing these boundaries that most folks don't, let's talk about your options!
The "no kill like overkill" option (including your budget) is a full on conversion to the differential out of a later model C6 corvette. We're not going to cover that modification because it's an expensive and involved process and this article is really about rebuilding the diff that comes in the C5 Corvette. Just know that the TR6060 transmission and differential conversion is an option, along with even the C6 rear subframe.
Not into the nuclear option? No worries, here's the rest of the ways you can overhaul a C5 differential for high power builds.
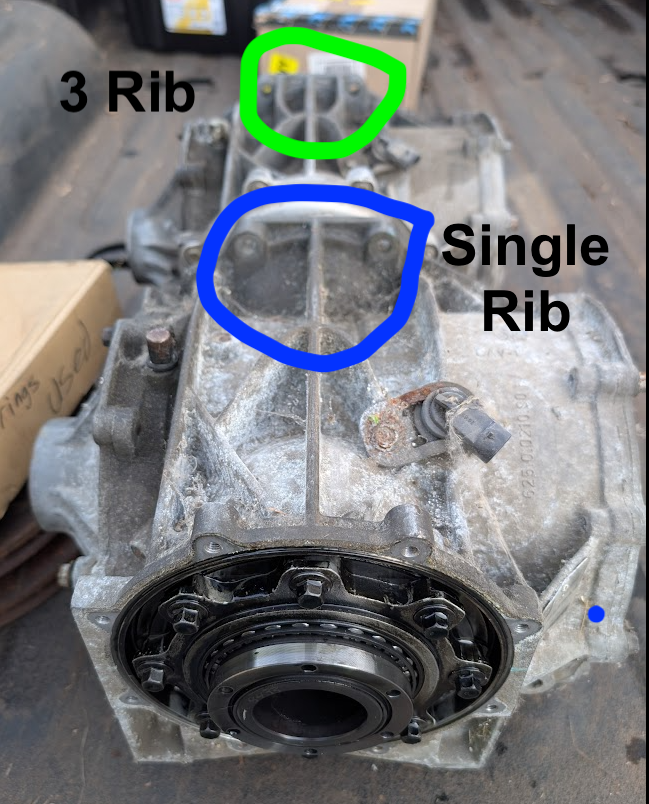
The next thing you'll want to focus on is what differential you even have. Pictured above is a single rib C5 Corvette differential versus a 3 rib differential. The 3 rib differentials became standard 2001+ C5 Corvettes and are renowned for having a more reinforced case that can handle more power. Converting from a single rib to a 3 rib will increase the odds that your C5 differential will handle as much abuse as possible. Is it necessary? Will it let you go easily past 500 horsepower? It's not necessary for most folks as we've said, and there's no real validated horsepower number to differentiate the need for a single rib versus three rib differential. The general consensus though is that a three rib give you a bit more headroom for power and abuse on your car, so look at getting a three rib differential if you are looking to maximize your odds of success
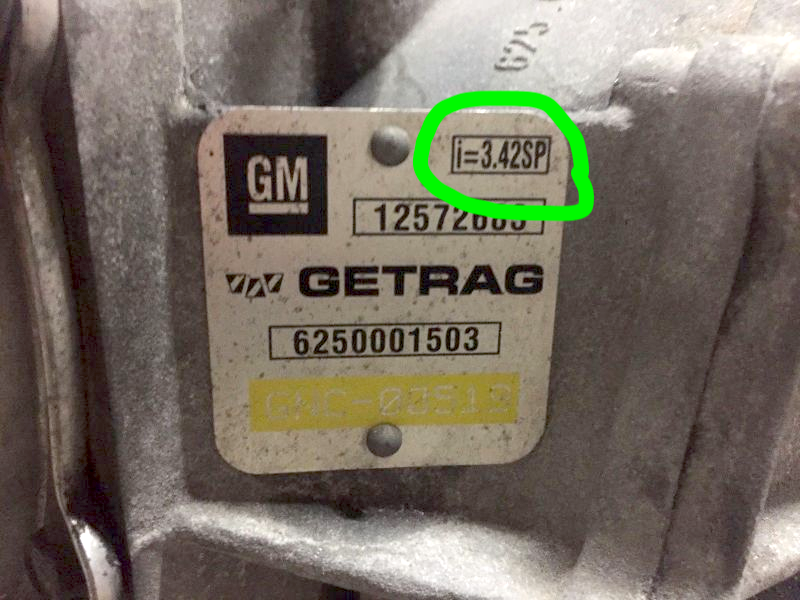
Now one last detail to look for in your or a sourced differential: if you're right on the edge of what a C5 differential should do power or launch wise... one additional OEM variation provides even more abuse tolerance: The C5 Z06 three rib differential with shot peened ring and pinion gears. These gears have additional hardening and have been stressed relieved to provide additional strength and shock tolerance to them. If you're looking to get the most out of OEM, this is what to look for. To identify a C5 Z06 differential with shot peened gears, look at the differential tag. Above you can see a picture of a C5 Corvette Differential tag and in green we've circled the gear ratio followed by the letters SP. The letters SP specifically indicate that you have the hardened shot peened ring and pinion gears from the C5 Z06 and can get away with a bit more power output from your setup.
Now even if your diff doesn't have shot peened gears... It is worth noting you can get hardened internal components to replace everything in these differentials. If you're going to swap internals out anyways, there's no sense paying the extra price to get a C6Z06 shot peened differential. In fact, if you have a C5 Z06 differential and planning to swap the internals out for a different gear ratio or maximum strength out of the three rib differential... you might as well sell it your C5 Z06 differential for the premium it commands and grab a regular old 3 rib differential and put the profits towards rebuilt internals.
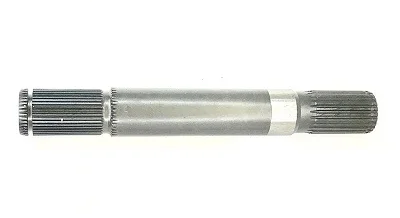
Other overhaul options include hardened output and input shaft options from Texas Drivetrain Performance. Swapping these out also increases your odds of success, but again most folks won't need these.
The above should cover the vast majority of what users need to know, and plenty folks don't need to know. There are of course some differential ratio considerations, but we've written about differential ratios before and this article is really about just how easy a DIYer can refresh their differential.
The Easy DIY Differential Refresh
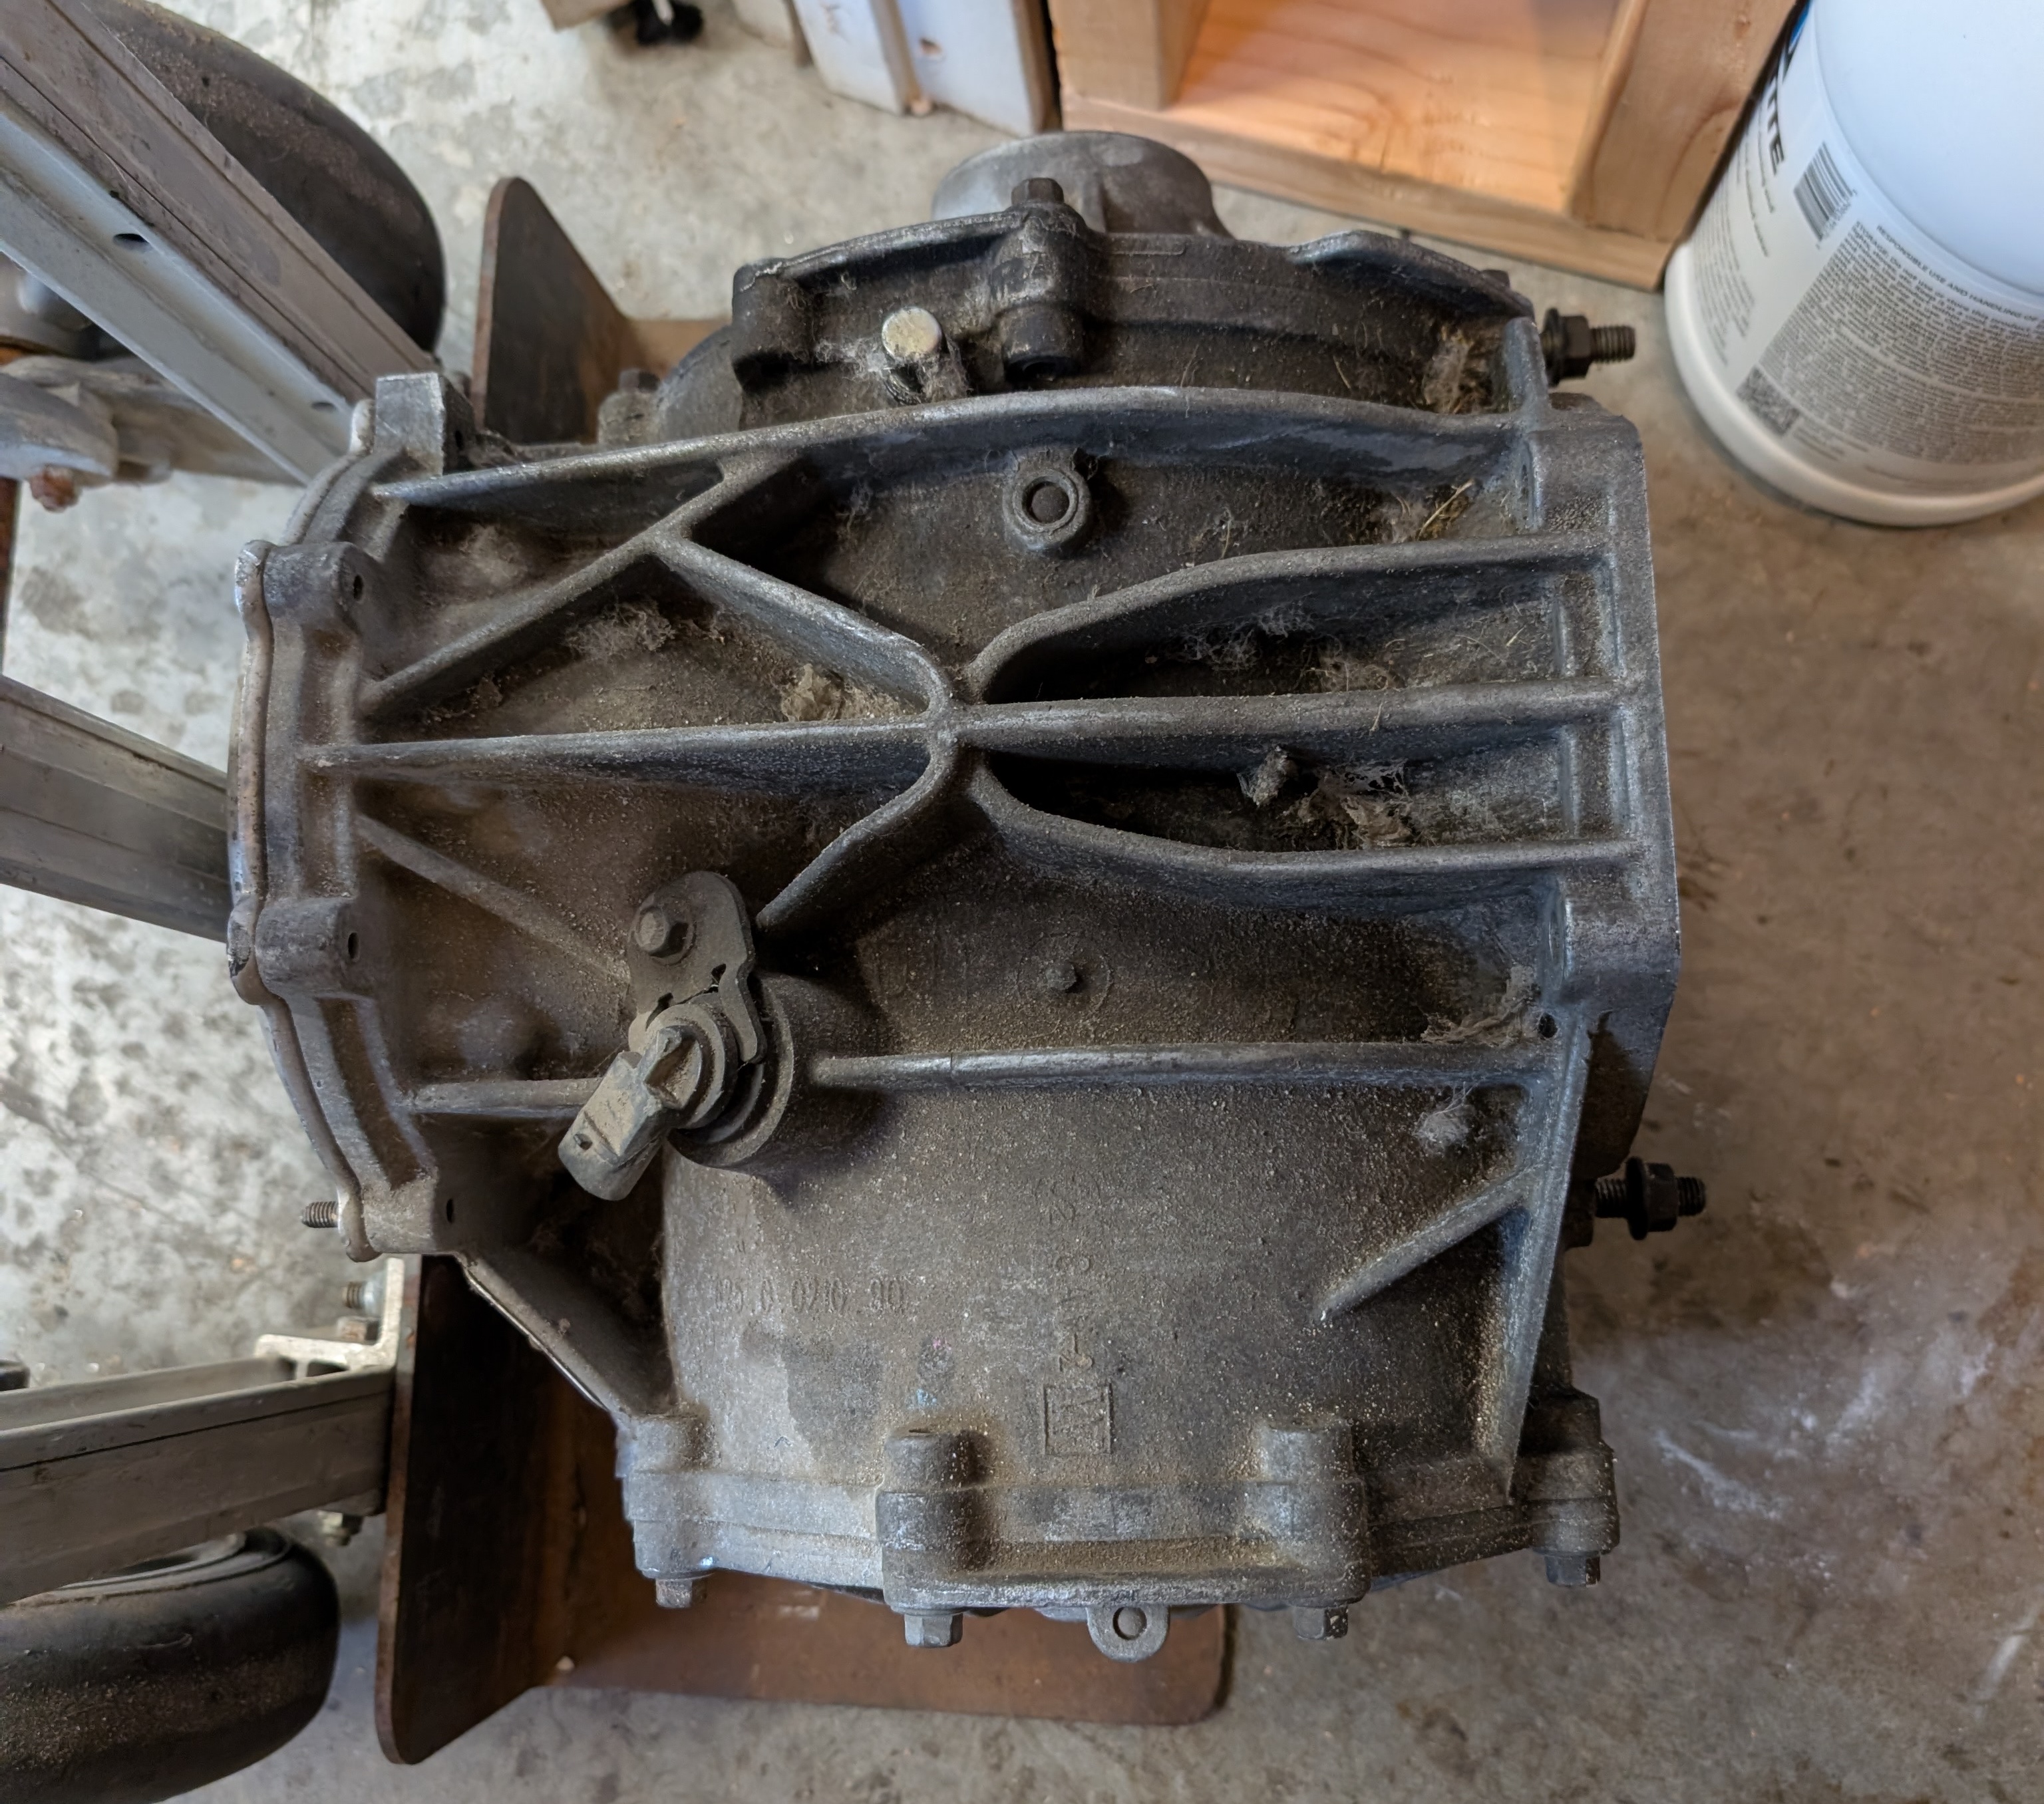
Hopefully by now you've established that you are in the vast majority of C5 Corvette owners and your needs don't exceed the capabilities of the equipment you've got. Assuming that's the case, let's now get down to the nitty gritty of how easy of a refresh the C5 differential is.
There are also a lot of write-ups indicating that you need specialty tools to pull this job off. We're here to show you that simply isn't true. This job won't require much in the way of tools that your average DIY'er doesn't possess, excluding a shop press. The shop press however can be worked around as you should be able to source a shop press near you. You car coordinate with a machine shop or local fabricator for quick use of their press for a very very reasonable fee, or post in a local car group and ask if you can borrow one for a while for a fee. Most folks only paid $100 for theres, and loaning it out for $60 for a week is a quick way to explain to their wife how wise of a purchase that shop press was.
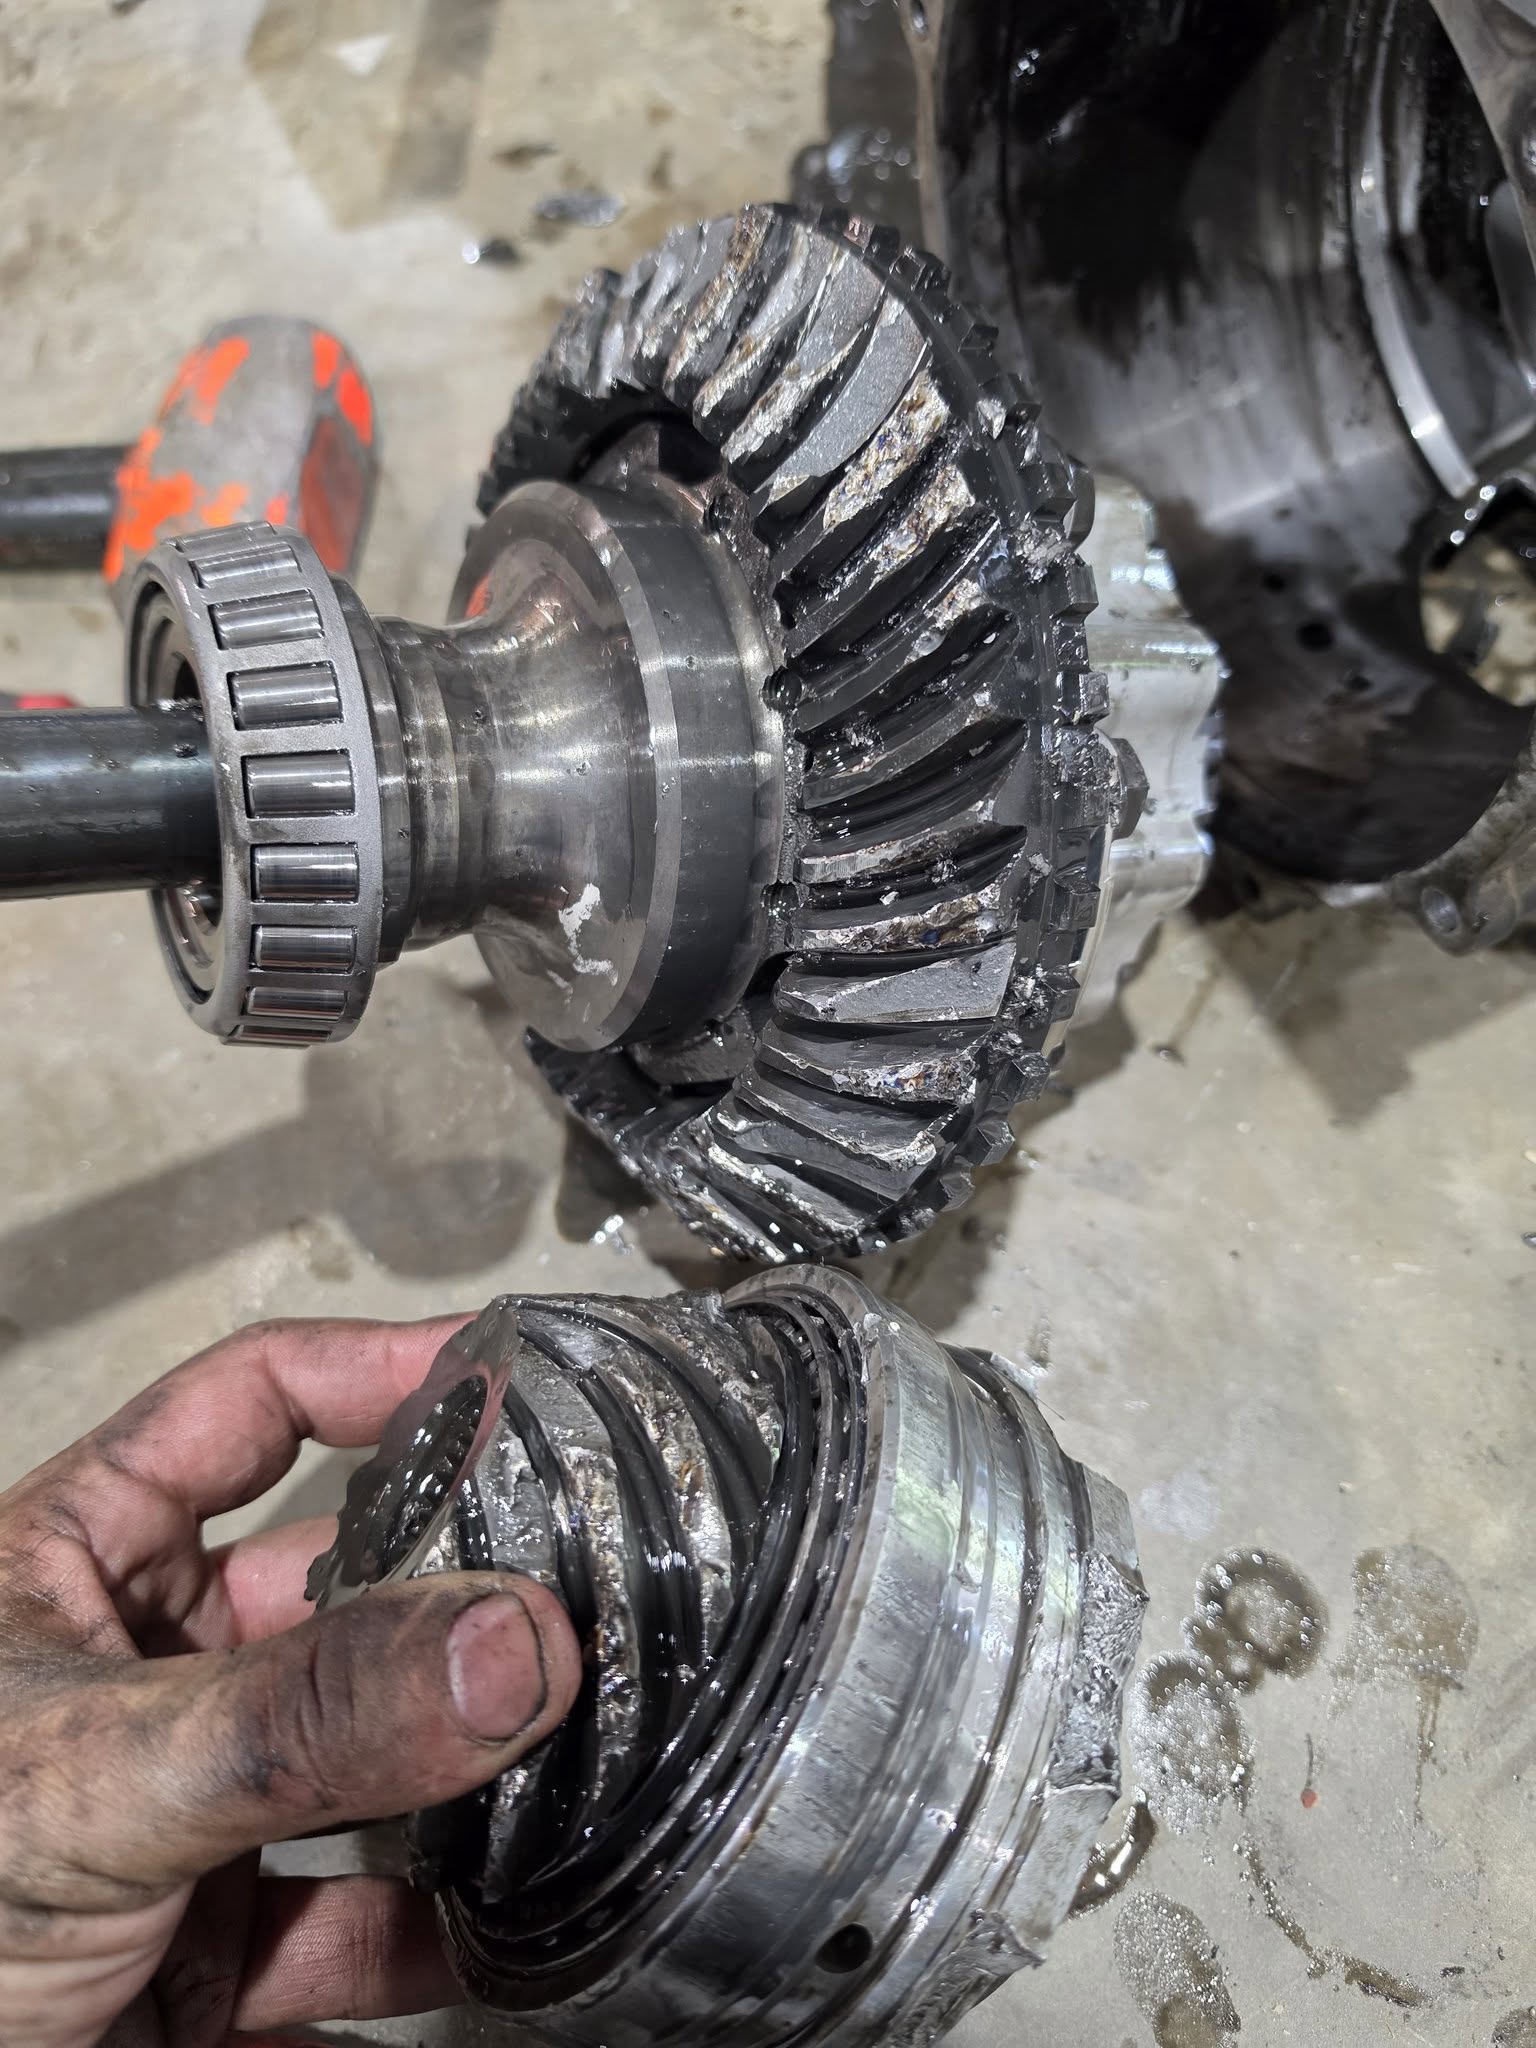
One thing of note for this job is we don't include any information on replacing output shafts or wheel bearings in this article. Why might you ask? Well, see the picture above where a differential failed catastrophically. Now look at the bearing in the picture, they're still good to go despite all the carnage! For the vast majority of folks the differential bearings and output shafts hold up without issue and don't need to be replaced, vastly simplifying the job for your average DIYer. You can rest easy, it's likely your issue isn't bearing related.
Parts You Need For the Basic Refresh:
- C6 Clutch Pack + Spring Washers
- O-Rings and Axle Seals
- Differential Fluids
- 2x Quarts of Mobil1 Synthetic (OEM)
- Alternative: 2x Quarts of Valvoline full Synthetic 75w90
- AC Delco Limited Slip Additive (Put in one bottle)
- Hydraulic Thread Sealant
- High Temp Red Loctite 272
- Purple Loctite
- This is optional for the smaller bolts throughout this project, but our author Shred Jesse won't shut up about how nobody knows how useful low strength Purple Loctite is... so we're putting it in here for him!
Tools You Will Need:
- Torque Wrench
- Metric Sockets & Metric Wrenches
- Make sure you have at least have 13mm, 15mm and 18mm in both sockets and wrenches. That size is very abnormal in most socket sets, and yet are the most frequently used sizes on the C5 Corvettes.
- Two oil catch pans to work in (Diff is too big for just one)
- A nice flat clear surface to work on. We like having folding tables for jobs like this where the need is temporary.
- Transmission Floor Jack
- Harbor Freight's works decent enough as well.
- Tall Jack Stands
- We generally like to see at least 18" of clearance, with 24" being even better. Whatever height you can get, work with that!
- These Yellow Jacket jackstands work good.
Tools That Will Make Your Life Easier:
- LARGE Impact Gun
- Blast off your ring gear retaining bolts with ease! Remove the giant axle nuts holding the axles to the rear knuckles in second! You can get by without it, but it makes the job much less stressful. Some folks report success using this to remove and reinstall subframe bolts as well, but we've heard tale of folks damaging the bolts via this method and thus don't recommend it.
- Shop Press
- You can order the one we linked, or get one from Harbor Freight, or if you'll never need one again just do like we said above and pay somebody to do it. Or buy the press and immediately sell it for half off, should keep the whole thing under $60.
Step 1 - Remove Differential From the Car
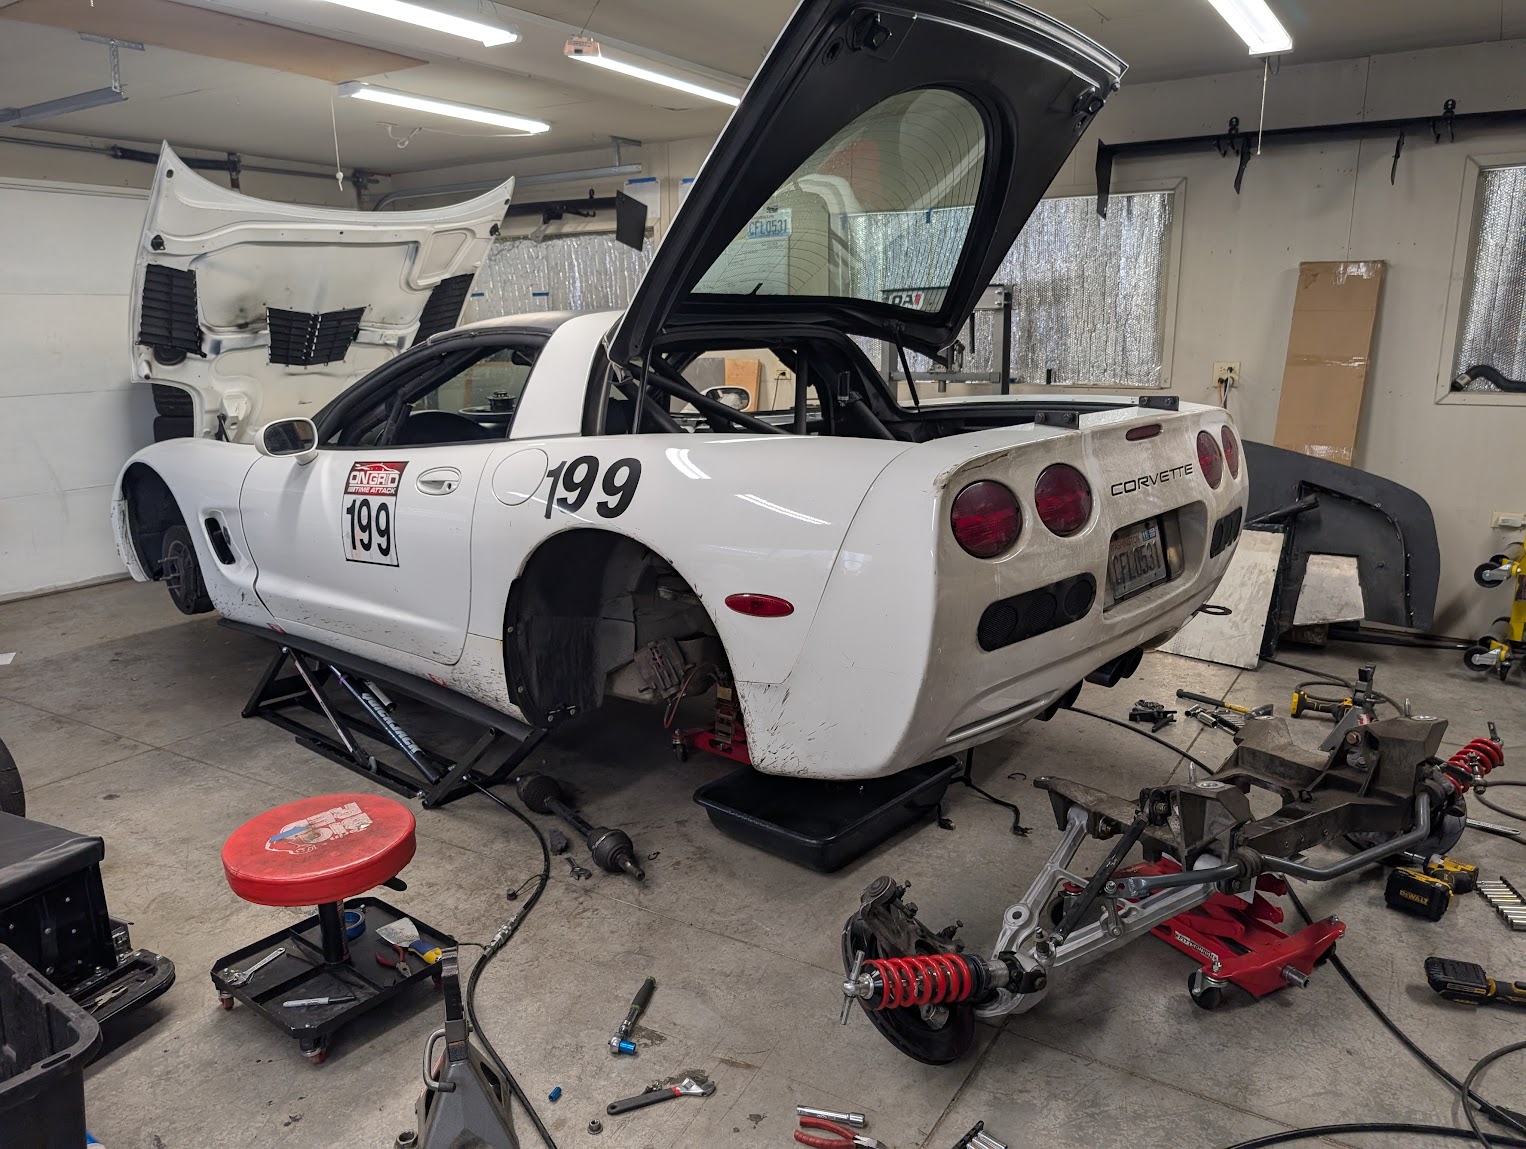
Removal of the differential from the C5 Corvette is a pretty well documented process, with lots of variations as well. Here's one of many videos on the process, though we advocate it as one of the clearest ones we can recommend at this time:
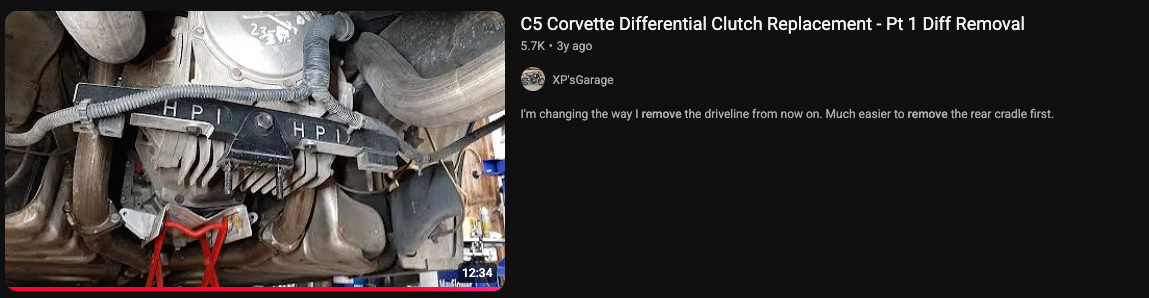
You can actually follow that entire video series for a lot of the process here, but it can be a bit overwhelming for some folks, so we recommend referencing it after cruising through our article. We also really like how they removed the rear subframe first while supporting the transmission, then removed the differential. Removing the rear of the car as two pieces simplifies access and keeps the weight of what you're trying to move around down. It also only adds two more bolts to the process, the differential mount to the rear subframe. In theory it adds 20 minutes to the job... but good luck finagling the entire rear sub frame with the differential on it in place and accessing the bolts in those 20 minutes. Pick an approach that best suits you though and go from there!
Step 2 - Remove Passenger Side Cover
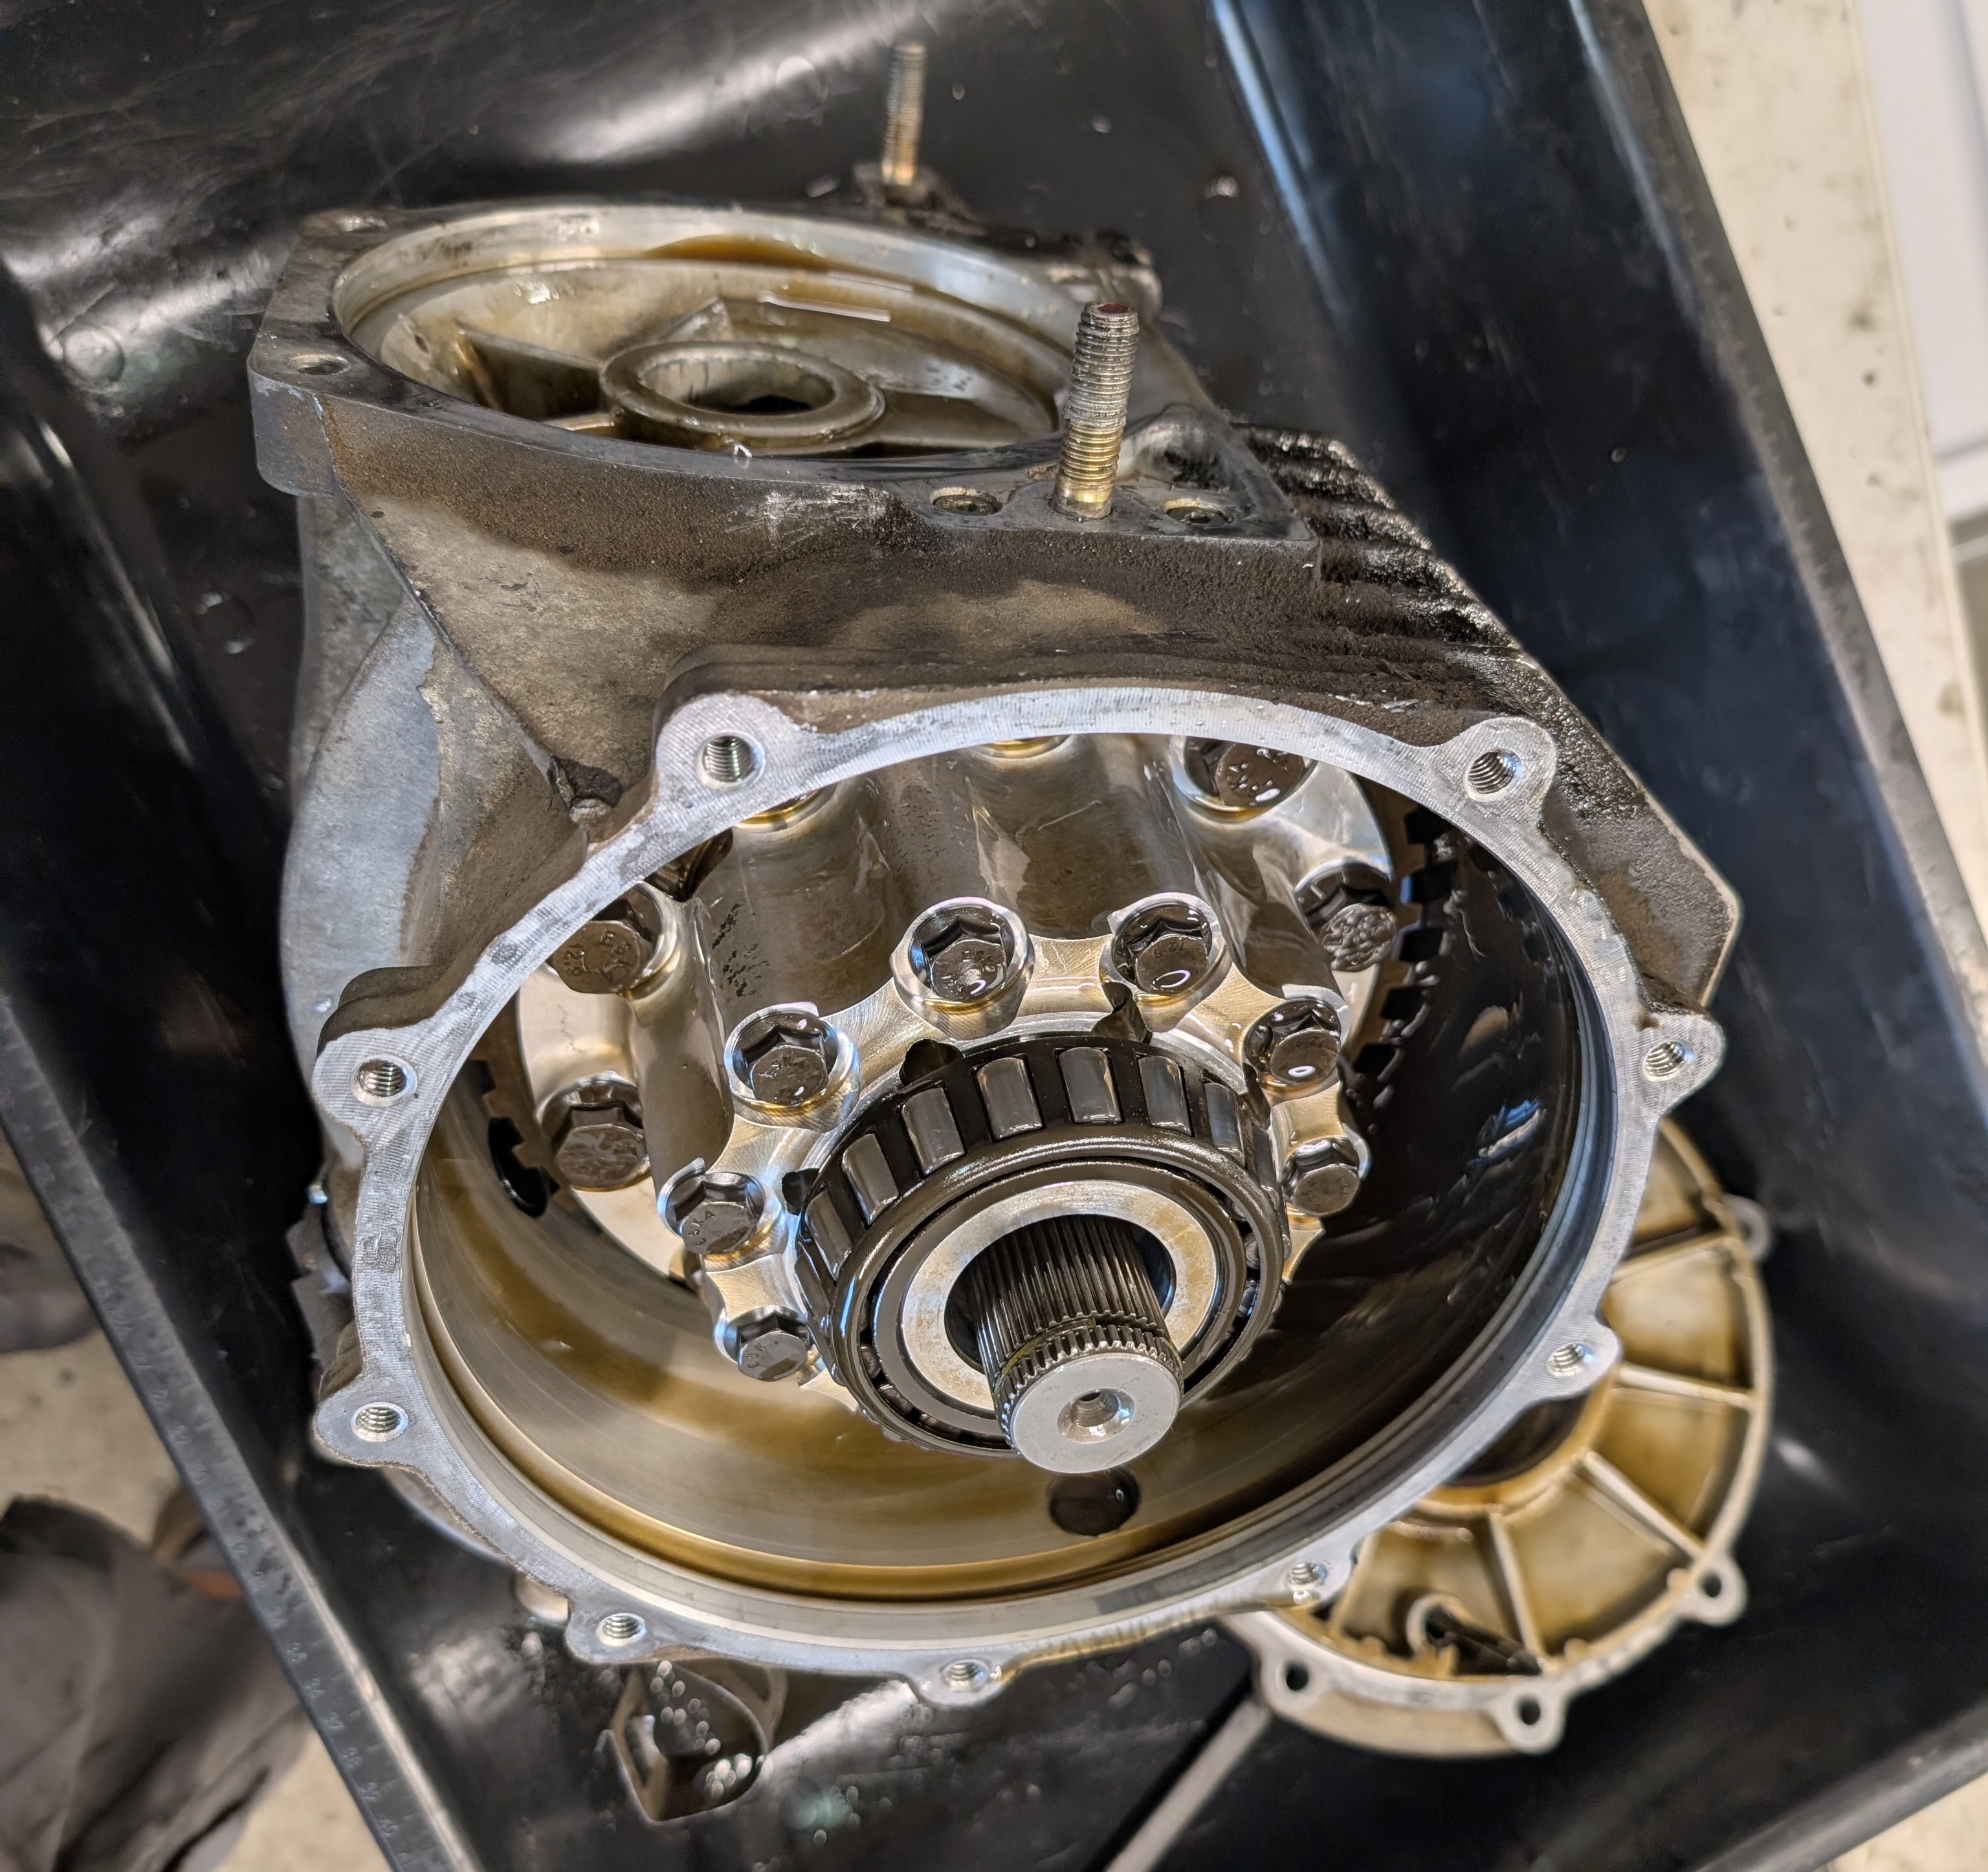
So we'll start this section by saying we highly recommend already having drained the differential on the car before you start this process. It'll be less messy if you do so and will reduce the weight of the differential for moving onto your bench. That said, sometimes the directions you find and follow for removal may not have it, so just be aware that draining the diff early is recommended.
The differential draining being complete now, begin with with removal of the passenger side differential cover. The bolts should all be a breeze to remove, though the cover itself may put up a bit of fight. Simply give the cover a few friendly taps per side with a rubber mallet once the bolts and removed and the cover should be off in no time.
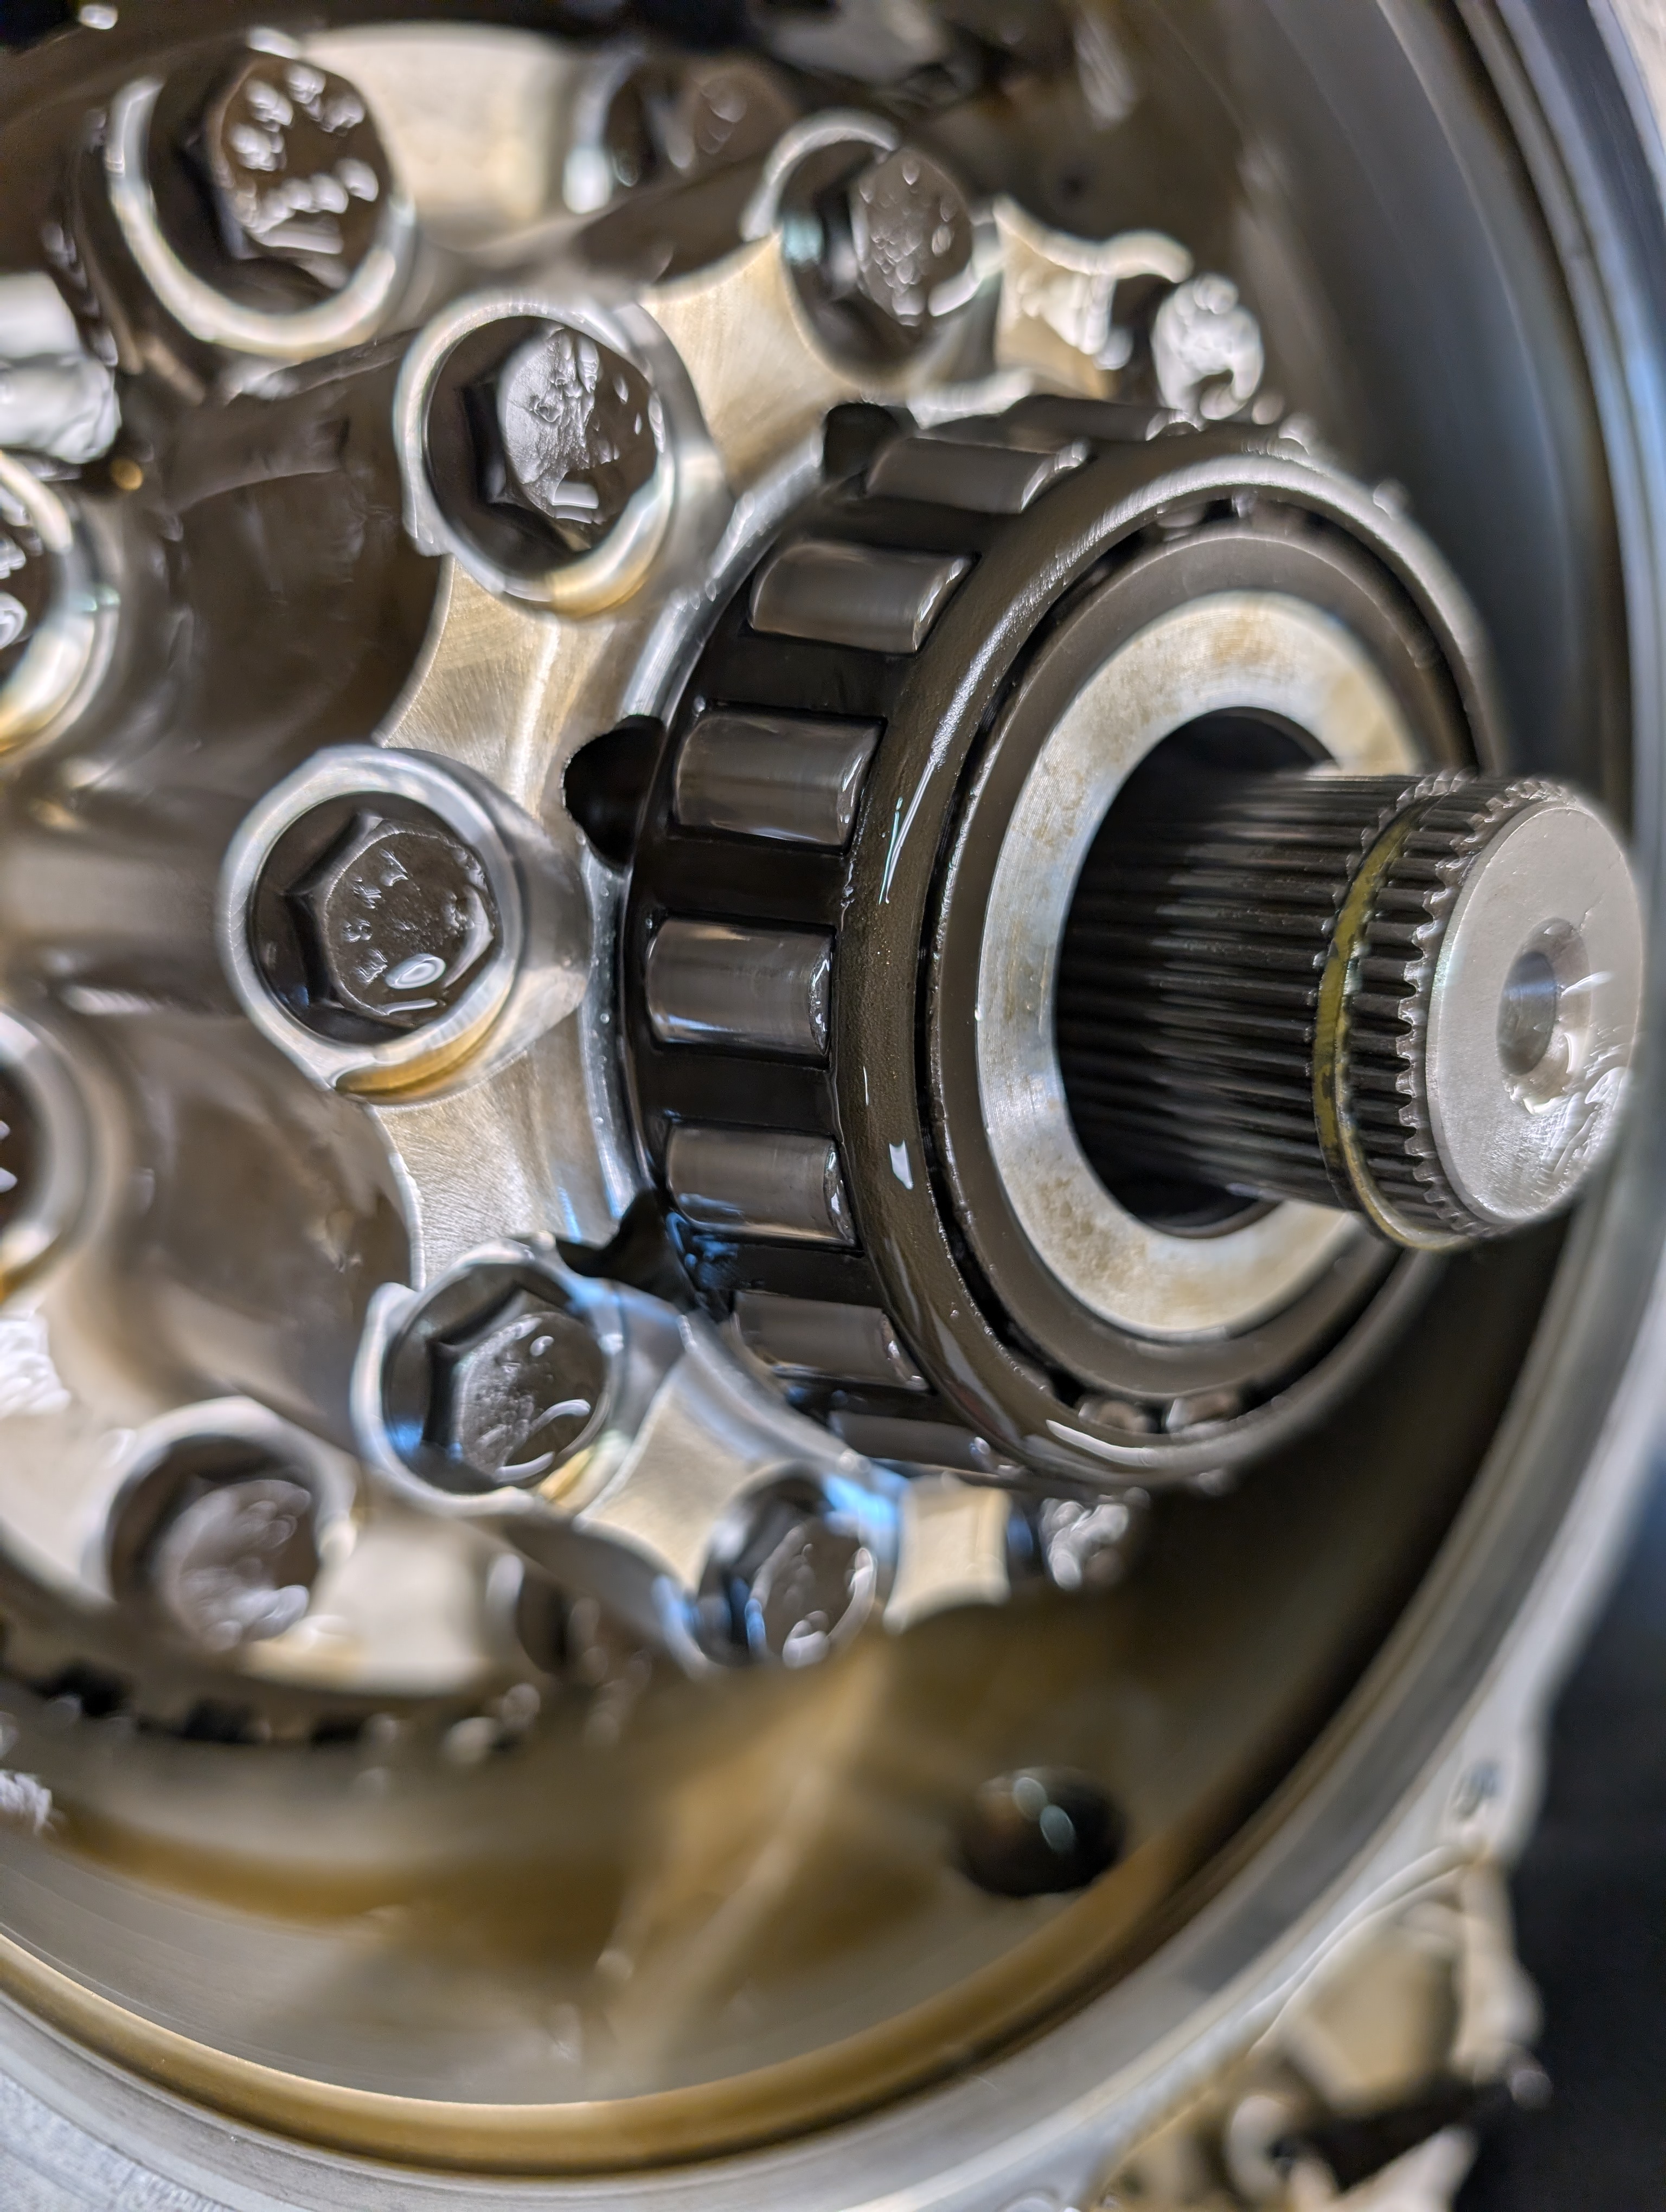
This should give you a good first view into your differential. Odds are good you won't see much of anything. If you see small metal fragments, don't freak out yet. Small chunks of the C5 spring washers can and do get out, and they generally don't do much of anything to a differential.
Step 3 - Remove Stud Which Blocks Removal Of Carrier
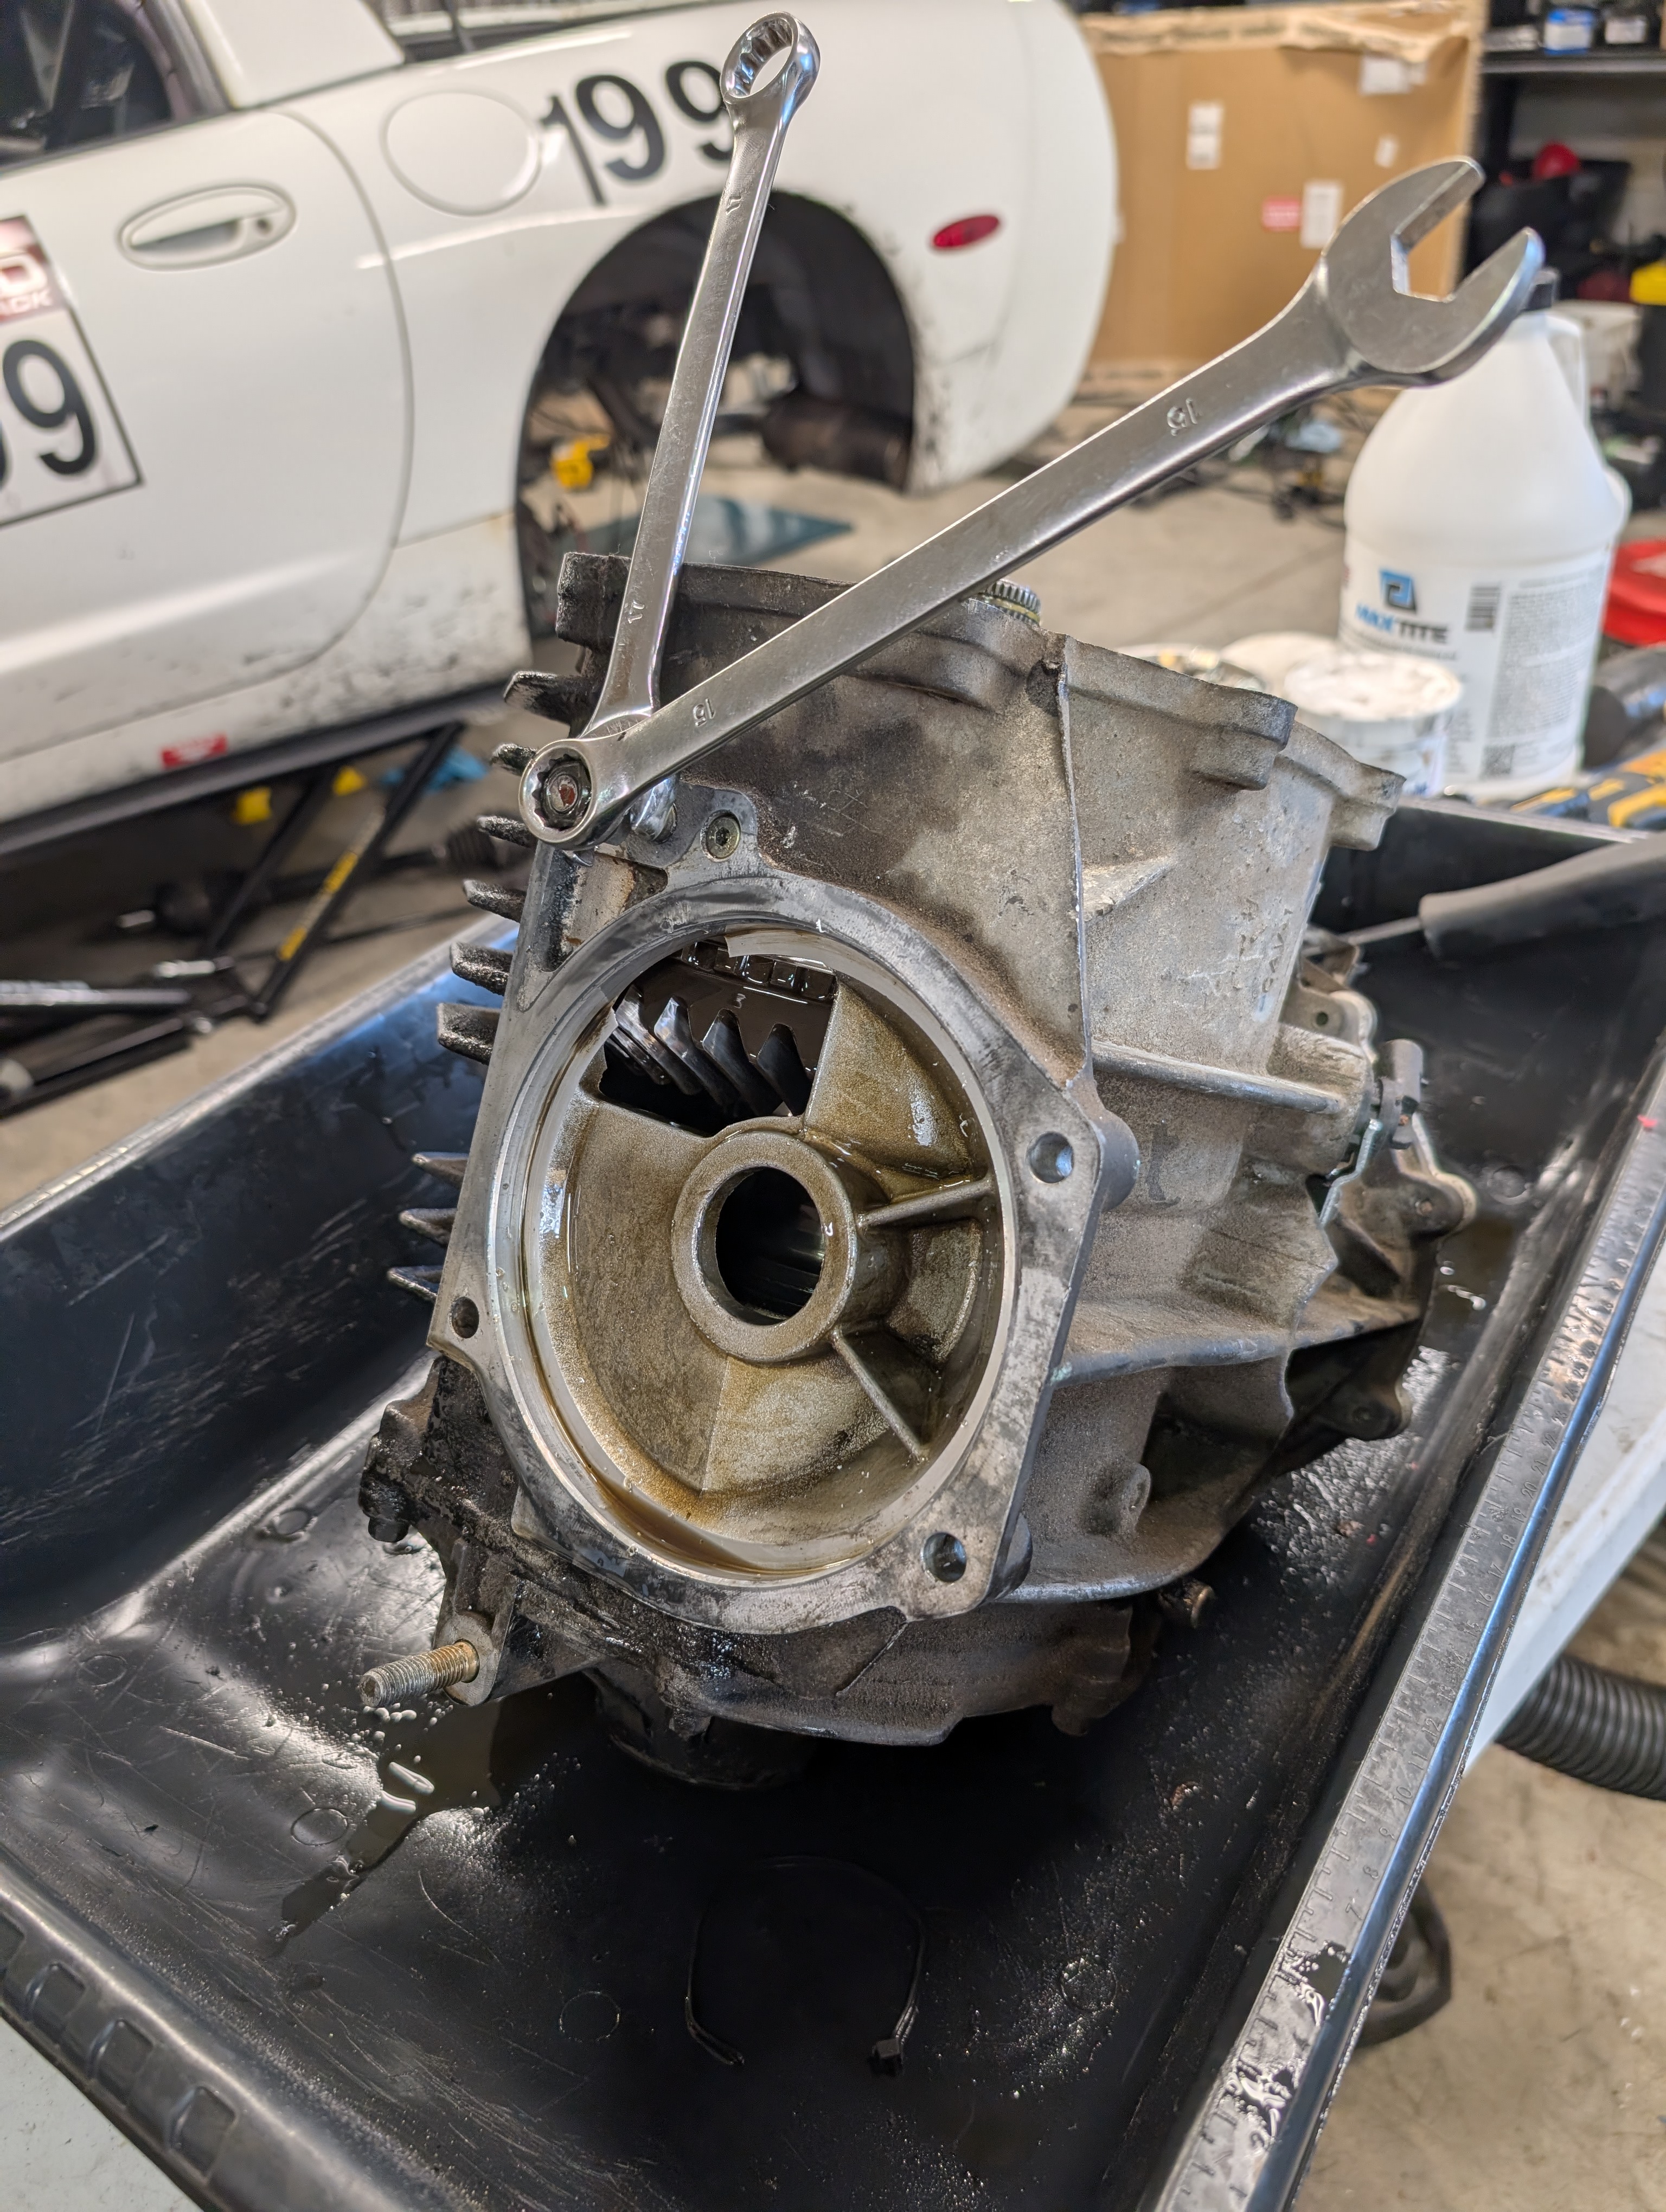
With the side cover removed the differential will be loose inside the case, but it's removal is blocked by one pesky little mounting block that holds one of the differential to transmission mounting studs. There are two allen key bolts holding the block onto the differential, and then the stud itself threads into the block. Start by finding two nuts (or utilize the two from the diff removal) and sandwich them together on the threads of the stud with two wrenches. Once they are snug, you can then utilize the sandwich nuts to turn the stud loose and remove it from the carrier.
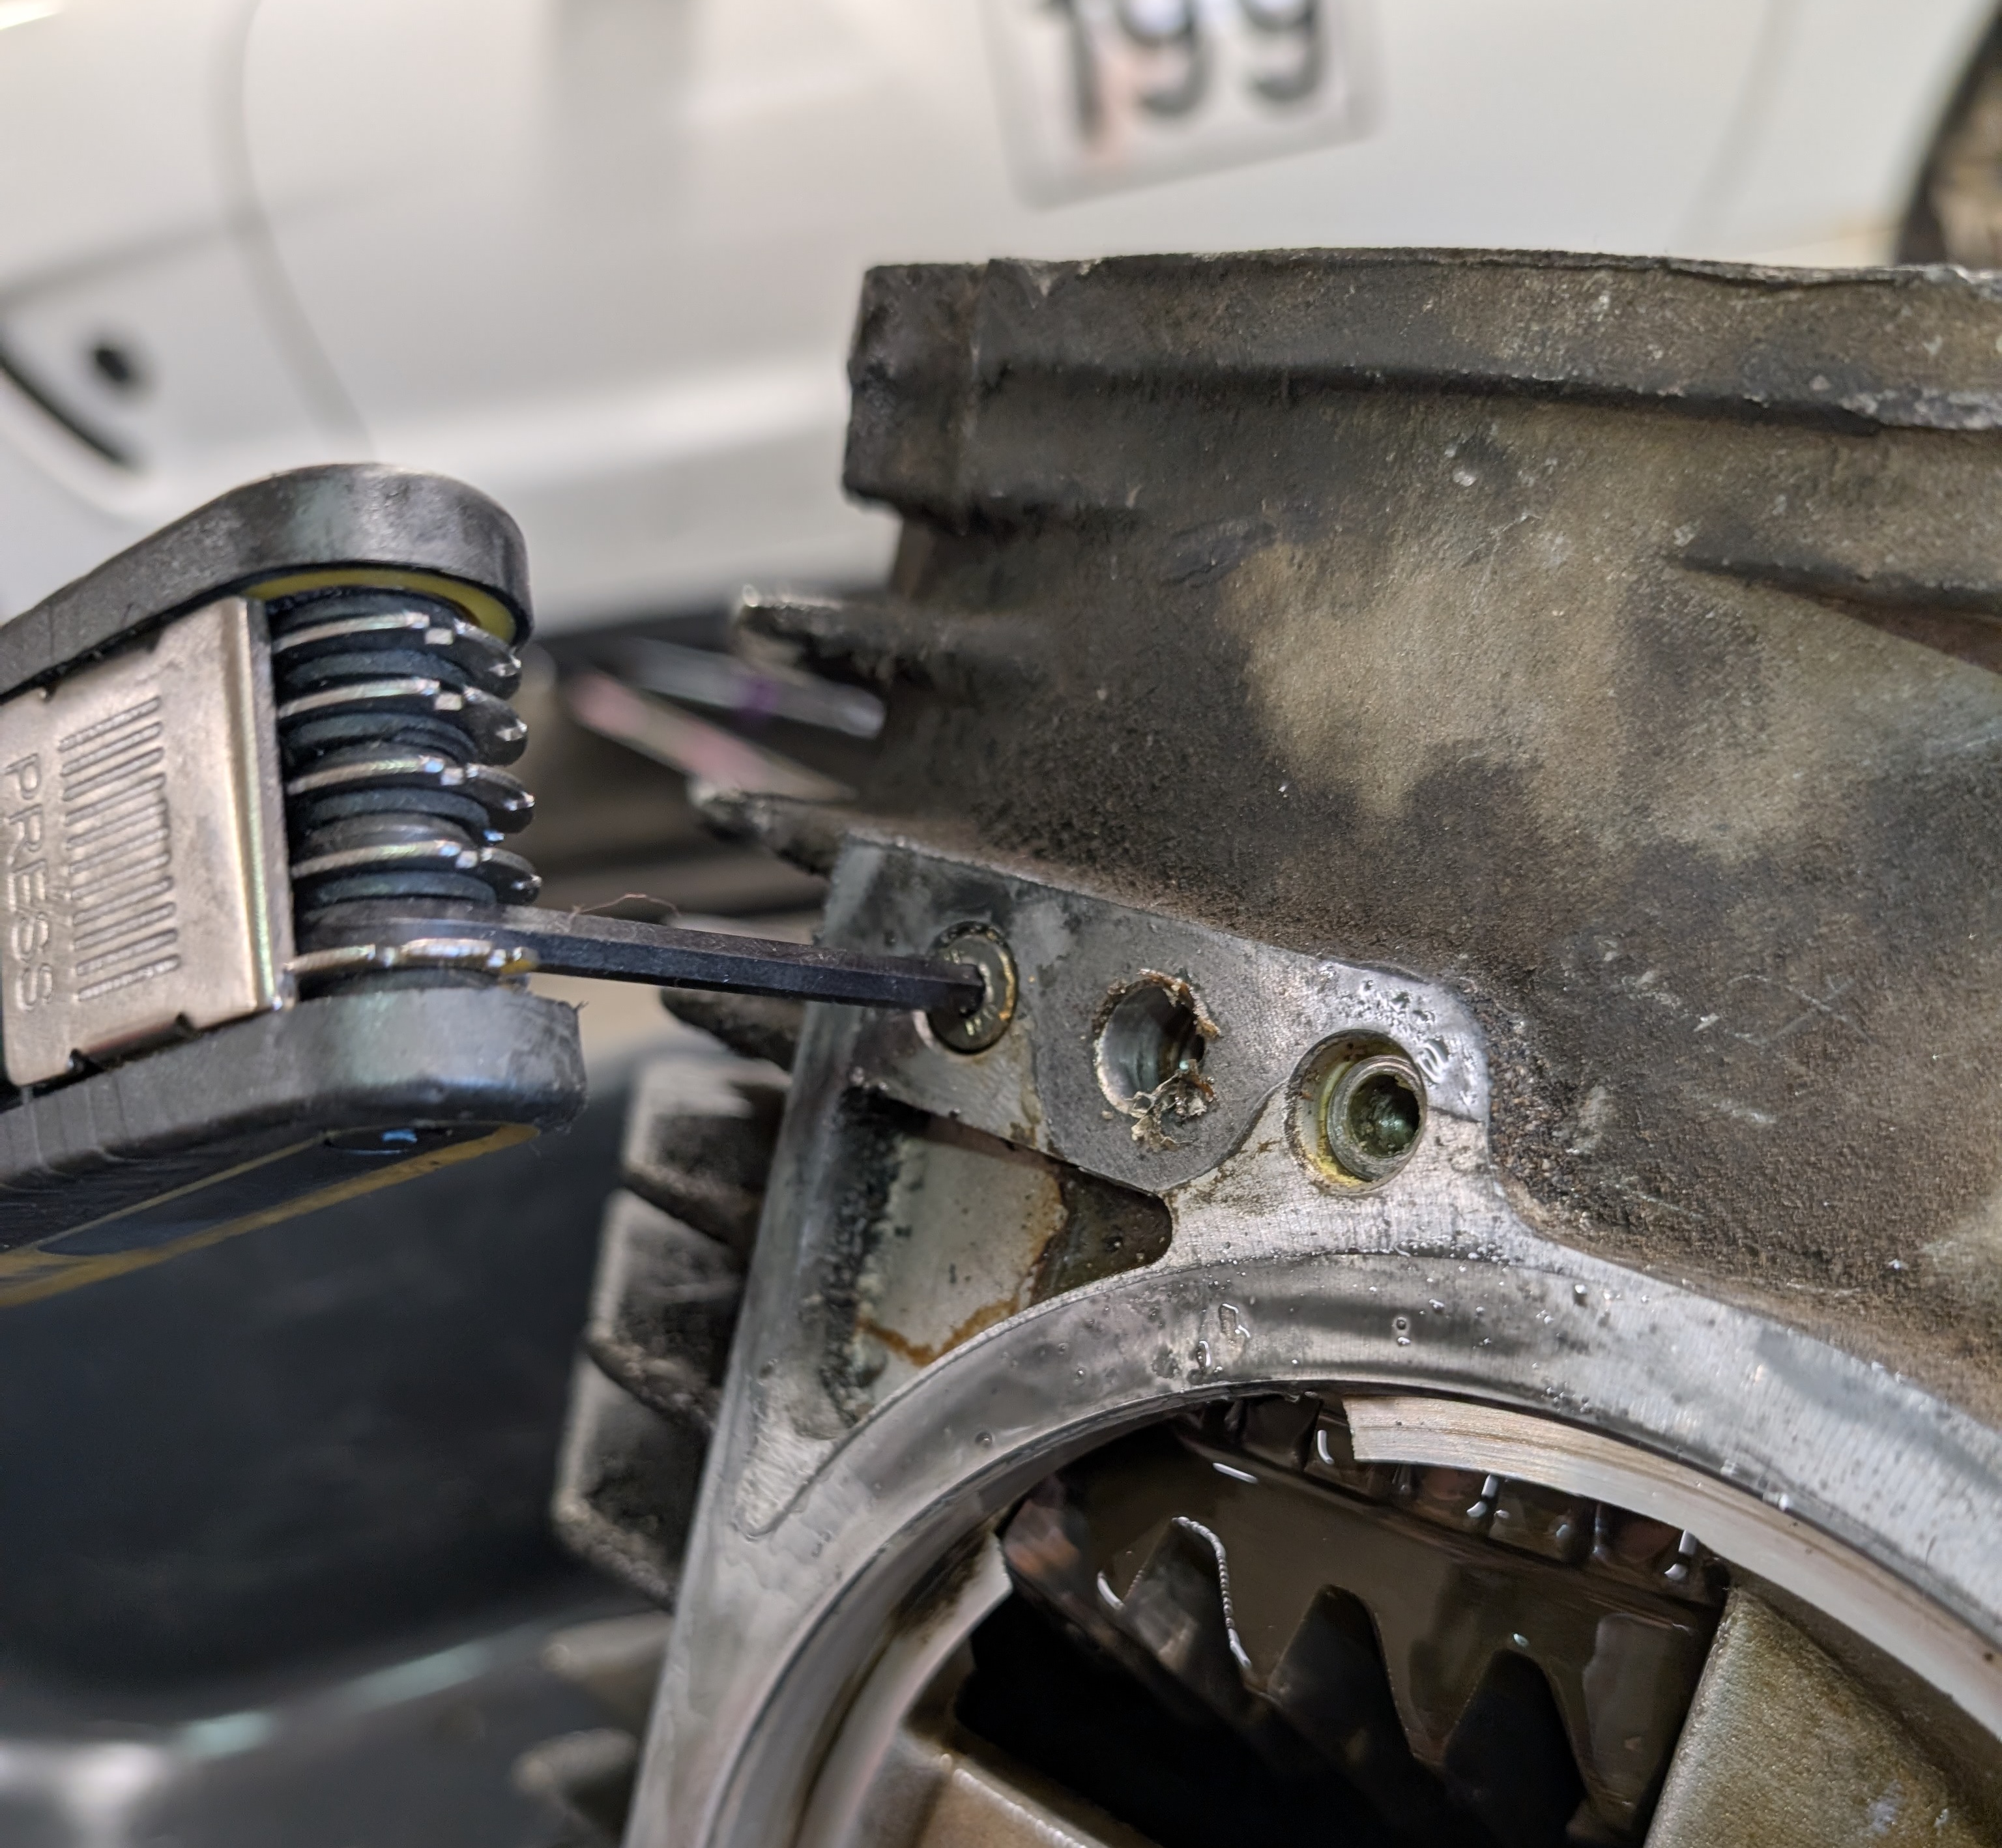
With the stud removed from the case and the block, simply grab an allen key wrench and turn out the remaining two bolts. This will allow for the removal of the block, which you'll of course put aside for re-use later. Also, do not concern yourself overly with the orientation of the block, it only fits back in one way.
Step 4 - Remove Center Carrier / Housing
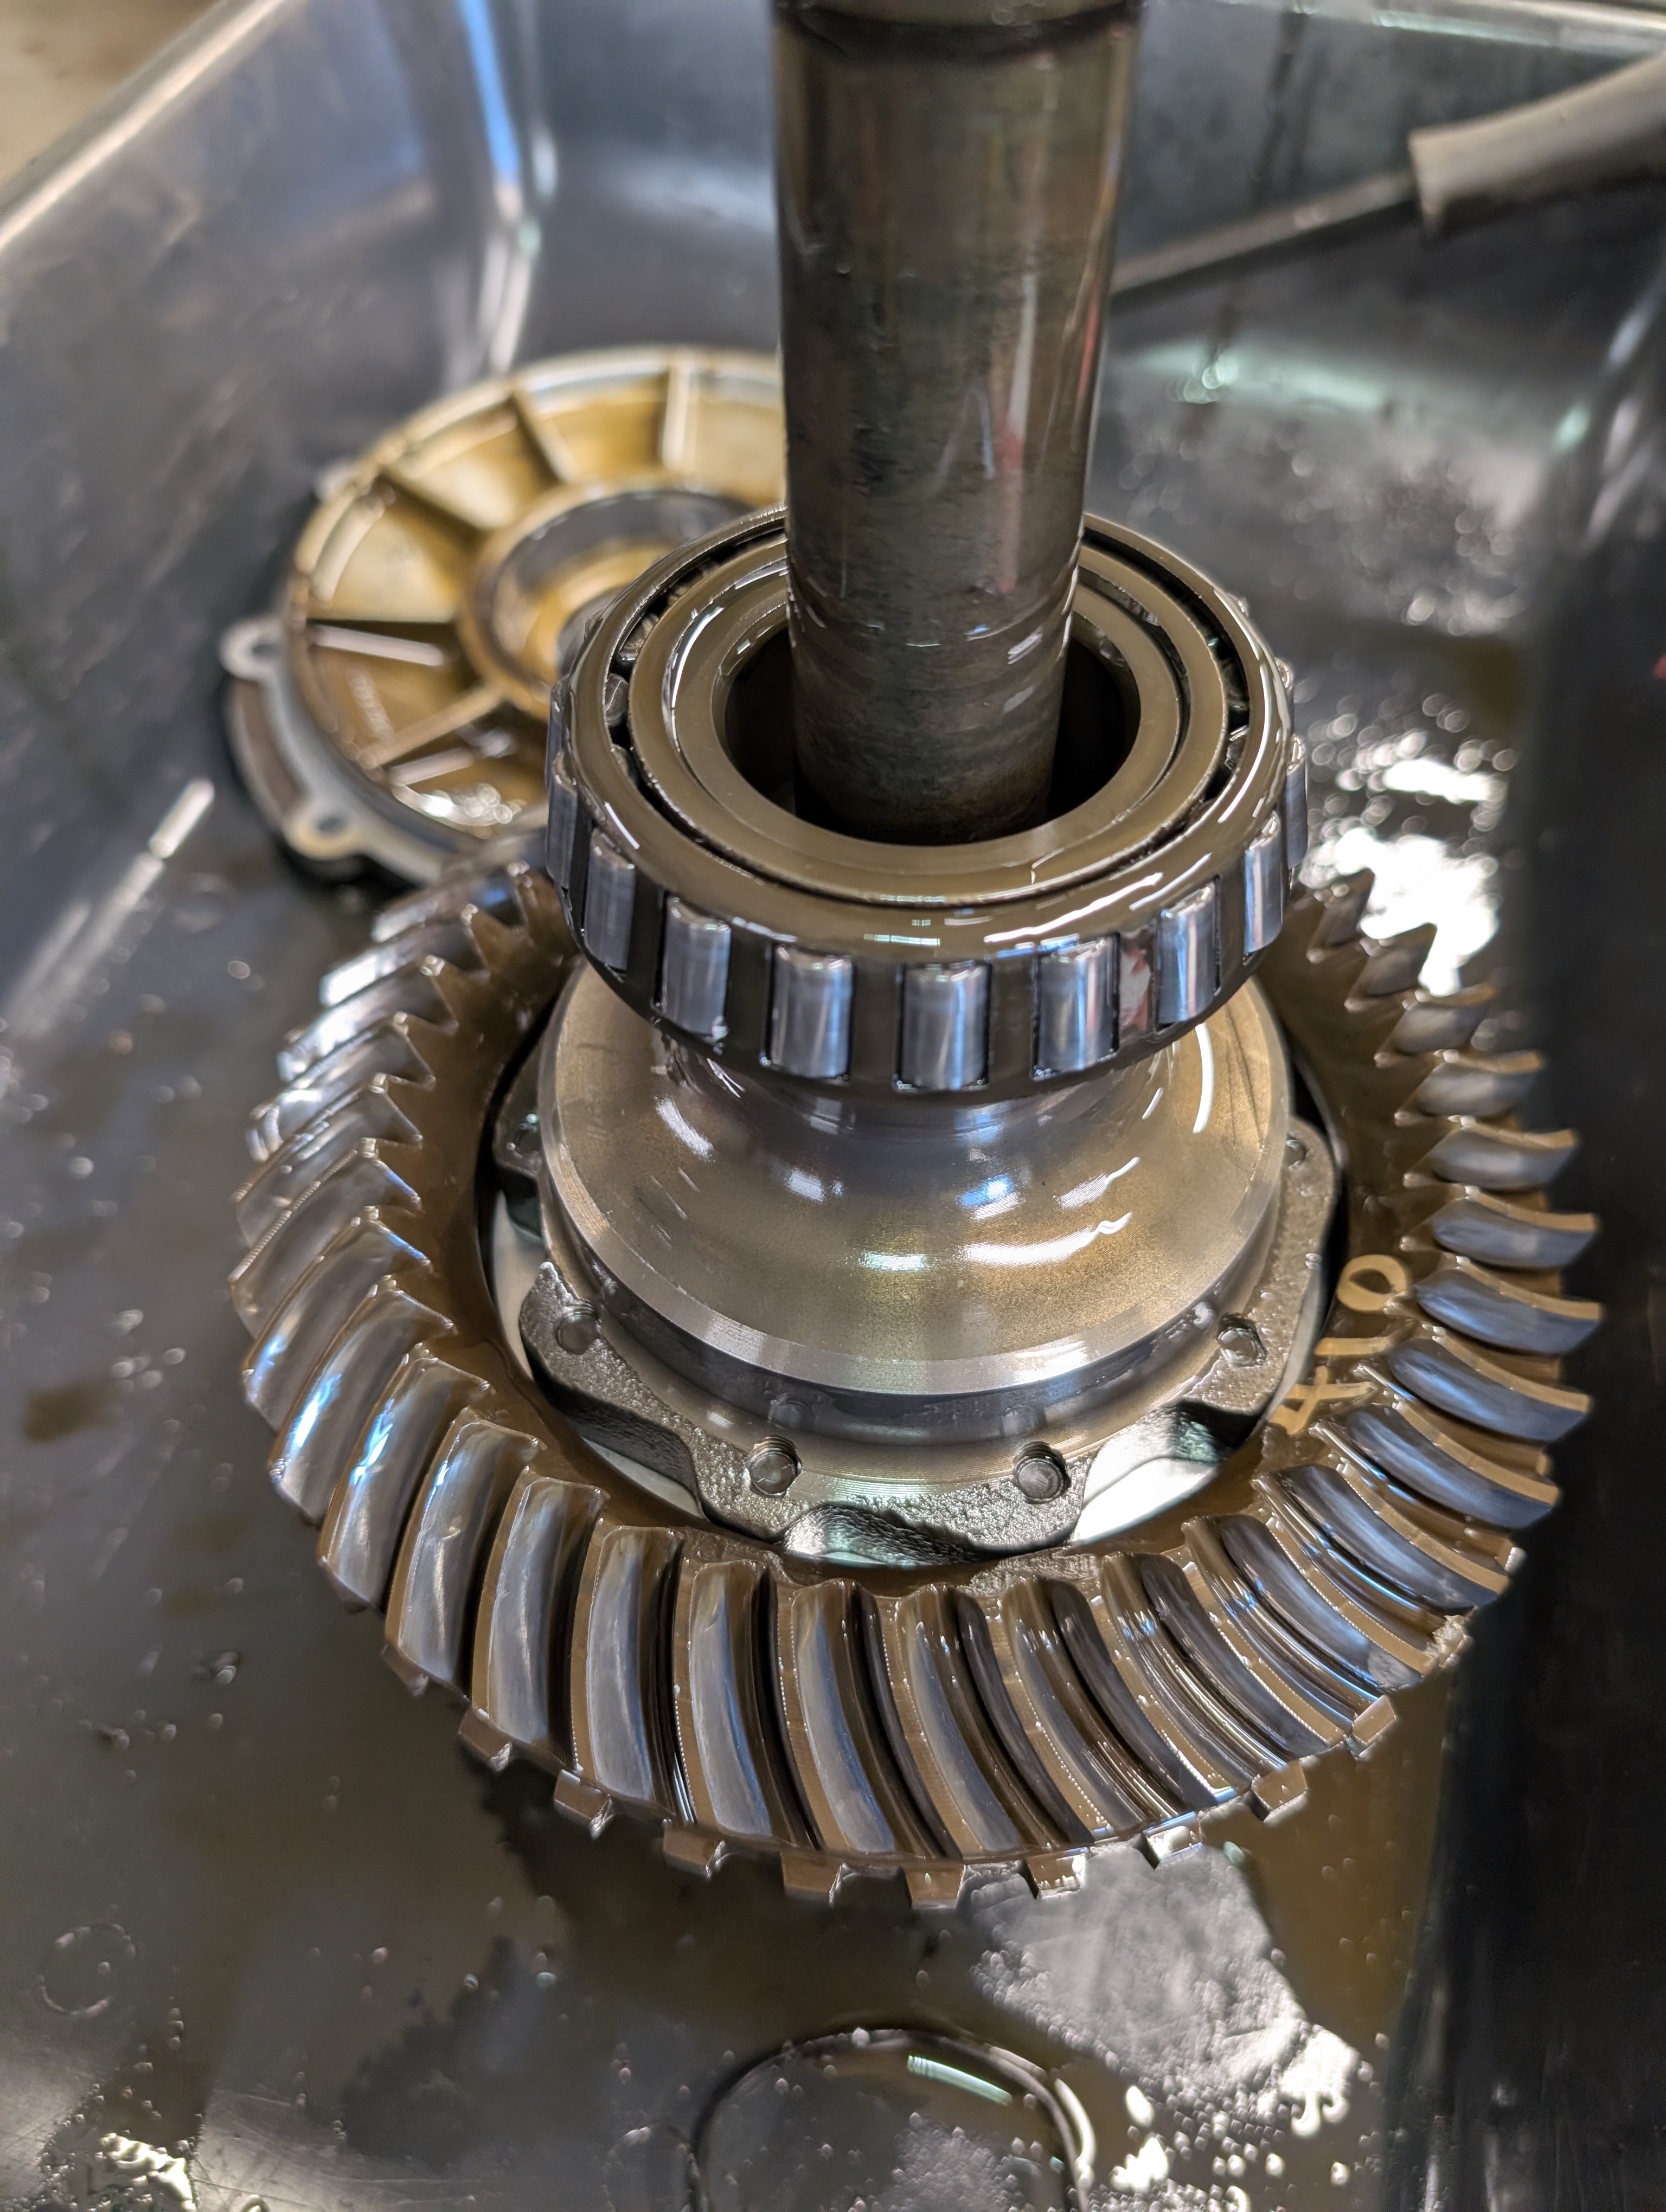
With the block out of the way, removal of the ring gear carrier should be no problem. Simply slide it out and put it into whatever your secondary space is. We recommended a second pan above in our listings, but a rag covered table will do, or any surface you don't care about getting diff fluid on.
Step 5 - Remove Ring Gear Bolts
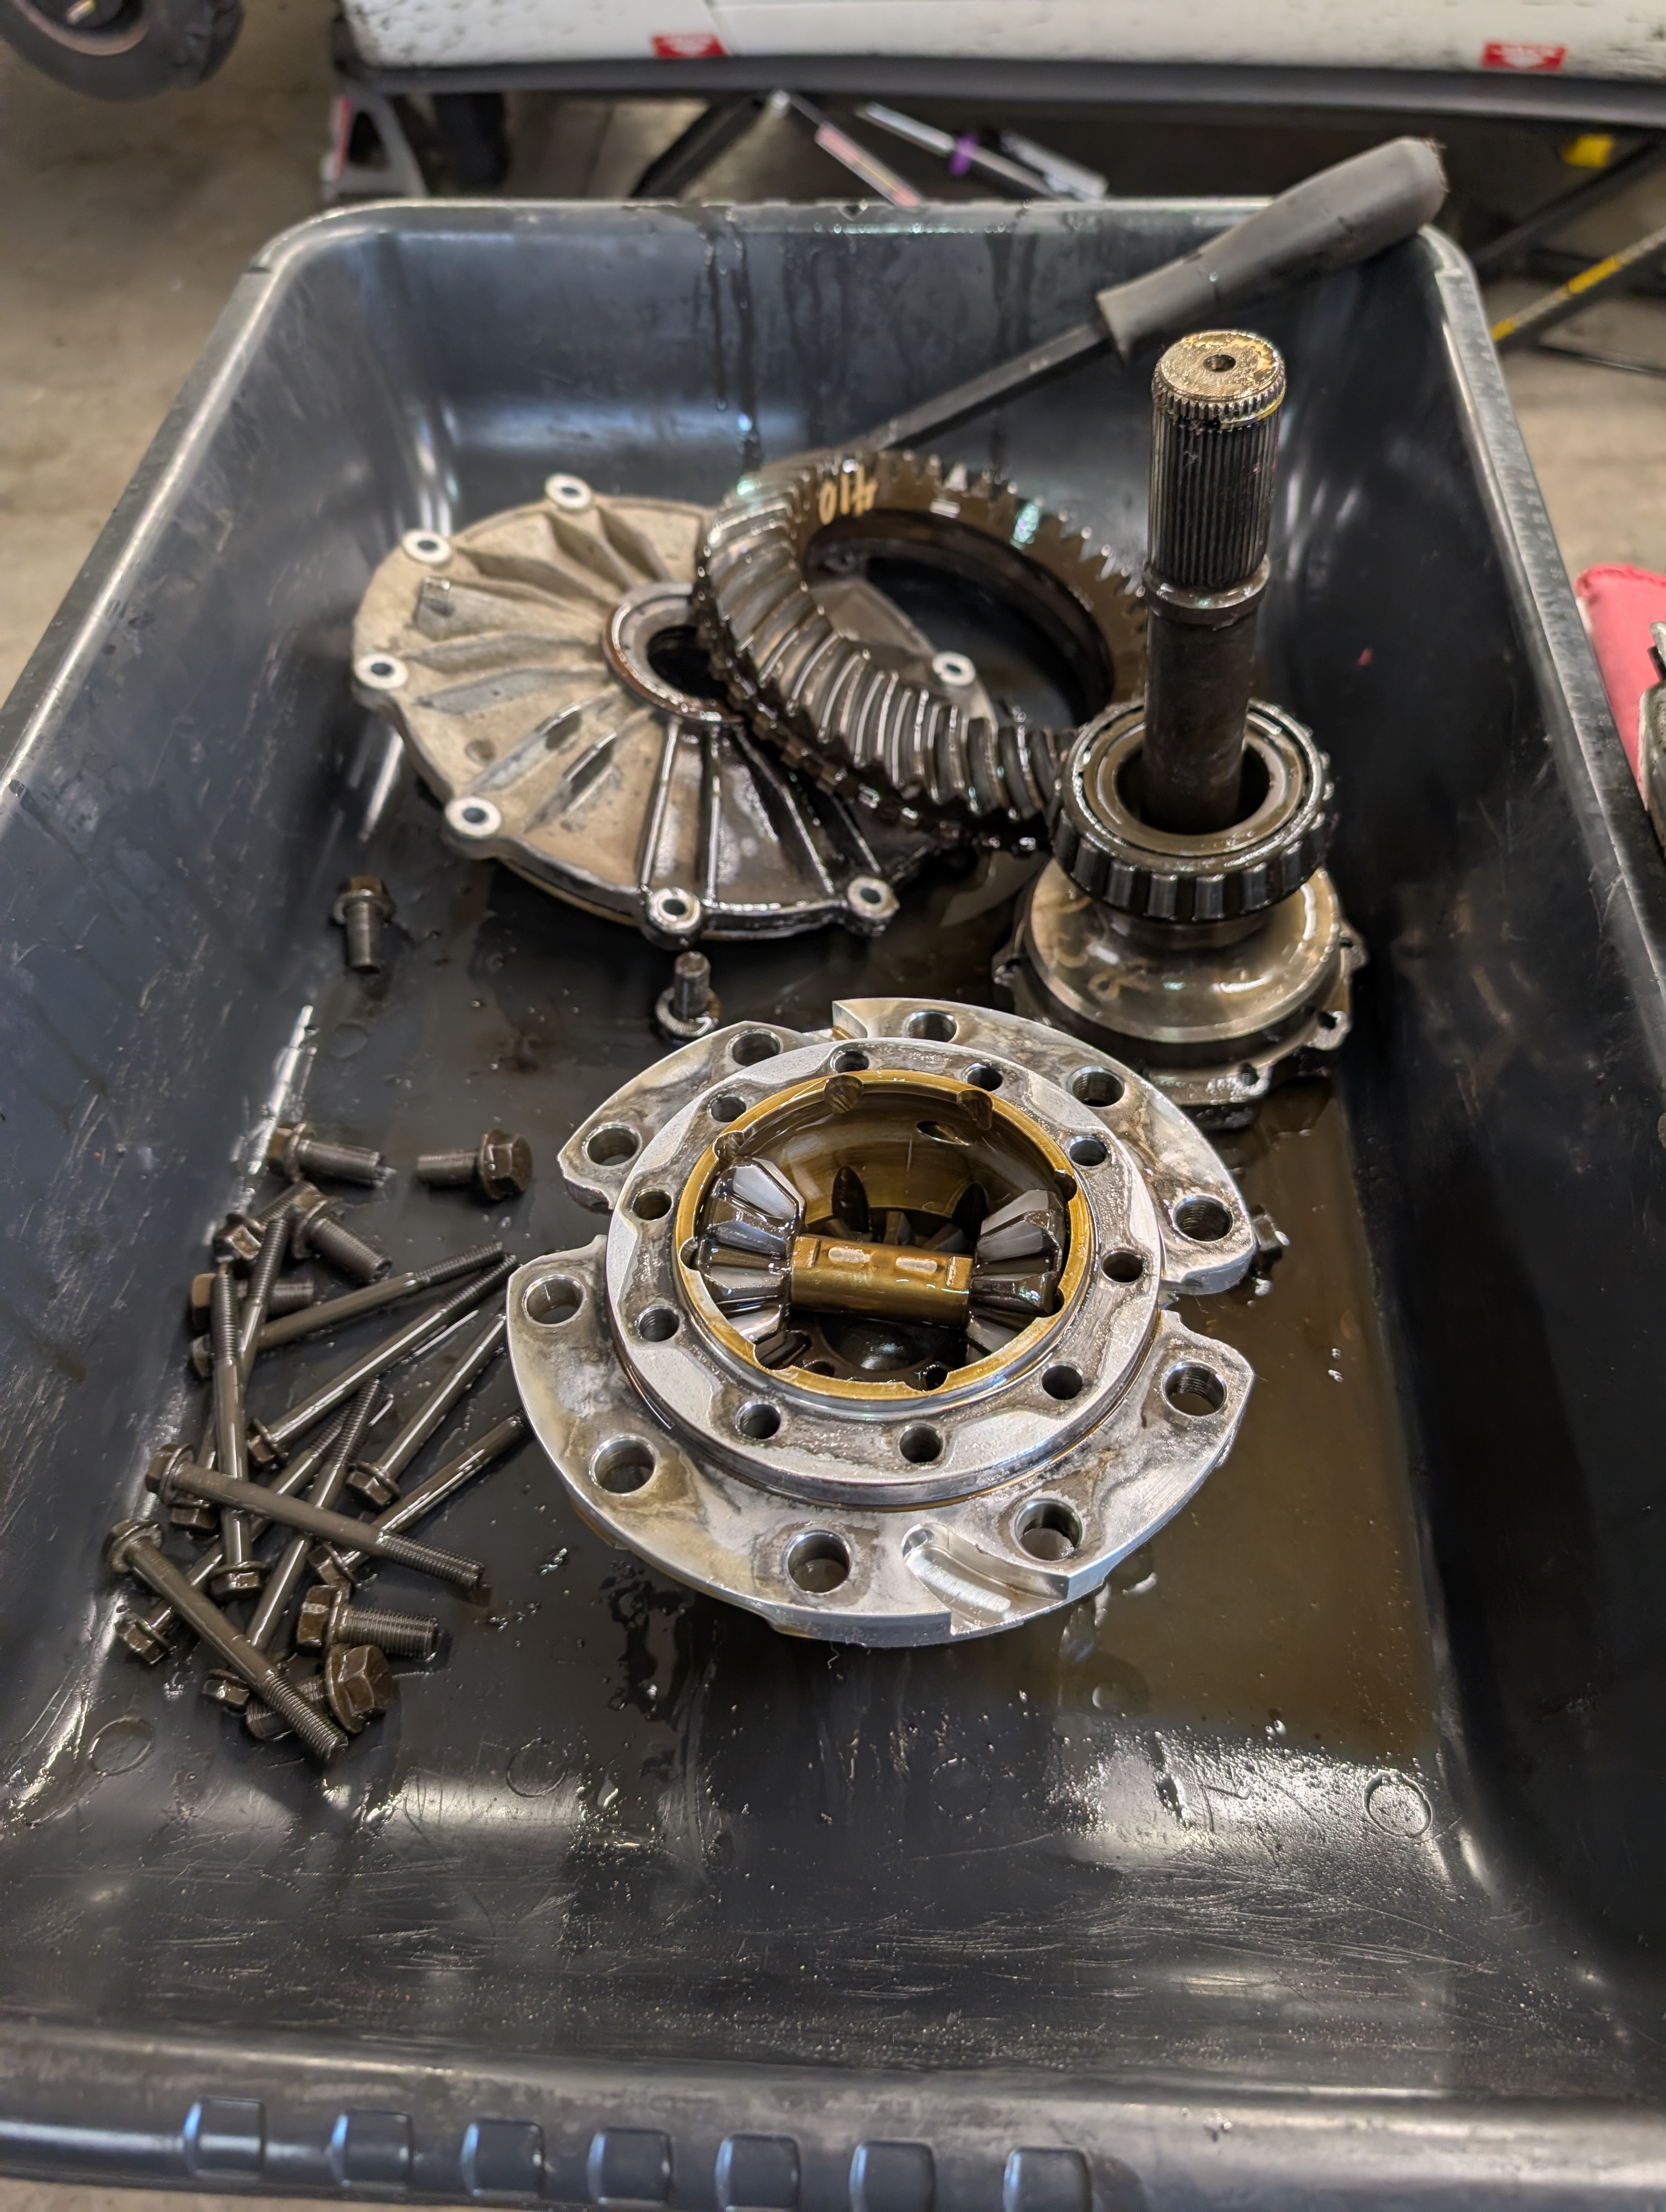
Next up you'll want to fully remove all of the bolts from the ring gear carrier. If you've purchased a big old impact gun like we've got, you're in luck the job will take minutes. Without it though you'll need to find a way to secure the carrier so you can turn the bolts loose. Multiple ratchets or break bars works, sandwiching the diff between two block of woods in a press works... the are DIY options, but this is a good opportunity to justify the purchase of a significant impact gun.
Step 6 - Replace Out First Clutch Pack - Inspect Carrier for Wear
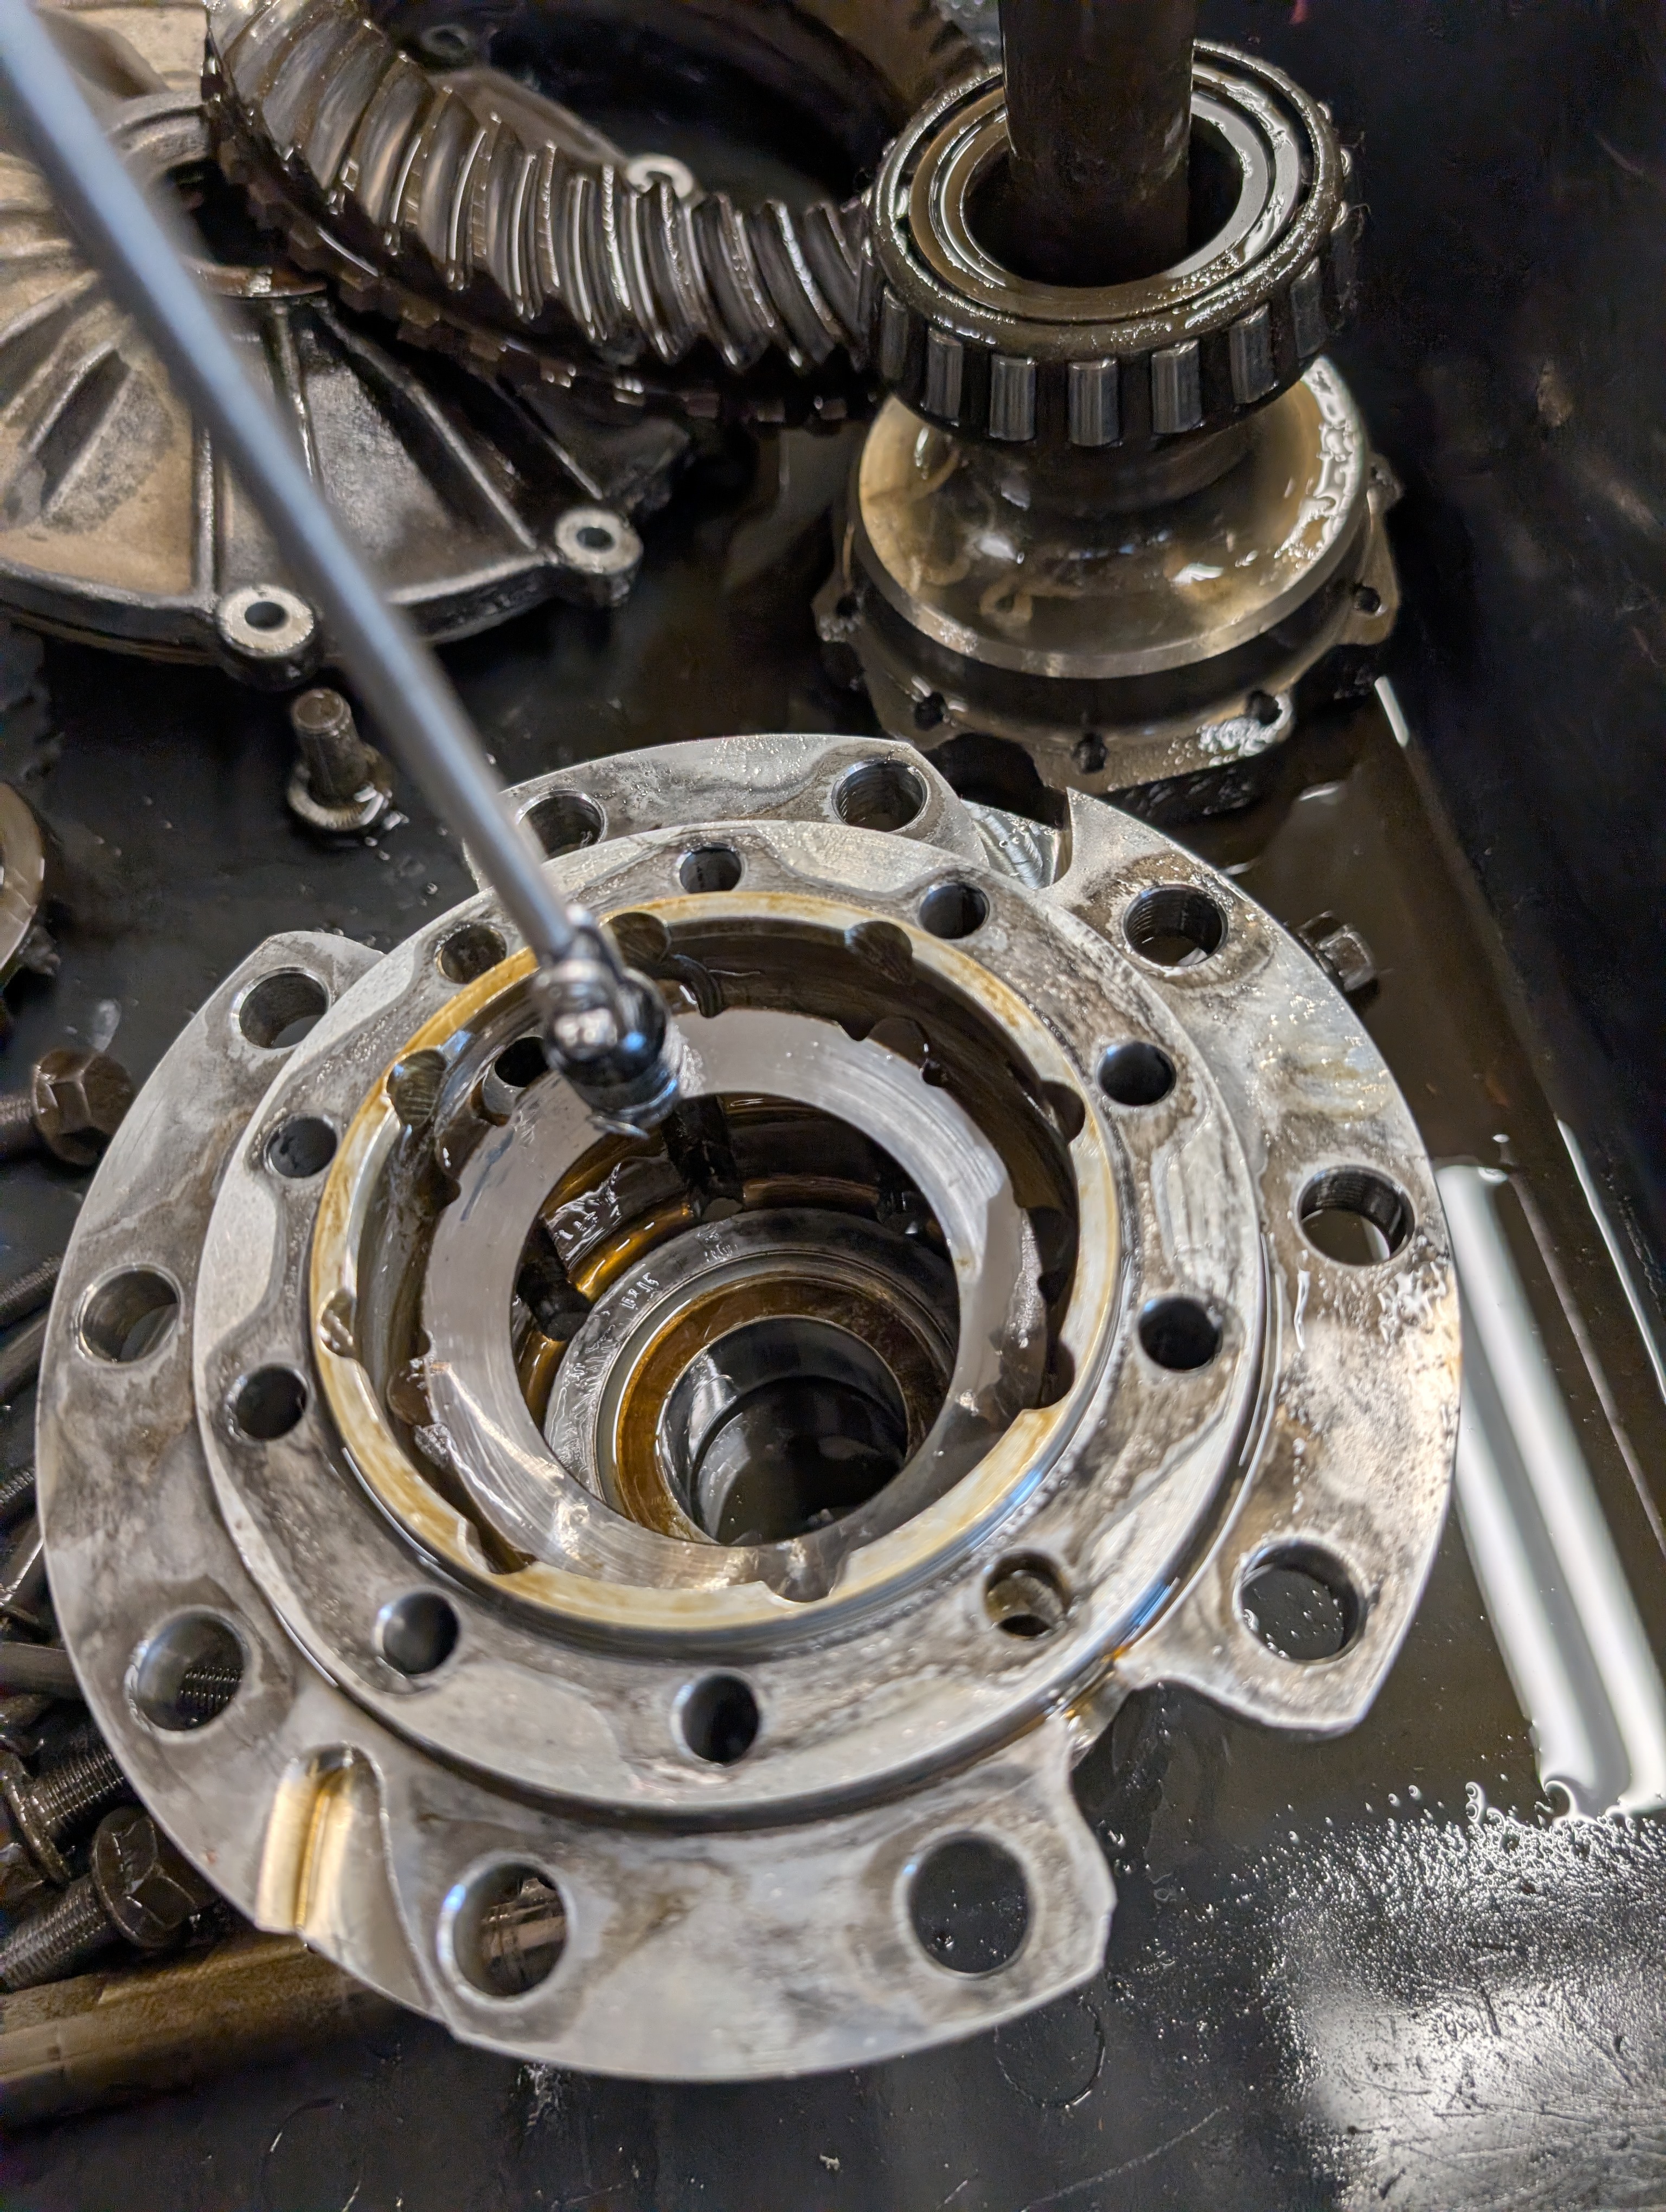
Remove the clutch pack by hand, and then fish the last small piece out either with a pick or a magnet like we used in the picture above.
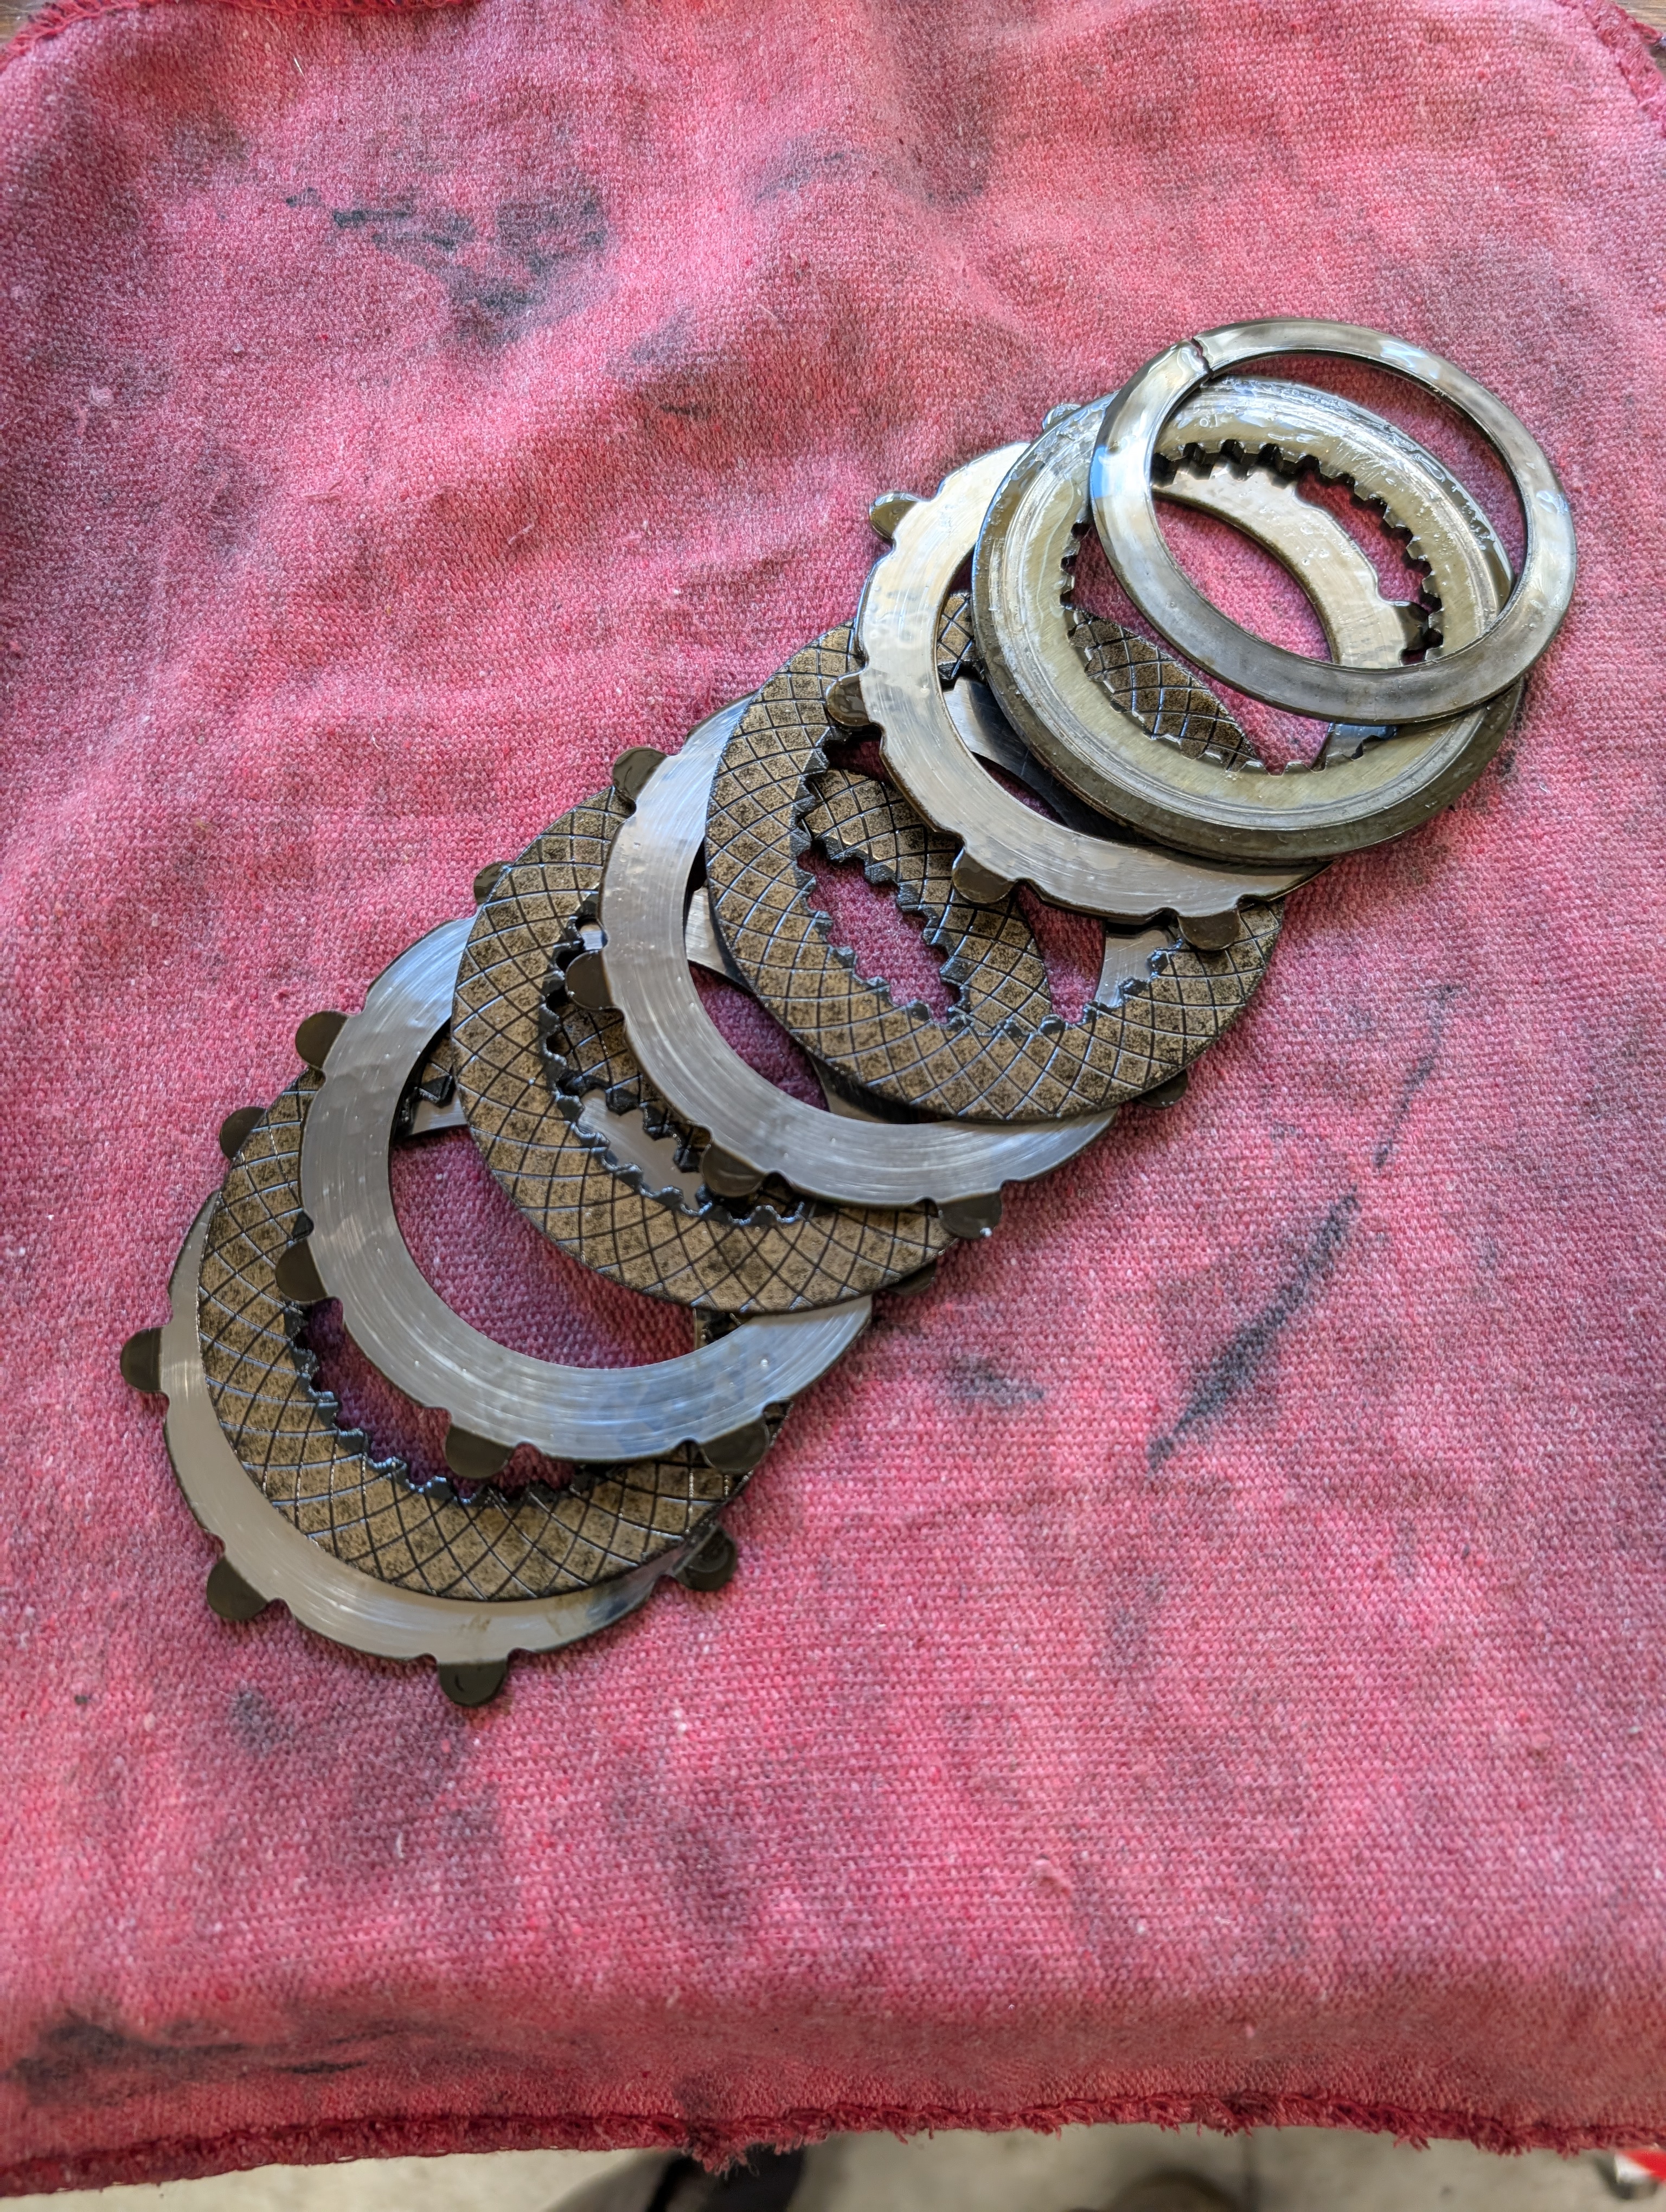
Here's what your clutch pack will more than likely look like. At the top of the stack is the OEM spring washer that preloads the stack in the differential. They nearly always snap, losing much of their spring behavior and making the differential basically an open differential. The rest of the stack pictured is by most objective measures reusable... but we don't recommend it and instead suggest going with the full C6 Z06 diff pack and spring. If you want to save some money though, many folks can get away with just the C6 Z06 spring.
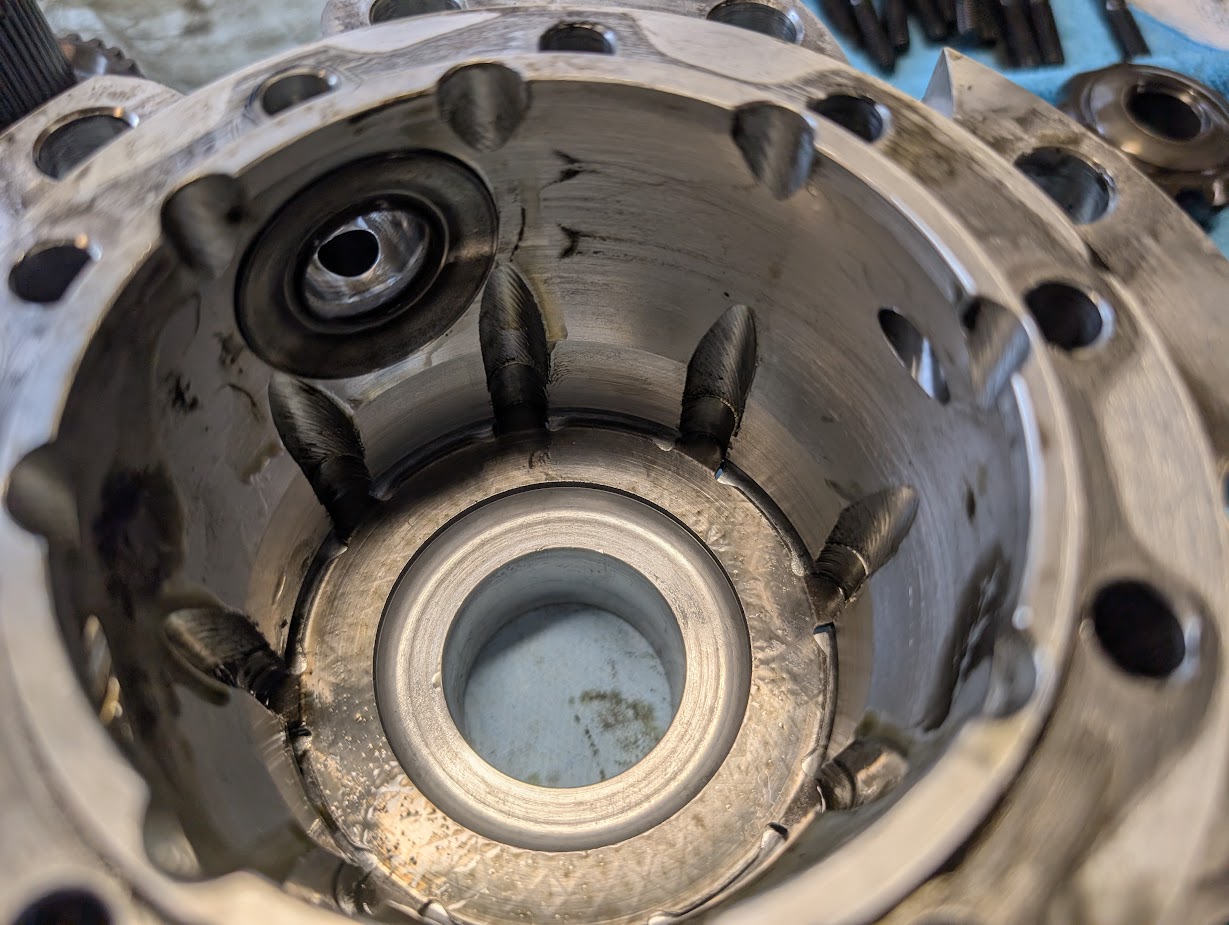
Above is what the inside of a reusable differential carrier should look like. Smooth, no radial gouges along the plane in which the diff packs live... the vast majority of folks differentials will look like this unless you beat the absolute pants off of your differential.
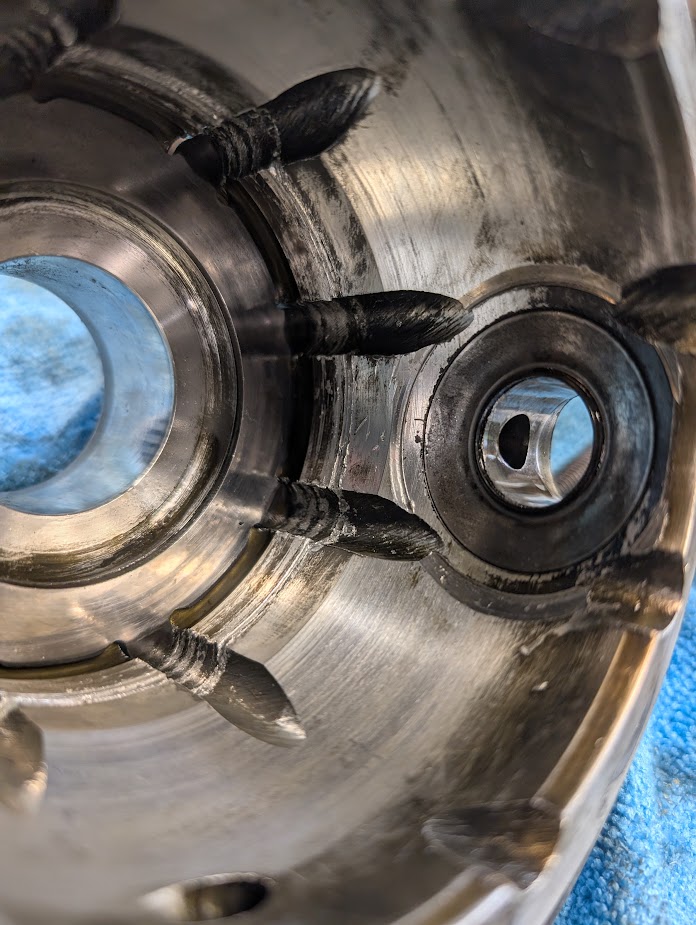
Above is an example of a damaged differential carrier, though folks have re-used worse. In thise case we're betting the differential first started whining, and then the owner kept abusing it for years... until it started screaming like a pig... and then they kept beating the pants off of it for another 10-20 thousand more miles. If that story is familiar... don't be surprised if you get to this point and discover you need a replacement carrier.
Again though, this is a very rare situation. Our author Shred Jesse pulled apart his differential recently that had begun whining at 30 events... and then went on to do 32 more events. During those further events he set some class records, one track record and secured a bunch of podiums in time attack... and when his differential was removed though nothing was damaged, only the clutch pack spring washers had failed. It's rare that the damage above occurs but not impossible, so we're obligated to mention it.
Step 7 - Apply Pressure to Remaining Clutch Pack Via Press, Remove Countershaft
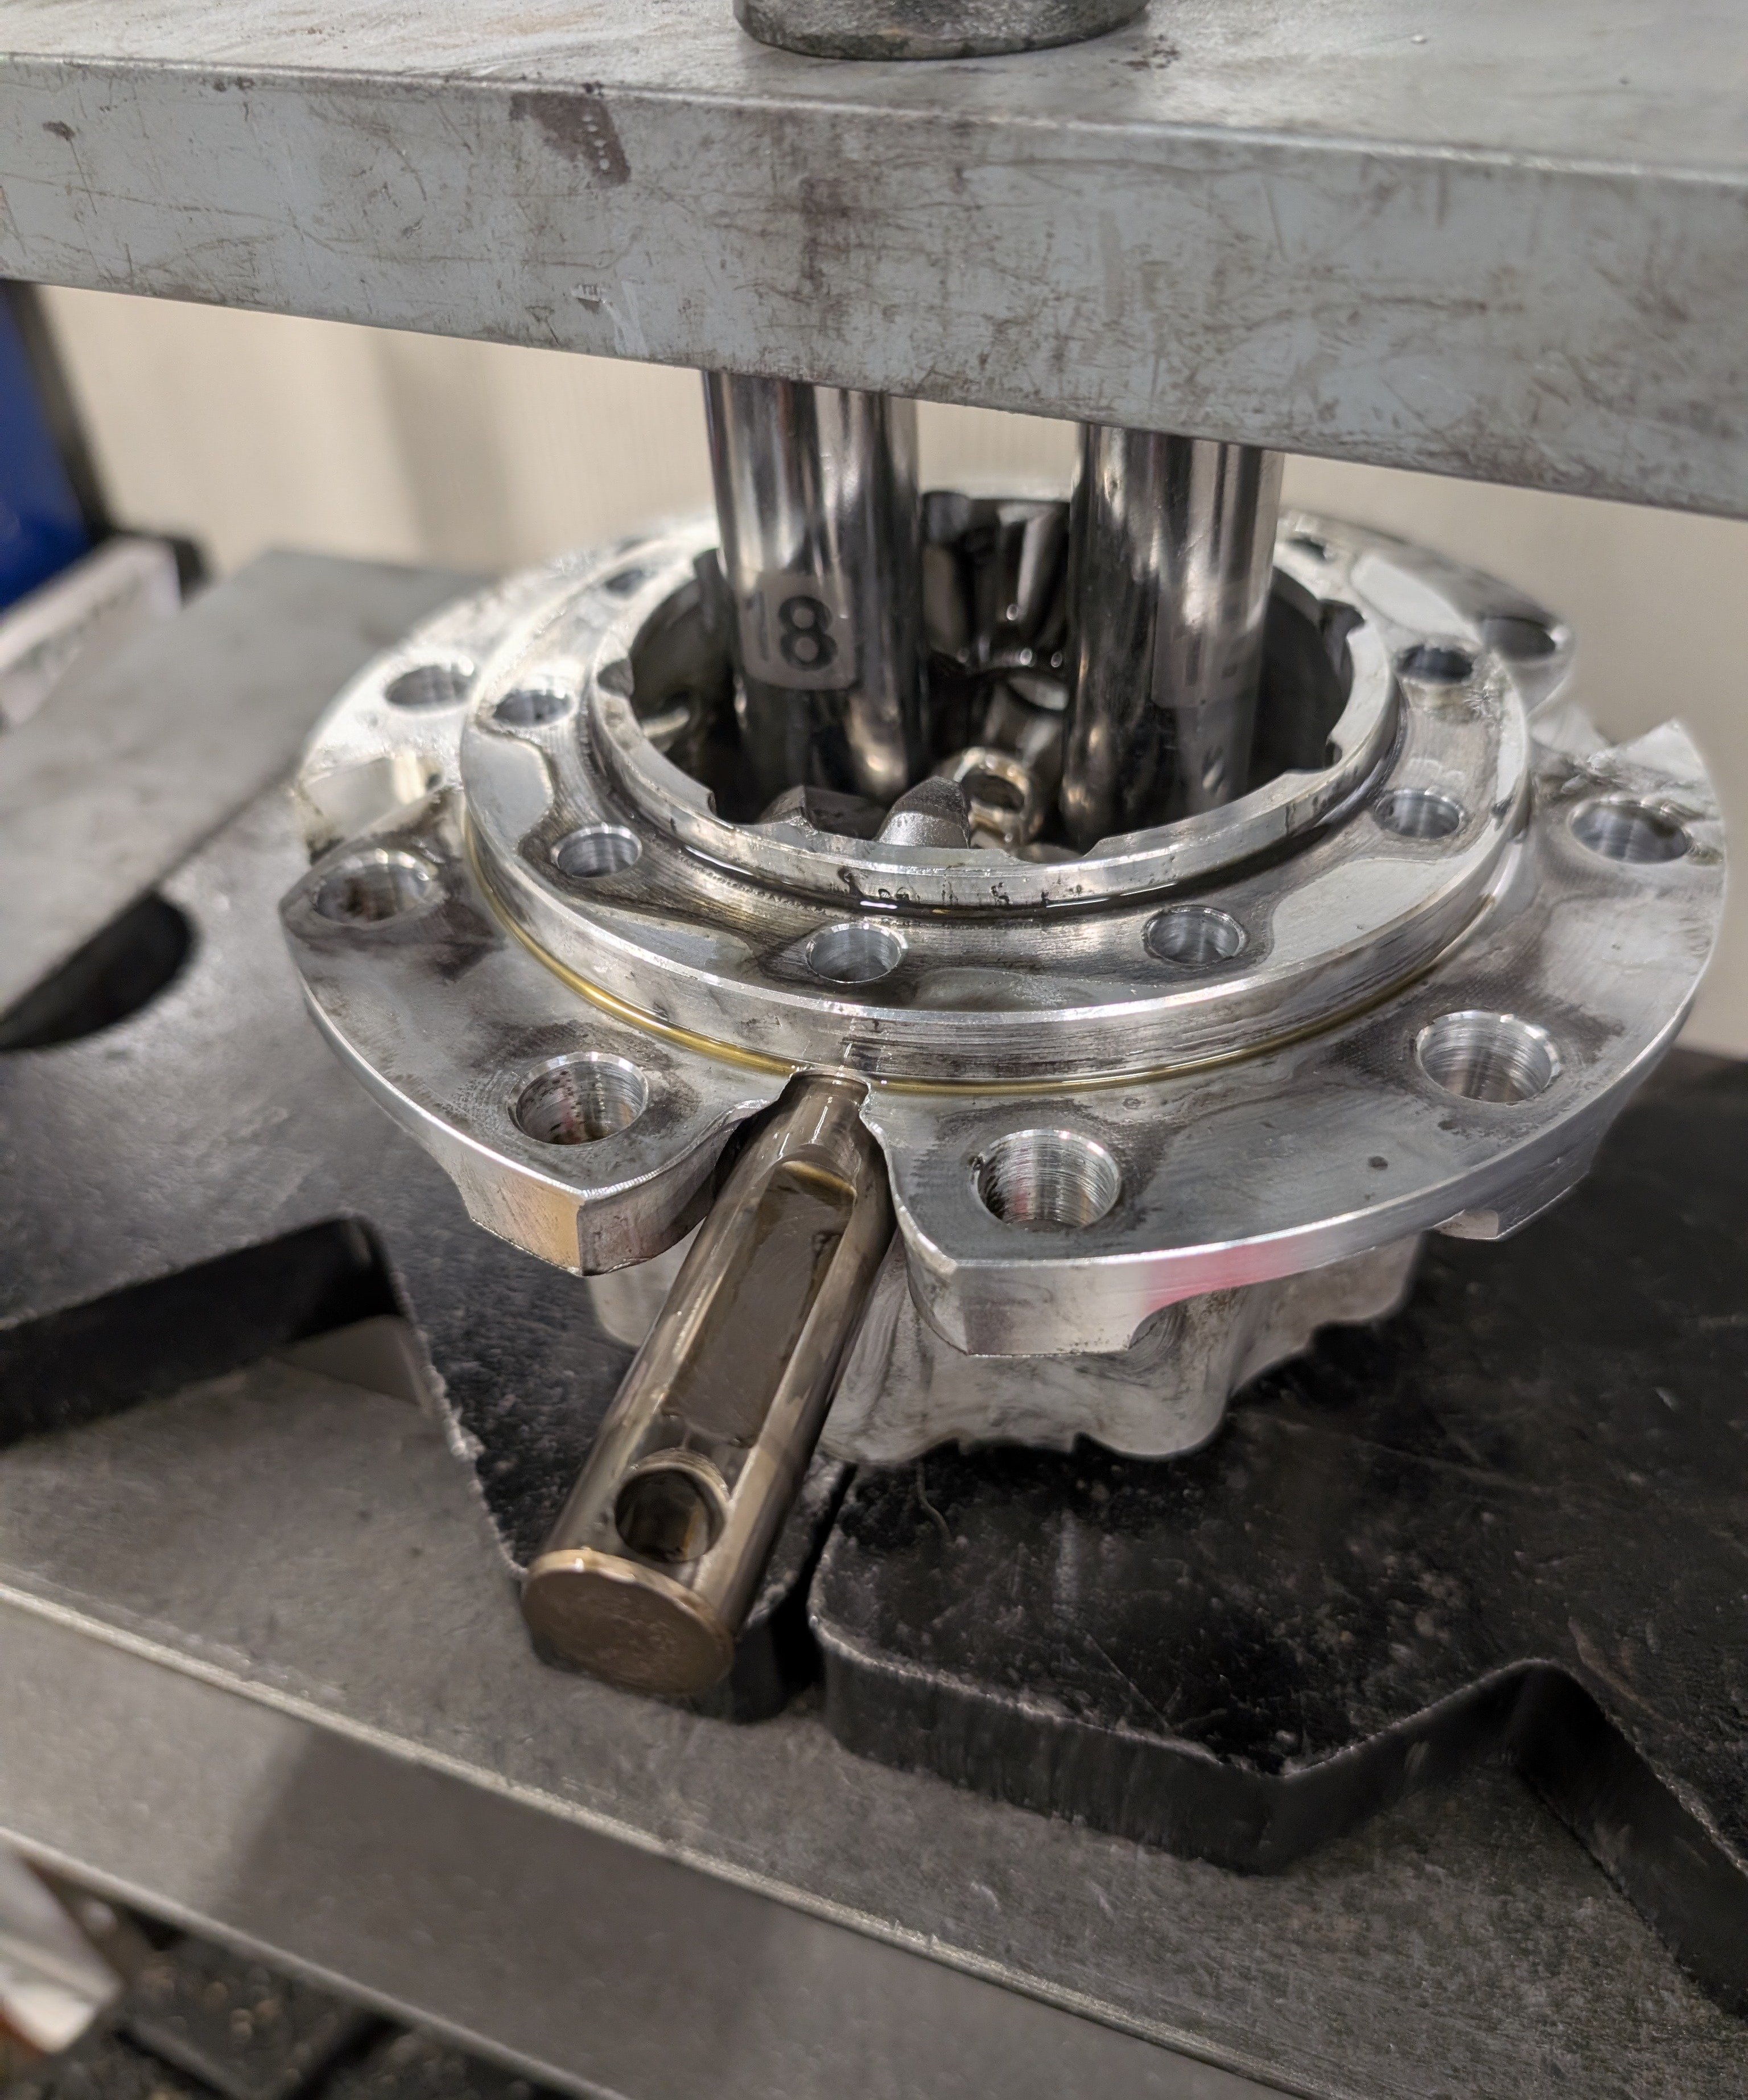
To access the other side clutch pack, you'll need to remove the counter shaft that holds the two side gears in place. The counter shaft nearly always cannot simply be pushed out by hand, as the pressure of the clutch pack with the spring washer prevents it. In rare circumstances though where a clutch spring has entirely failed, you can just press the shaft out by hand. If that is your case, you're going to really need to thoroughly inspect everything in your differential as that is a significant failure!
Now there is a specialty tool for this process... but we've found you really don't need it and you can see just how we did so in the picture above. Two equal length 18mm-ish deep sockets pressed down equally via a steel plate does the trick, and you likely already own these sockets or are better spending your money on more sockets versus a specialty tool you'll never use again.
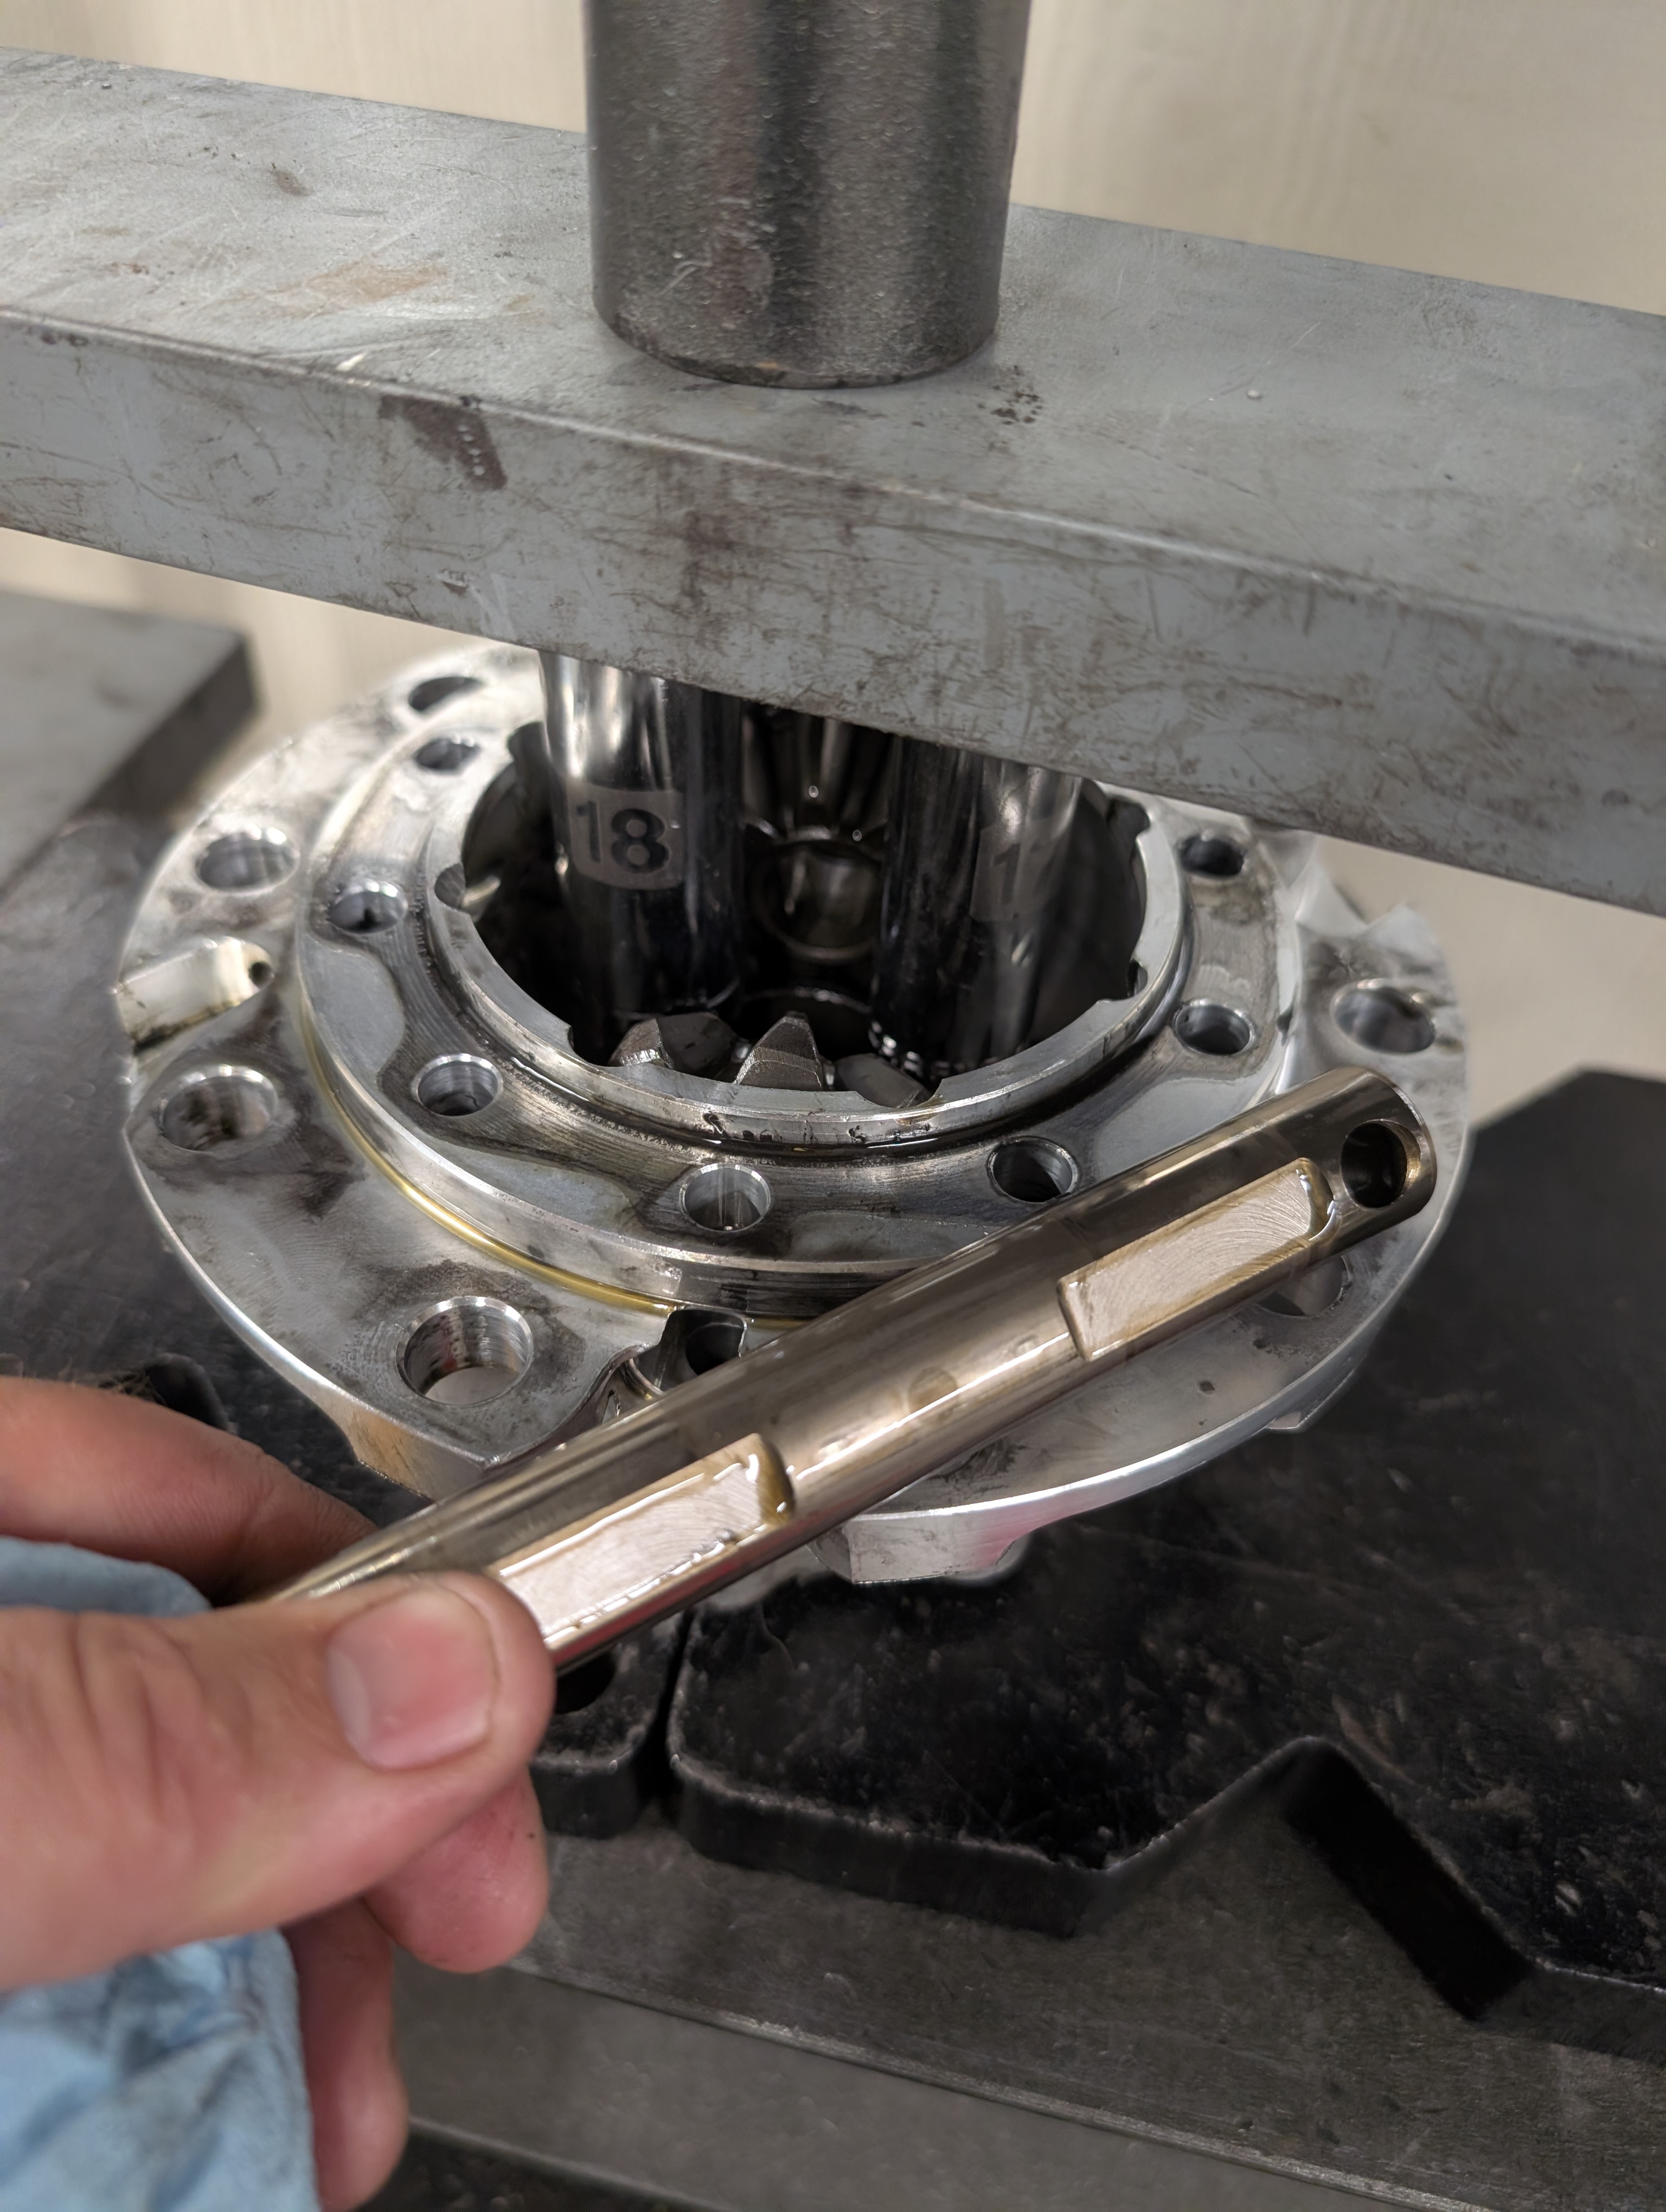
With modest pressure on the shim stack, the countershaft should easily push out.
Step 8 - Remove Remaining Clutch Pack - Inspect Carrier for Wear
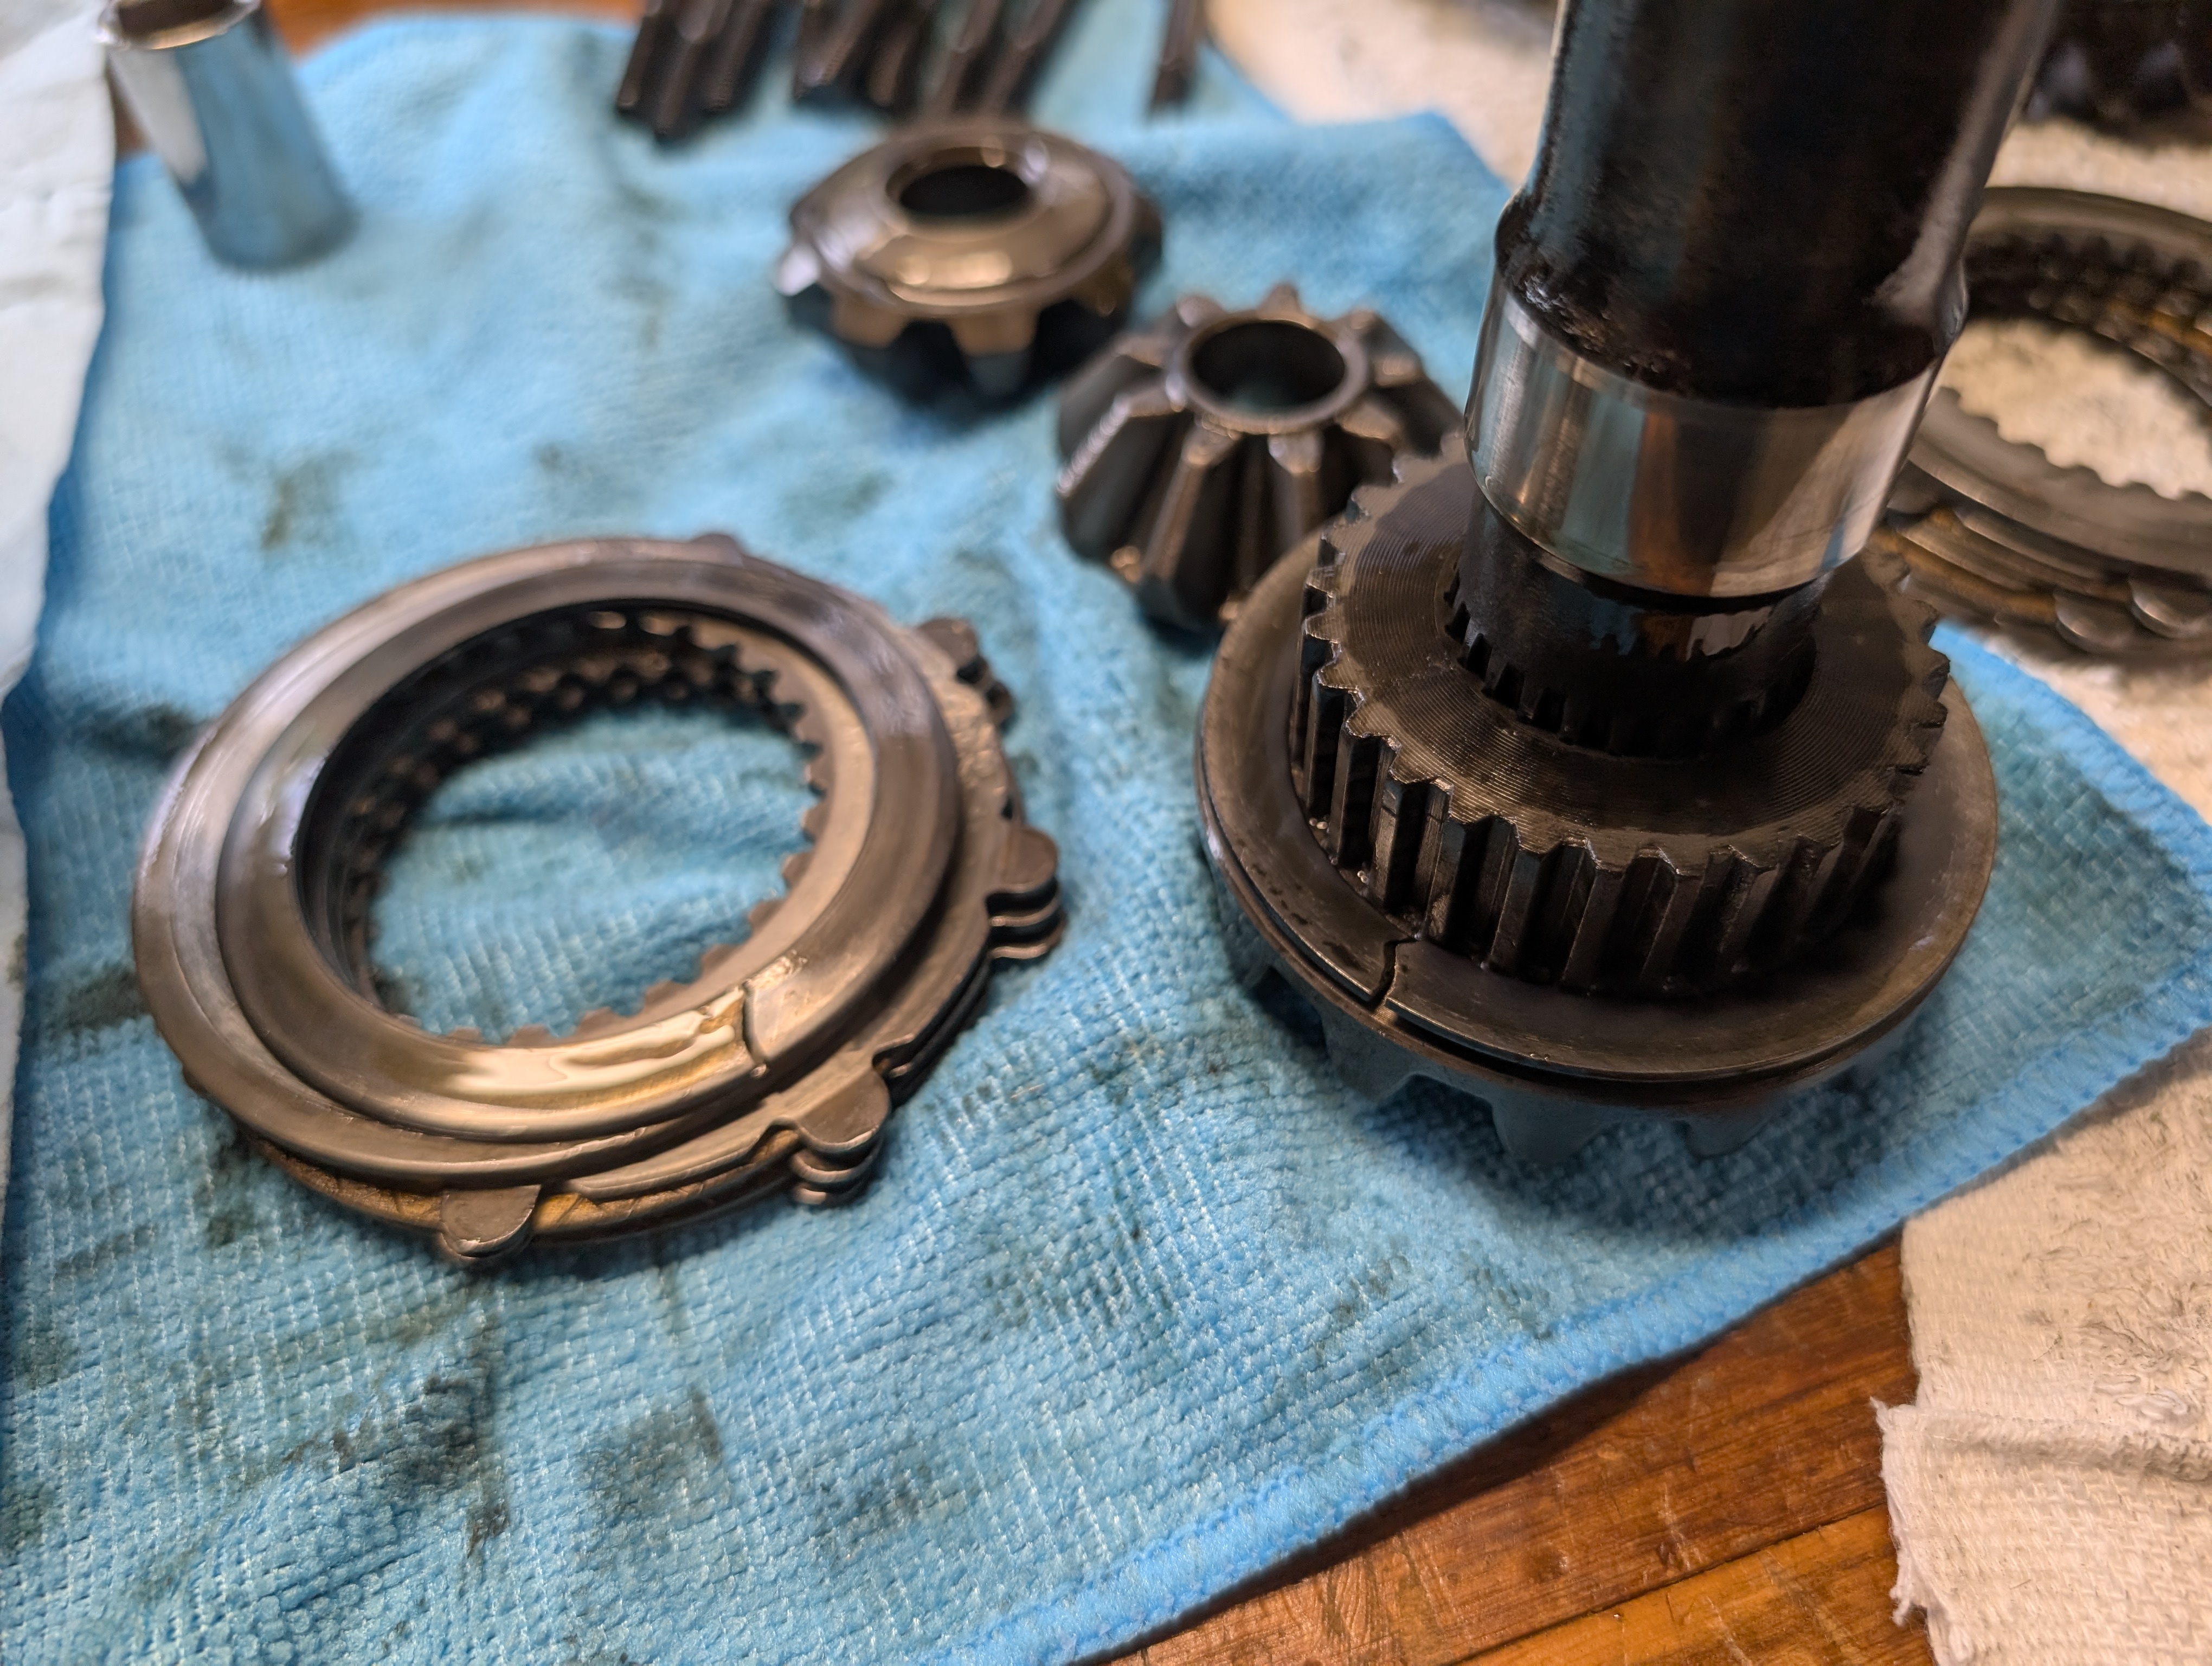
With the counter shaft now removed the two side gears will all but fall out, and you can remove the output shaft and gear. From here the clutch pack itself can be removed... and more than likely you'll see a cracked spring washer like we have here, along with another we put on the right side for example. These nearly universally fail on folks when driven hard with sticky tires.
(Insert side gear bushing picture here)
Be aware when removing and reinstalling the side gears, there are bushings that go behind them. They can at times be indistinguishable from the surface of the side gears. Just be you keep both, and have both on re-install
Step 9 - Replace Clutch Packs, Reinstall Countershaft
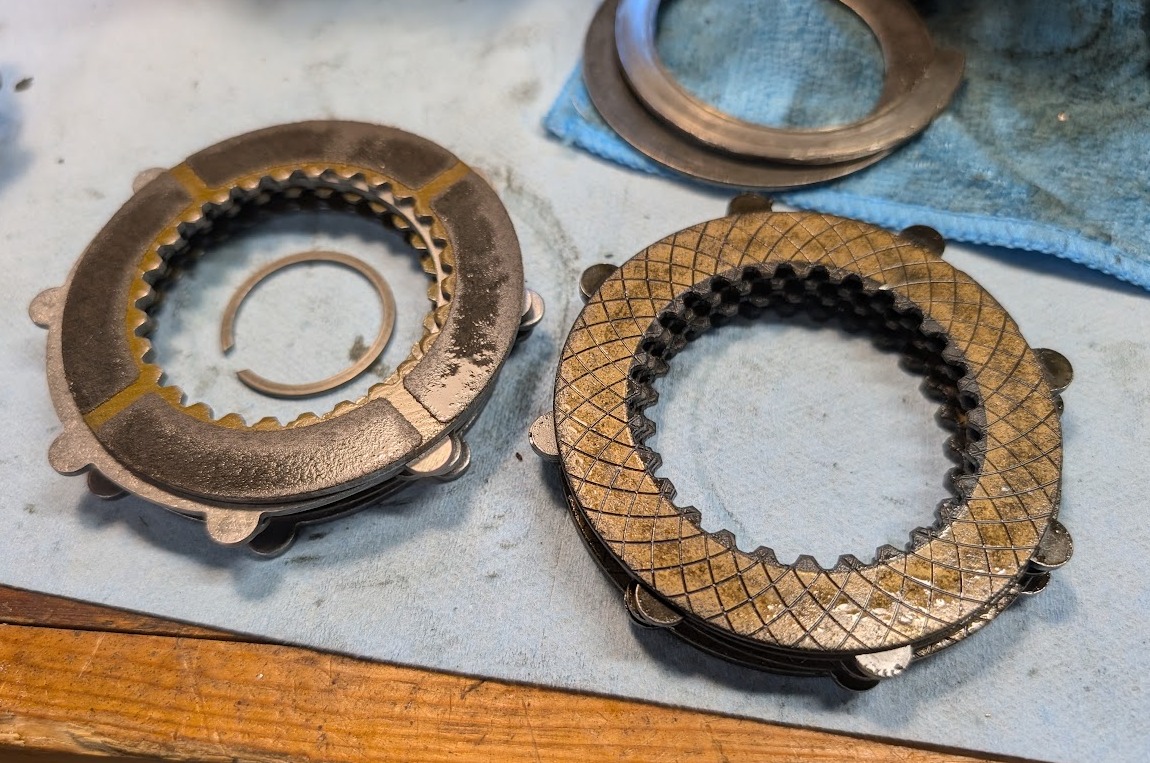
With all of the clutch packs removed, you will now replace the old clutch packs with the new ones, unless you intend to re-use OEM and only replace the spring washer. While reusing OEM is possible and often a fine solution for most folks... you're already there and the lift is almost nothing to replace them, we highly recommend replacing them. Be sure to maintain OEM stack order of discs and plates along with the placement of the spring washer.
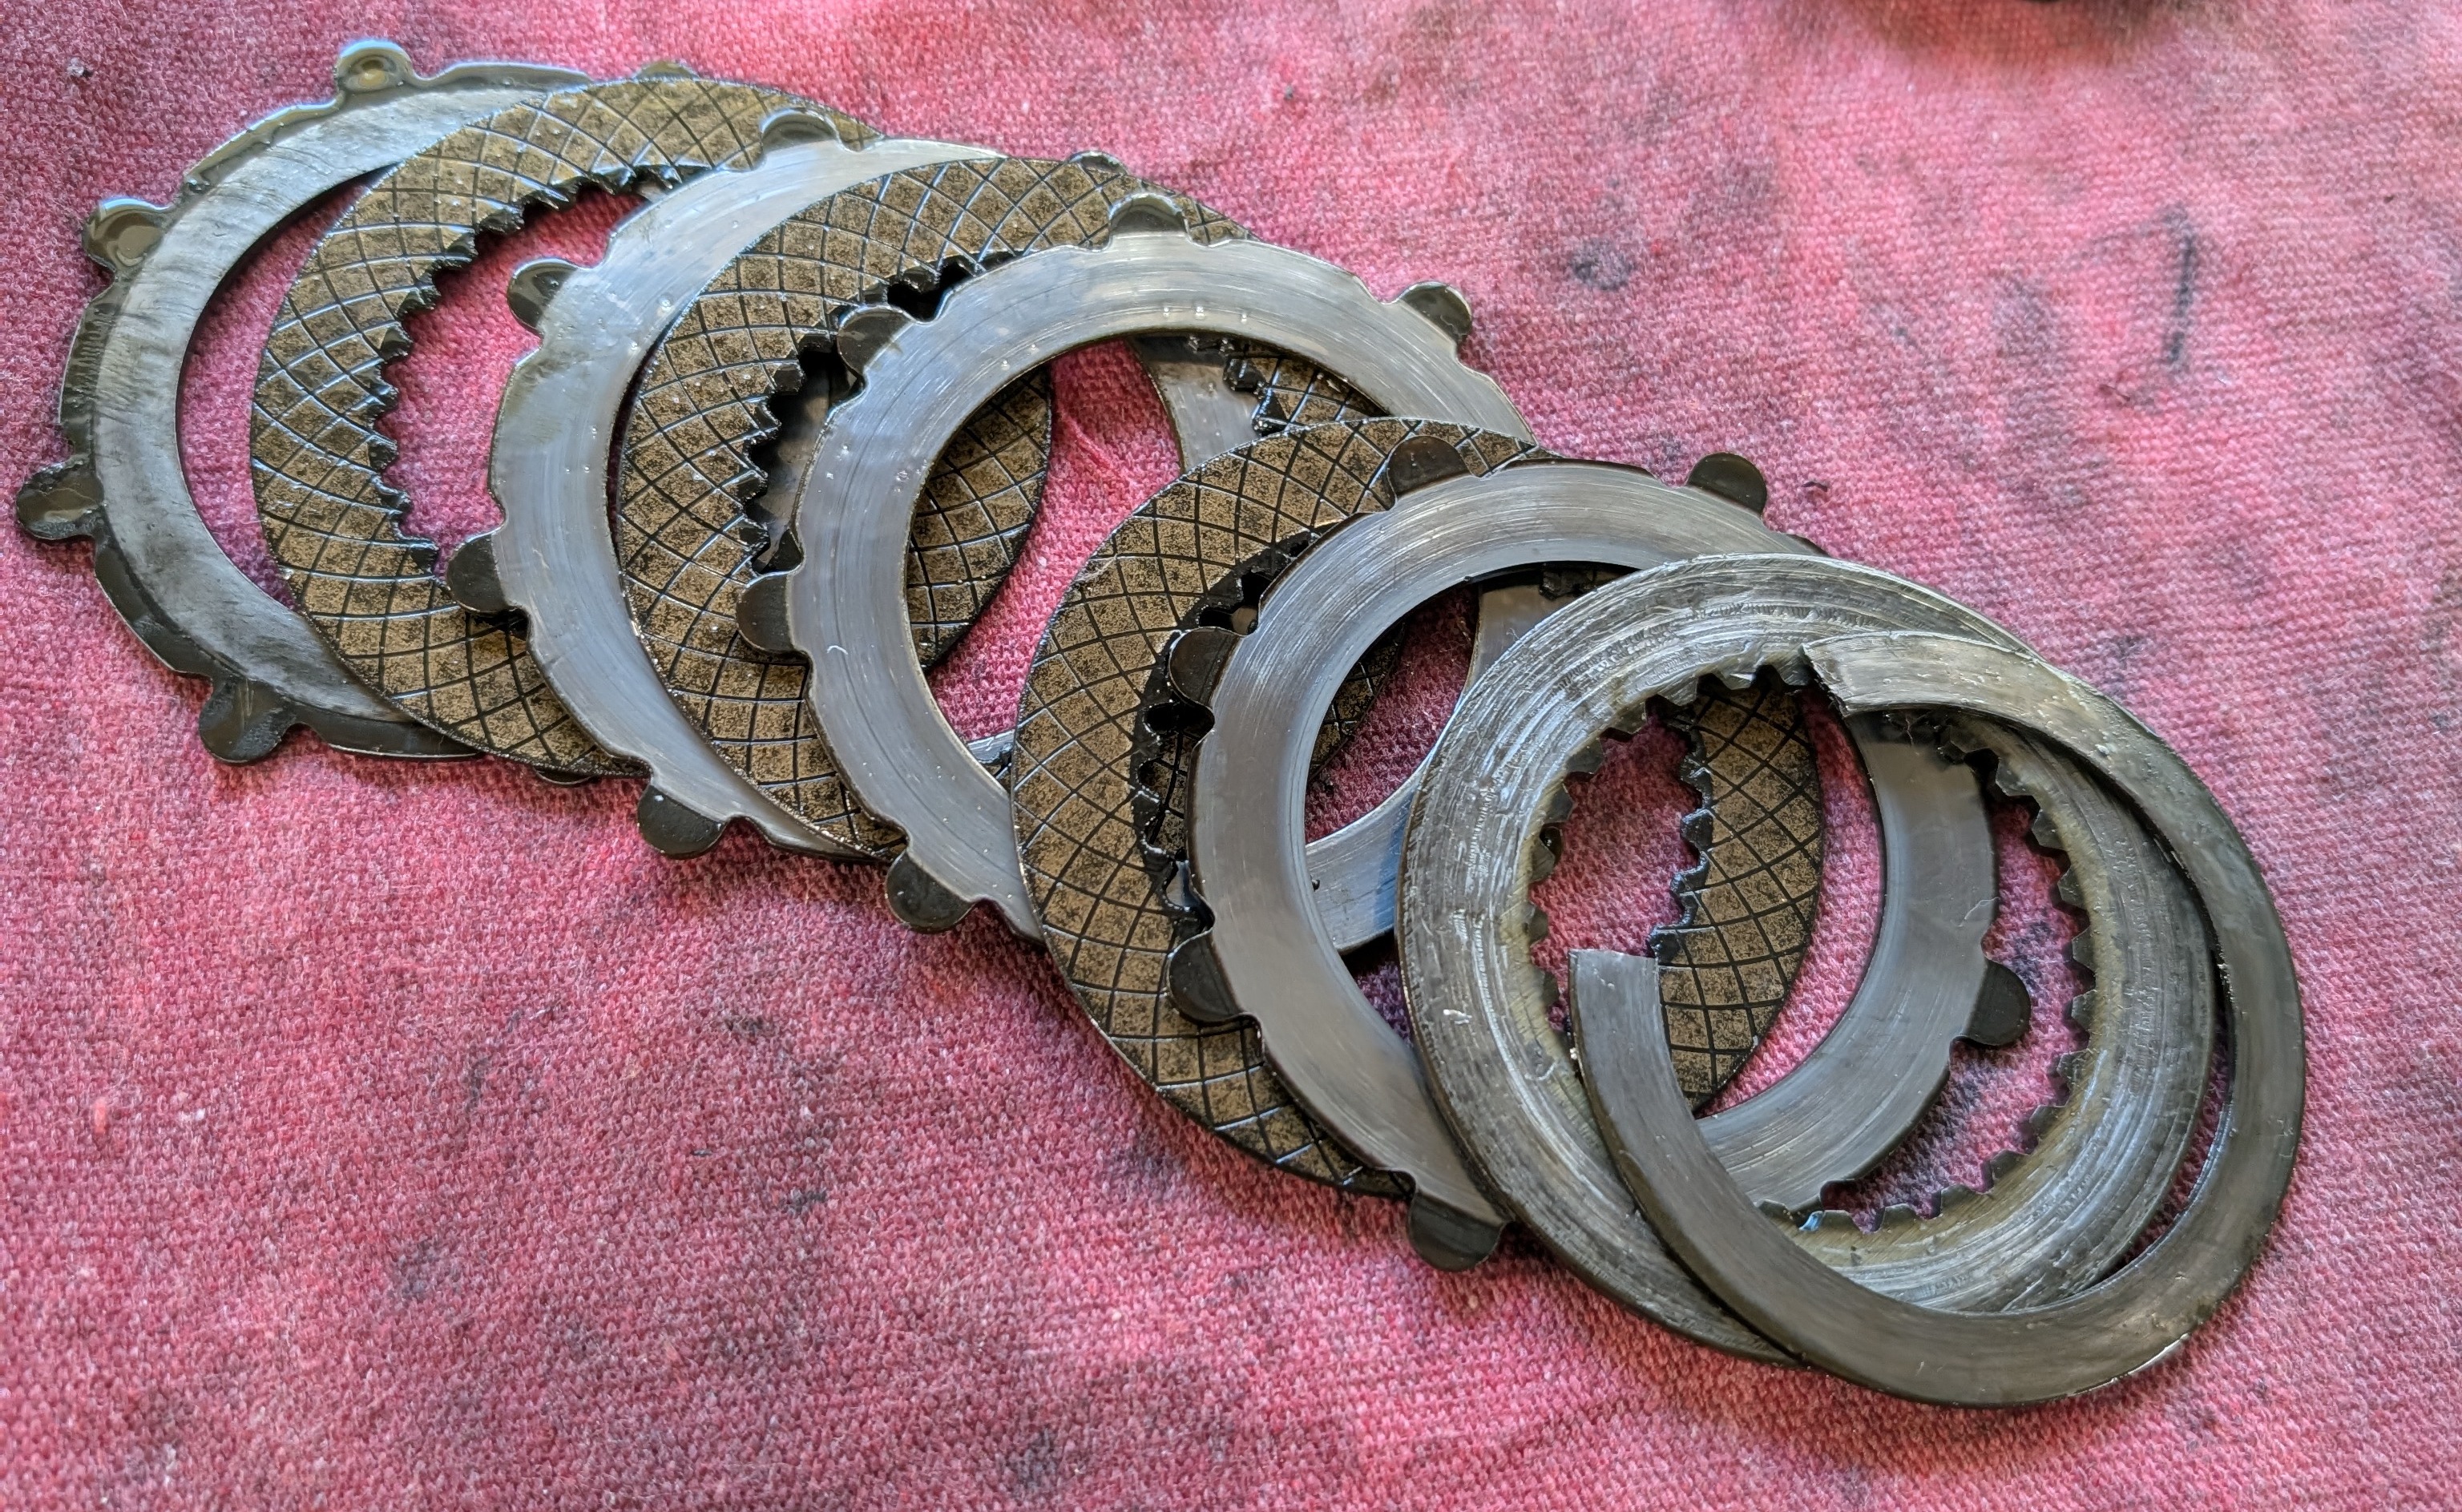
Here is the OEM order as pictured above, with the bottom being on the left, and the top with the spring washer being on the right.
Step 10 - Reassemble Center Carrier with Ring Gear
At this point you'll simple follow the process of center carrier disassembly in reverse. Press the spring pack to re-insert the counter shaft, put two sides together again with the output shafts and gears all in place, and bolt everything back together.
One thing that can be challenging is holding the center carrier in place to torque everything together. We've found a few blocks of wood in the press work wonders to hold everything together. Given you just needed a press two steps ago, you likely still have access to a press at this moment.
Relevant Specs and Info:
- The larger ring gear bolts are torqued to 144lb/ft
- The smaller bolts for the pinion case housing are torqued to 18lb/ft
- We highly recommend Red Loctite for these bolts.
Step 11 - Pull And Clean Diff Magnet From Driver Side Cover
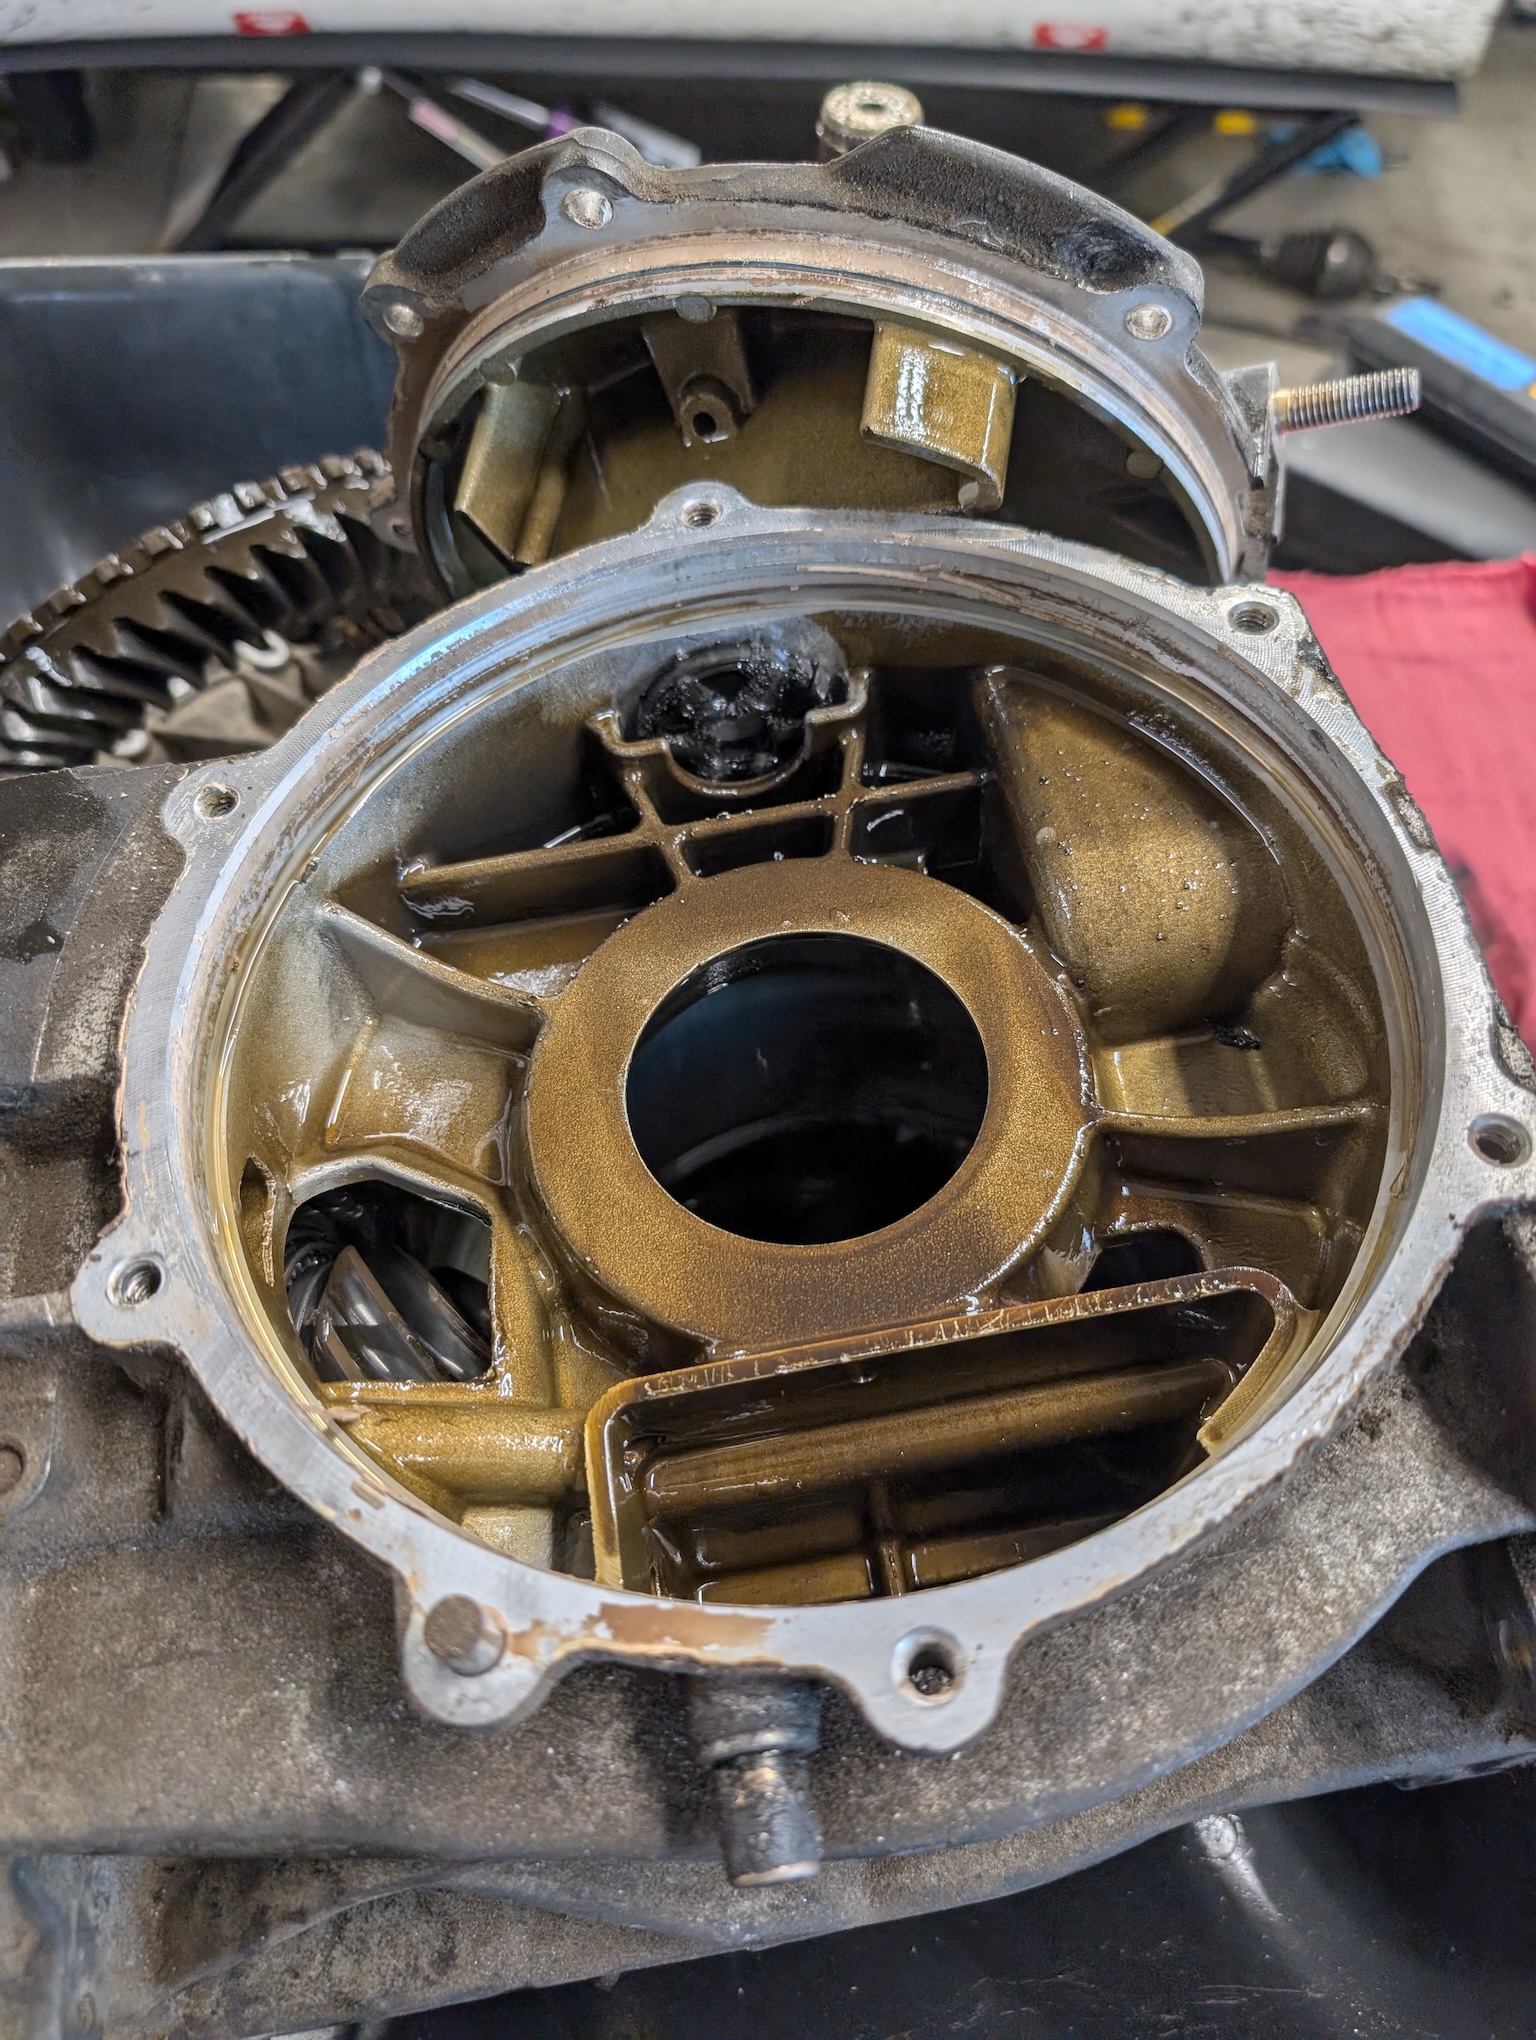
If nothing was wrong whatsoever inside of your differential, you can in theory skip this part. Odds are that isn't the case though and there's going to be some metal filings that got caught by the passenger side magnet, if not a chunk of your spring washer as they rarely just cleanly fail. Whatever the story, we recommend doing this.
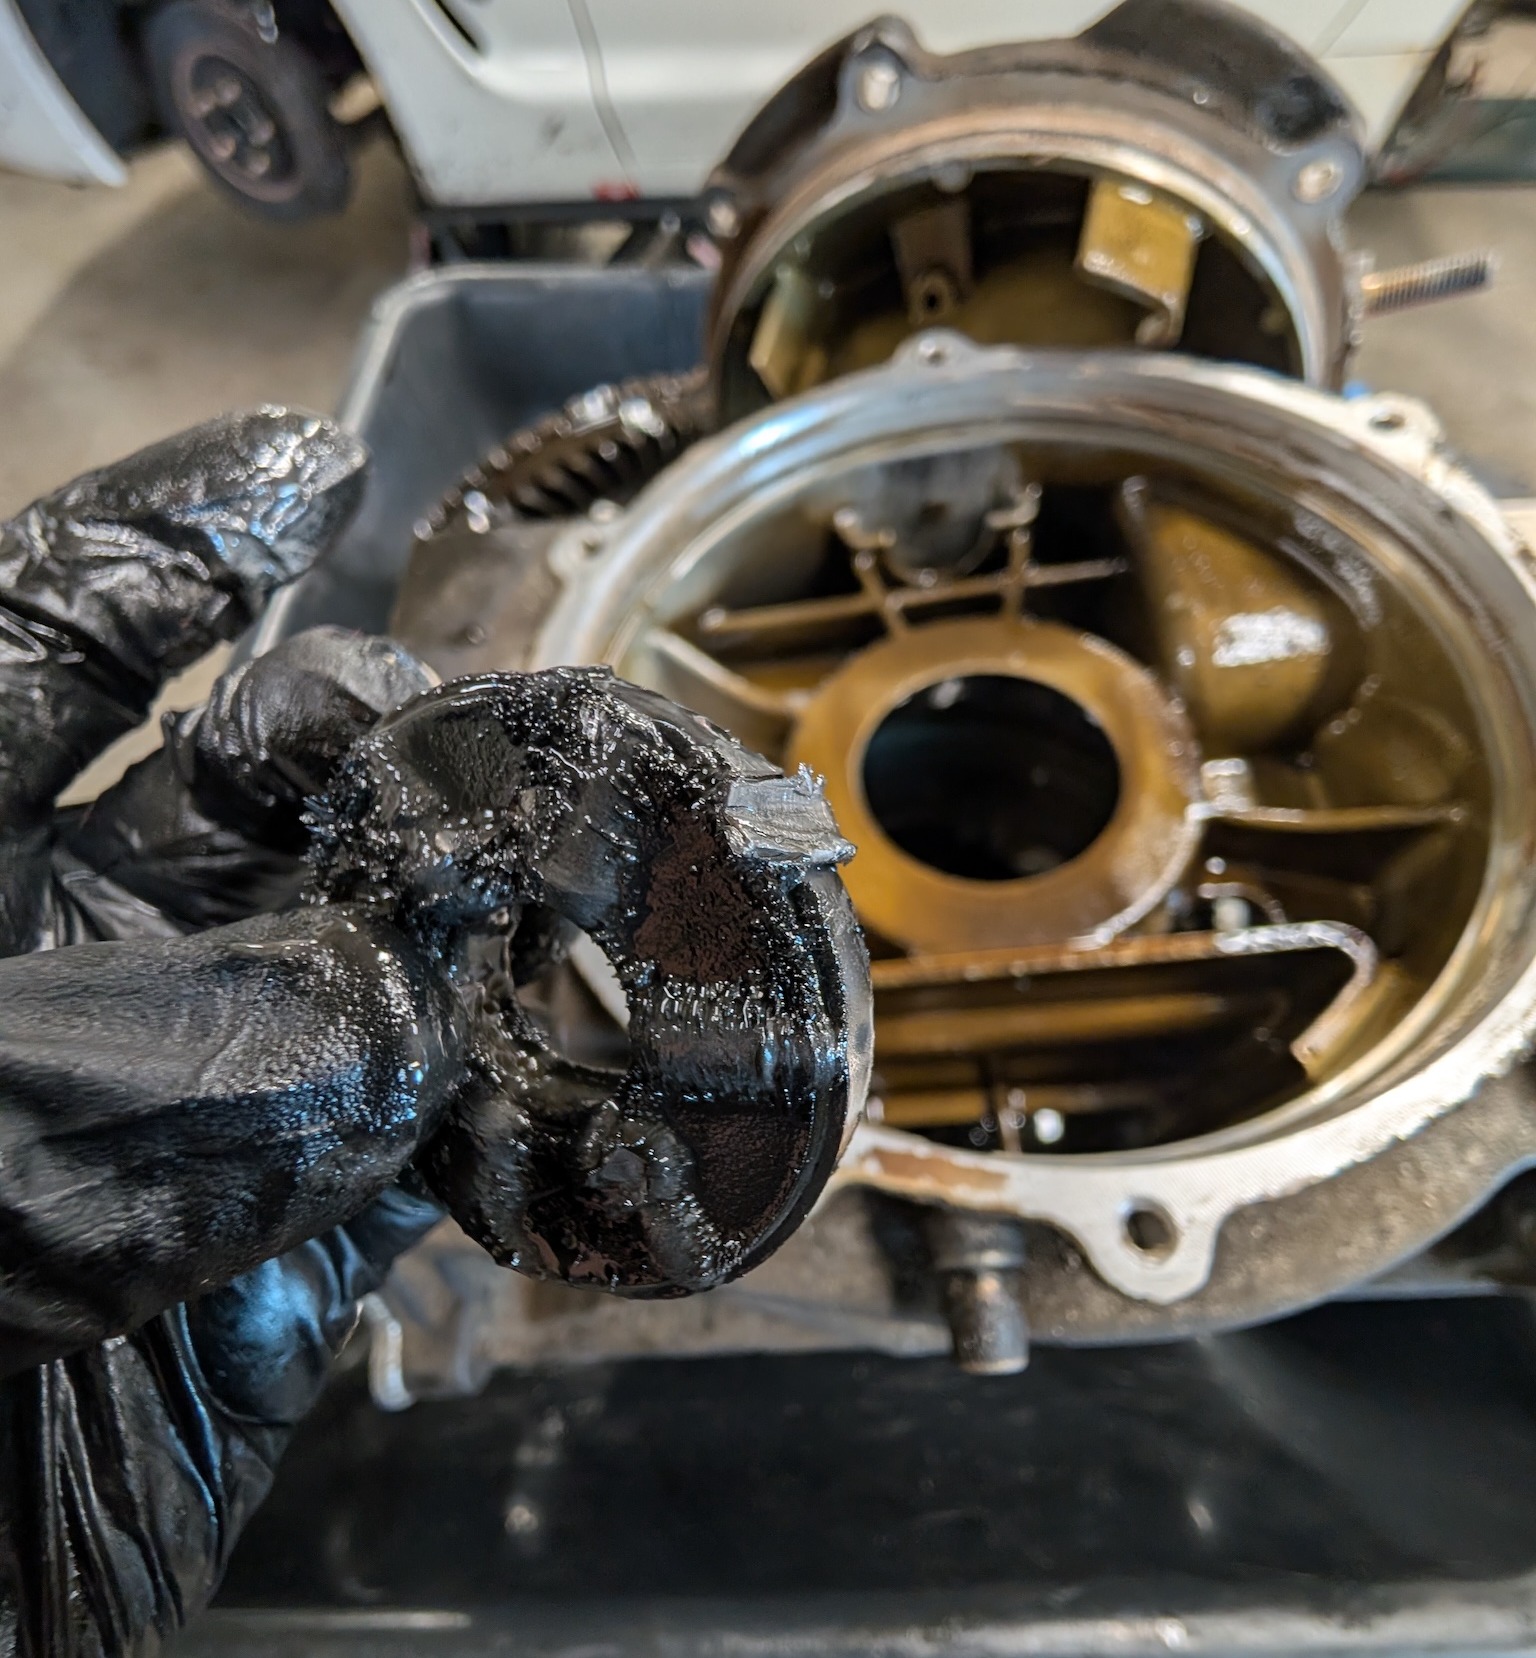
Above is a picture of the magnet on one of the differentials we tore apart. Recognize that chunk? We sure do, it used to be part of our spring washer! Clean the magnet off, cover in grease, and put it back in. It'll resume it's job of hoovering up any metal shavings that come loose. Replace the O-ring on this side, and reinstall but consider replacing axle seal first. Case cover bolts are torqued to 18lb ft.
Step 12 - Replace Axle Seals
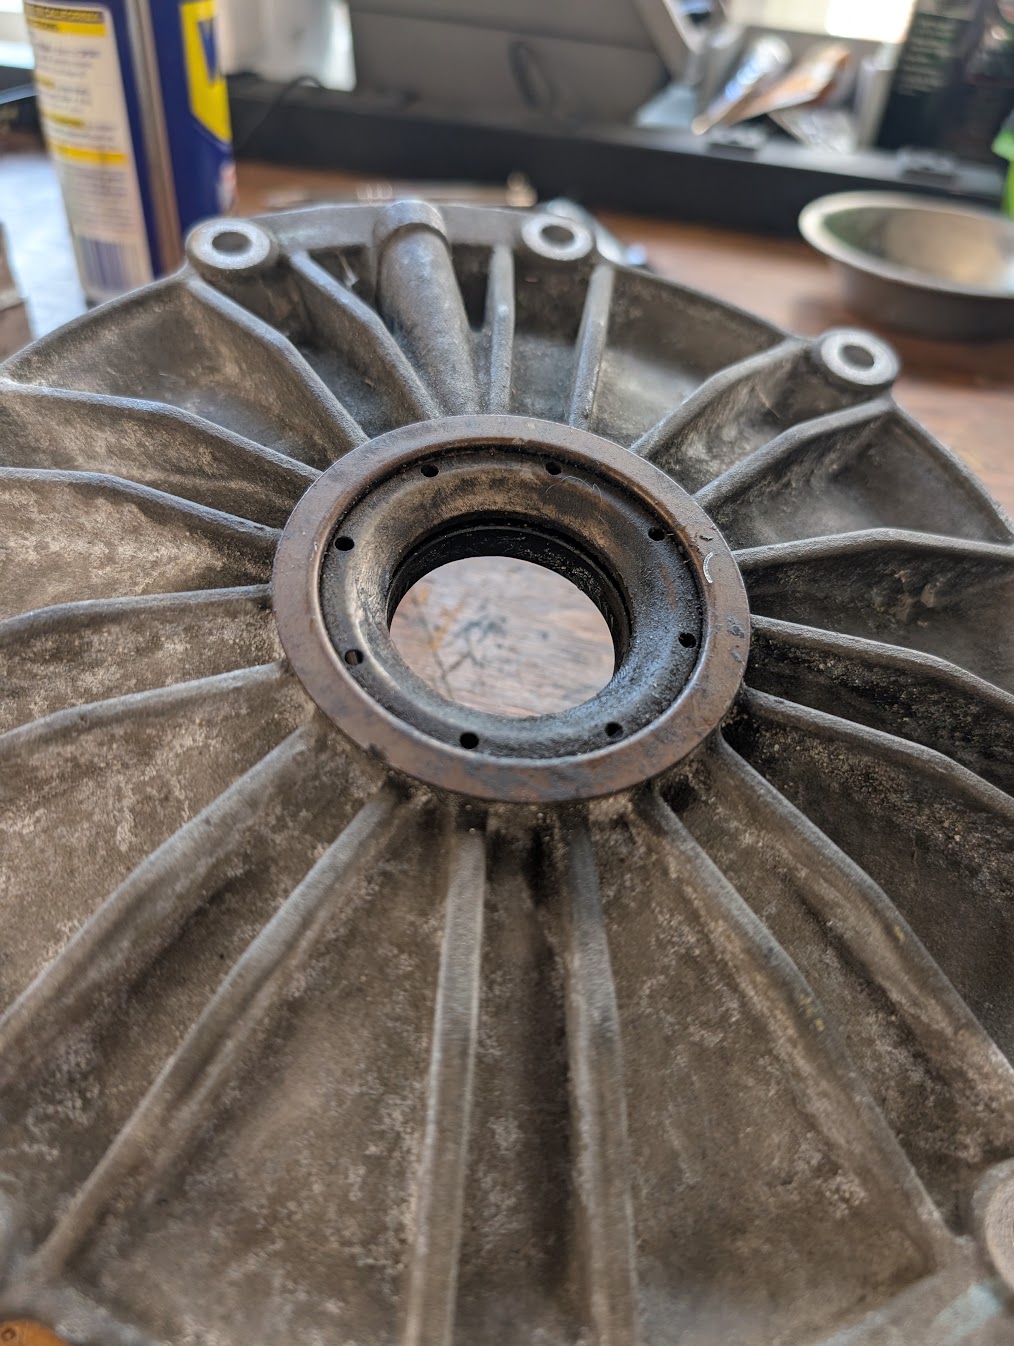
Replacing the axle seals is essential at this point. They nearly always leak when re-used, and they're a cheap replacement part while you're here. Simply pry and/or tap the old ones out. Use a rubber mallet to assist in the removal process if need be, being reasonably careful to not ding the surface, but don't worry it's not made of glass either. Tap the new axle seals in until flush with a rubber mallet, and you're done!
Step 13 - Insert Differential Assembly Into Case and Reinstall Stud
Reinsert the differential assembly into the case. You can now reinstall the mounting stud block exactly the opposite of step 3. We recommend utilizing Hydraulic Thread Sealant at this point since these bolts go through the case and can weep.
Step 14 - Reinstall Driver Side Cover
You're in the home stretch now! Place the driver side cover in place and torque all bolts to 18ft lb. The entire case should all be in place now, all bearings should be in their respective races, and you're read for the reinstall!
Step 16 - Reinstall Differential Into Your C5 - You Are Done!
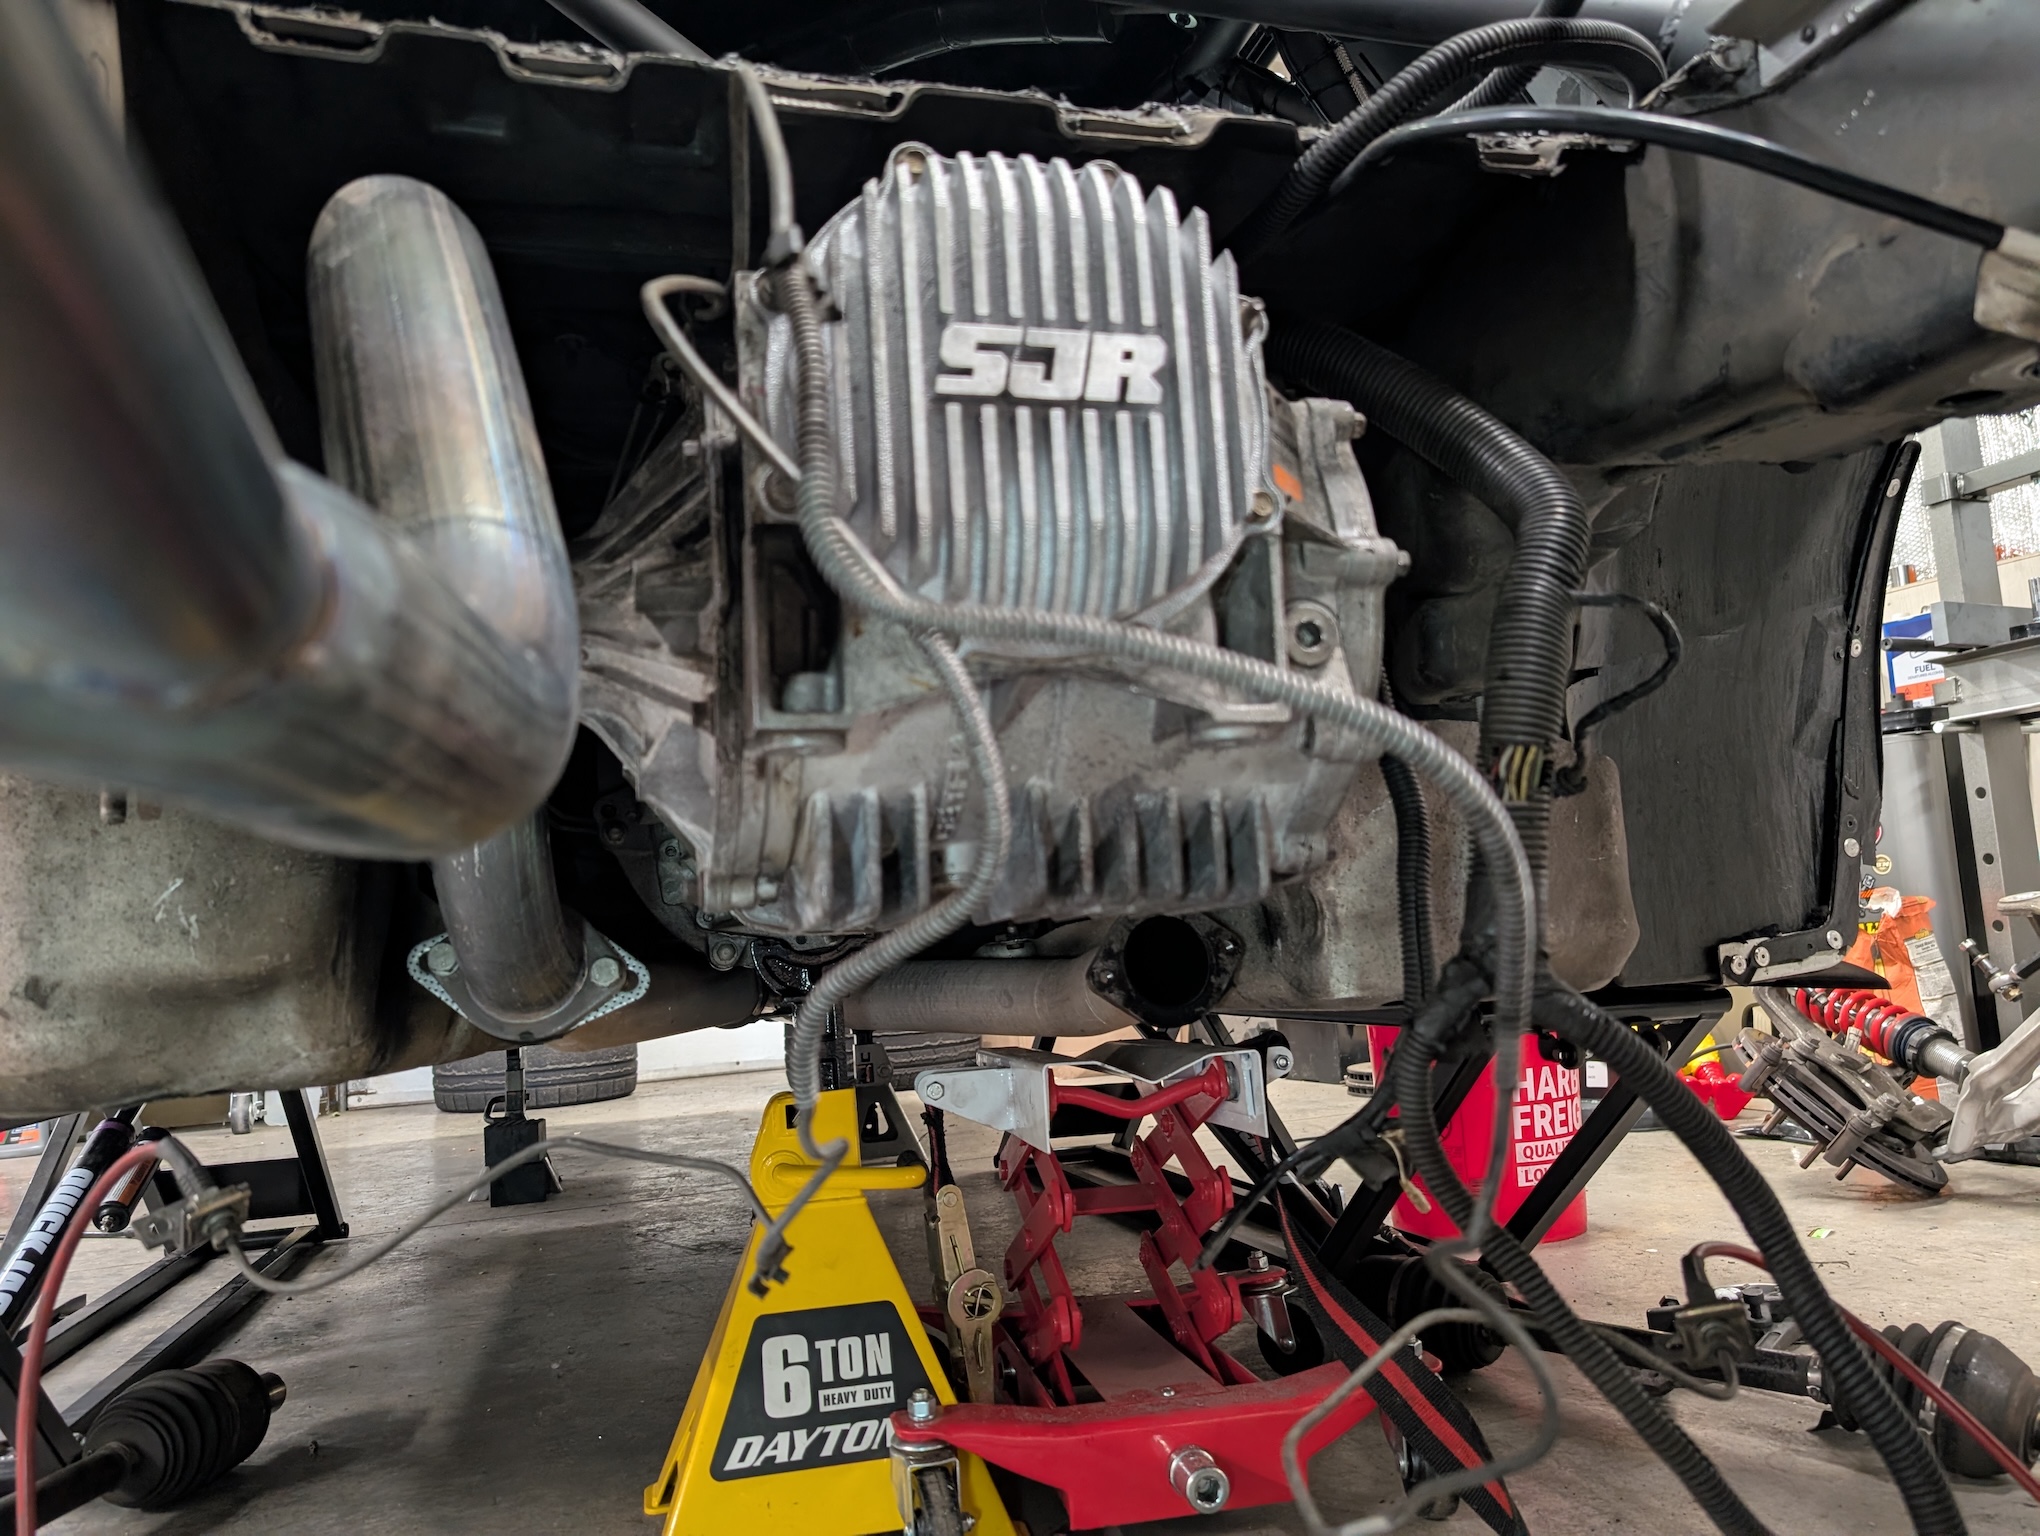
At this point the task should be complete and you can move on to reinstalling the differential or continue with whatever work you are already looking to do with the rest of the drivetrain.
Break-in Procedure And What To Expect Afterwards
Fortunately for you, the break in procedure on these is pretty straight forward. A simple full 3-4 heat cycles should do. Run the differential all the way to warm, let it cool off for a few hours. If you replaced pinion gears as part of your differential refresh though a full 50 miles and/or 15-20 full heat cycles are recommended.
Now if you're just street driving the car, we doubt you'll notice much difference. If you happen to step on it and get a bit of wheel spin off the line, you'll simply notice the car steps out a bit less and controlling the wheel spin is easier. Generally though, the difference will be negligible.
If you're a track driver or auto-crosser, you should notice the biggest difference. The car should now "hook up" better on exit, adding traction when you step on the throttle at exit instead of requiring tip toeing around to ensure the car doesn't step out too far. This is because power will be put down to both wheels, whereas before with shot spring washers the differential acted more like an open differential which would attempt to transfer power to the first wheel to break traction. Throttle off oversteer should also be far easier to manage as well, where-as with a differential that isn't acting right you'll find lifting can cause the car to behave rather unpredictably.
...and that's all there is to it! Hopefully we were able to convey to you the reader that the job isn't that big of a deal. If you can remove and reinstall the rear subframe, this job doesn't require hardly any more technical know-how.
Best of luck, and we hope your refreshed diff drives your C5 Corvette hard for many more years to come now that it's refreshed!