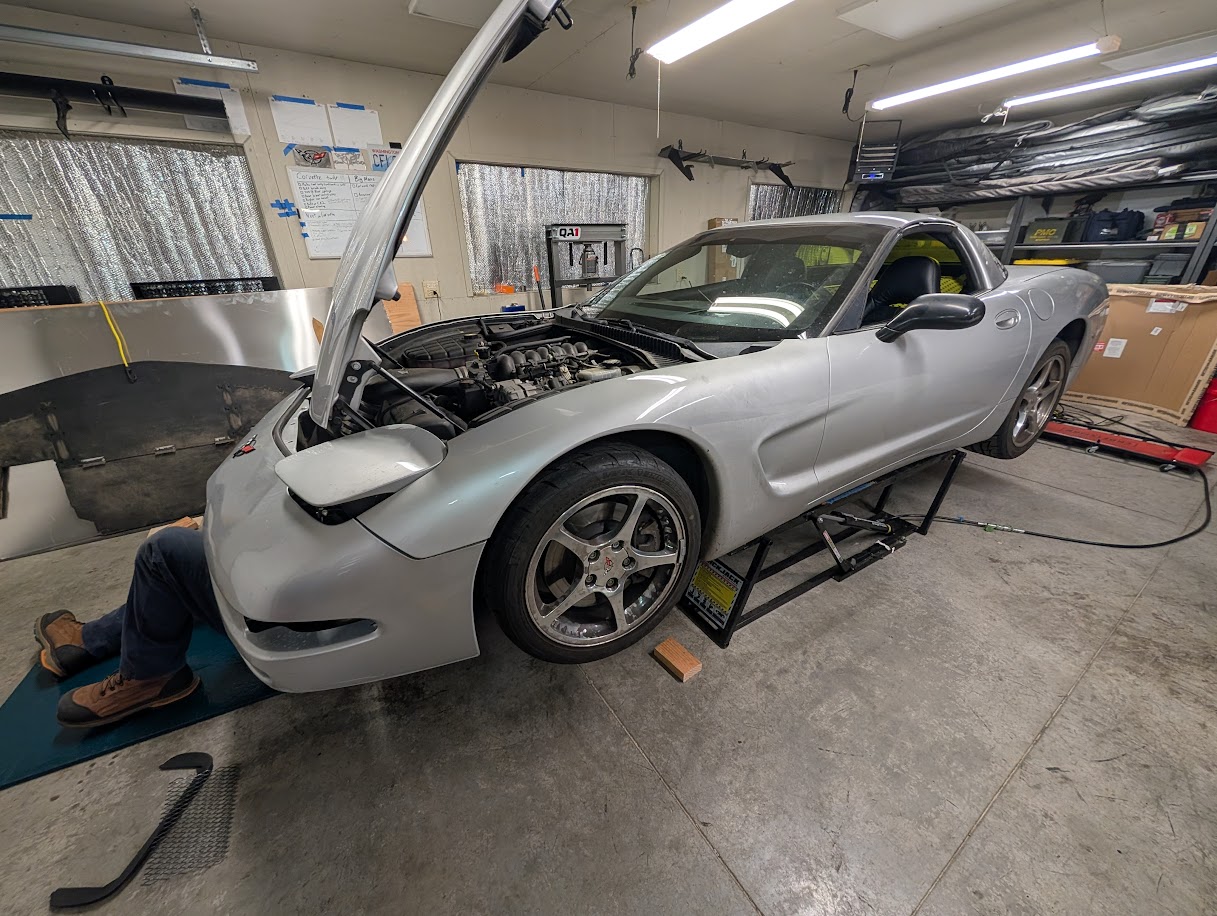
Welcome back to the Dead to Shred series, where we take a Corvette that was pretty much written off as dead and bring it back to life! In this installment, we tackle the heart of any C5 Corvette... the motor!
When we test drove this C5 Corvette originally, the motor didn't make much noise... but as with many cheap performance car purchases, it sure made noise when we went to pick it up again next time! Fortunately the noise subsided a bit as the car warmed but, it it remained present in the background even at temperature. We drove the car home, took a few more test drives, and determined we'd surely need to dig into just what was causing the noise.
Where to Start With a Noisy C5 Engine?
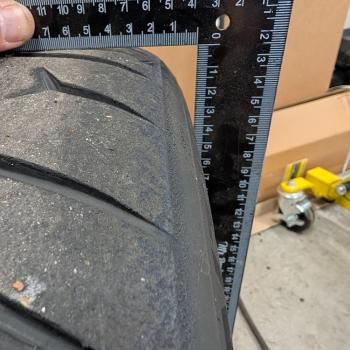
So you've got a C5 Corvette with a noisy engine. Where should you start? Well first off, verify it's not just "piston slap". These aluminum block engines when cold can sound a battery clattery, mostly because there's some tolerance around the pistons that hasn't been taken up yet. It's no big deal, all of these LS engines had them, for whatever reason especially the 2001 LS engines specifically. You can reduce the noise a bit by increasing oil weight to 5W40 (or higher for racing use) but in general... it's just a thing on these C5 Corvettes.

A quick way to check if a noise you hear is engine related or not is to remove your serpentine belt. This should remove several more potential cause of noise, and if the noise persists after the belt well... you'll need to keep looking! Plus the belt on your C5 Corvette is quite possibly pushing 20 years old so you might as well replace it!
For us, unfortunately, the belt wasn't the cause of our most concerning noise... but it did eliminate a few other concerning sounds. To try and eliminate all other possible causes of noise, we gave the idler and tensioner pulleys a quick check to see if any were loose. Sure enough, we found our tensioner pulley had come quite loose loose. No big deal though, they're cheap to get on amazon, bolt right up, and it quickly eliminates one more unsettling source of engine RPM related noise.
Now if your noise persists a bit longer, next up you'll want to take a gander around and look for anything obvious. Most folks don't find themselves with a mystery corvette like we have, but still, take a quick visual cruise around and look for any obvious issues. In our case, we found a few obvious potential issues right away. The first one being, the air injection system was only partially removed on our C5 Corvette. This could potentially be leaking some air, and so properly handling the AIS system was a good place to start.

Another very obvious problem that our car had was that the motor mounts were blown. These motor mounts come filled with fluid from the factory, and over time become brittle, tear, and leak out all of their fluid. Ours had long ago run out of fluid and were entirely separated, only staying in the front of the car due to gravity. This alone generally won't cause a noise, but it sure as heck will take a small noise and amplify it!
Engine Mounts Used: Power Torque Engine Mounts from Oreillys ($39 a piece).
Race Mounts We Endorse: AMT Motorsports Vulcan Motormounts
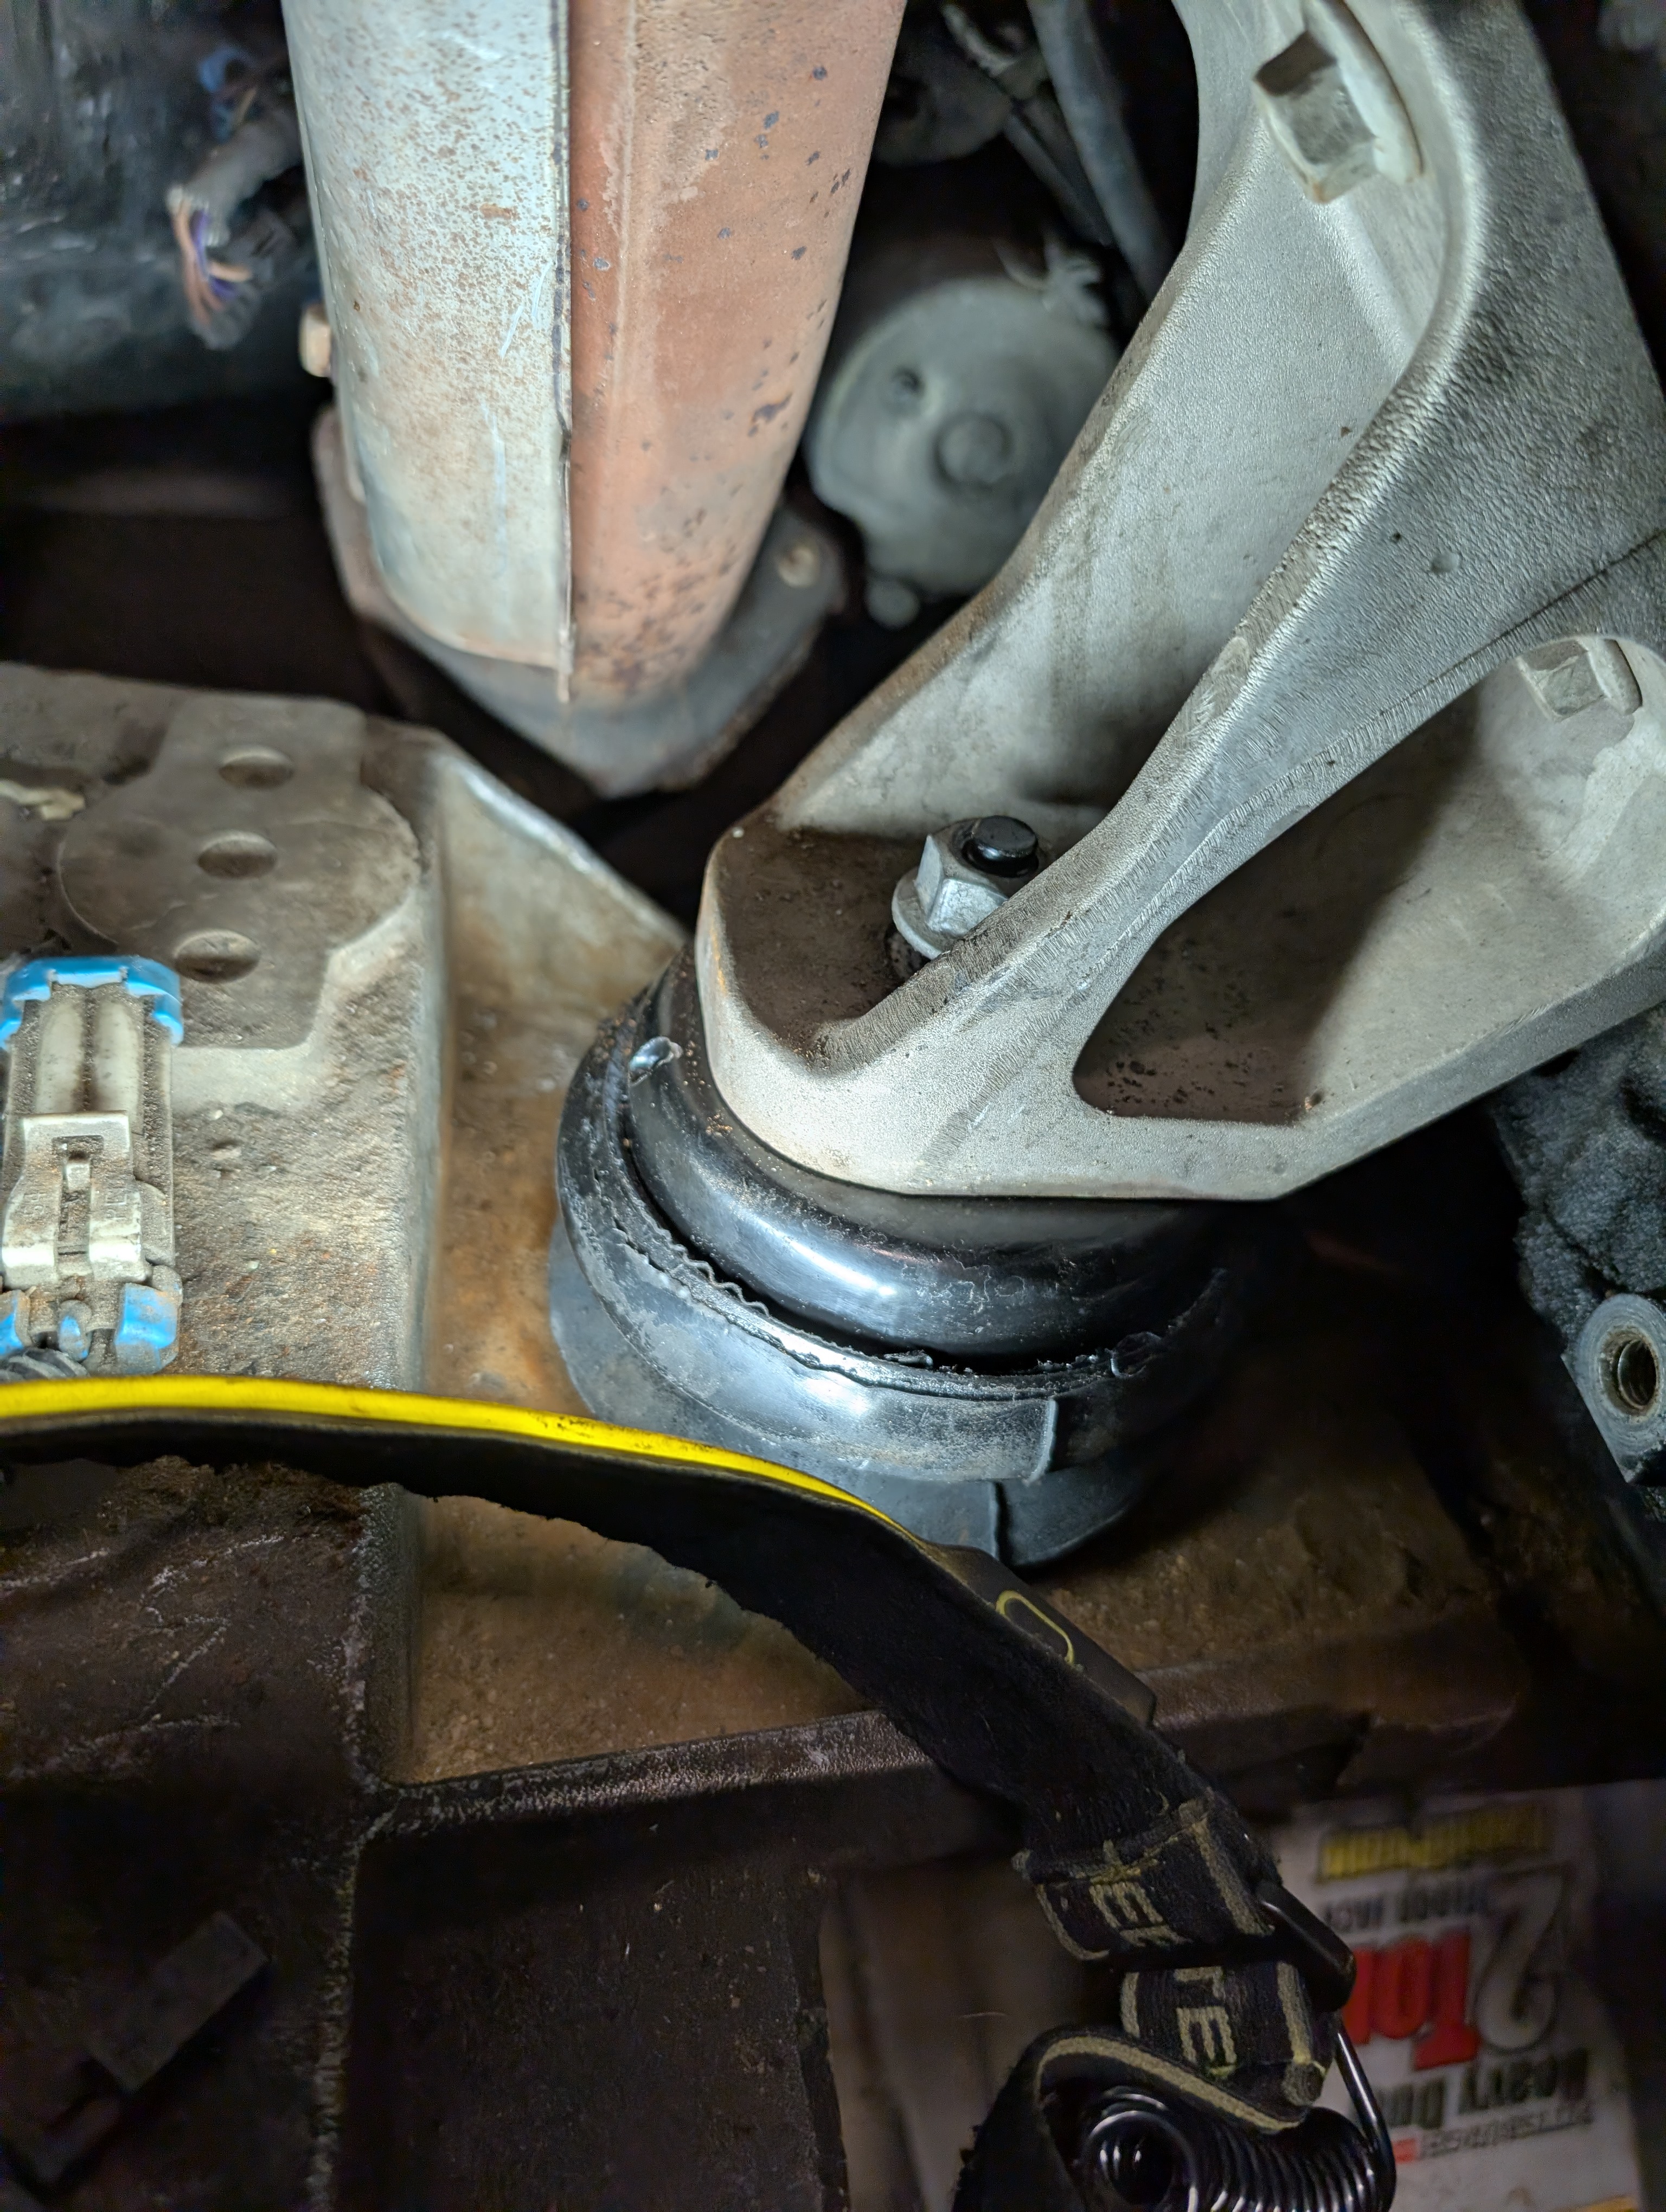
We replaced the motor mounts as a later part of the project, but they're actually not that hard to do. The passenger side is quite reasonable, and the drivers side will take some finessing but is possible. Having quikjaks at least is recommended and with some patience and finagling the new motor mounts will seat right up and without issue.
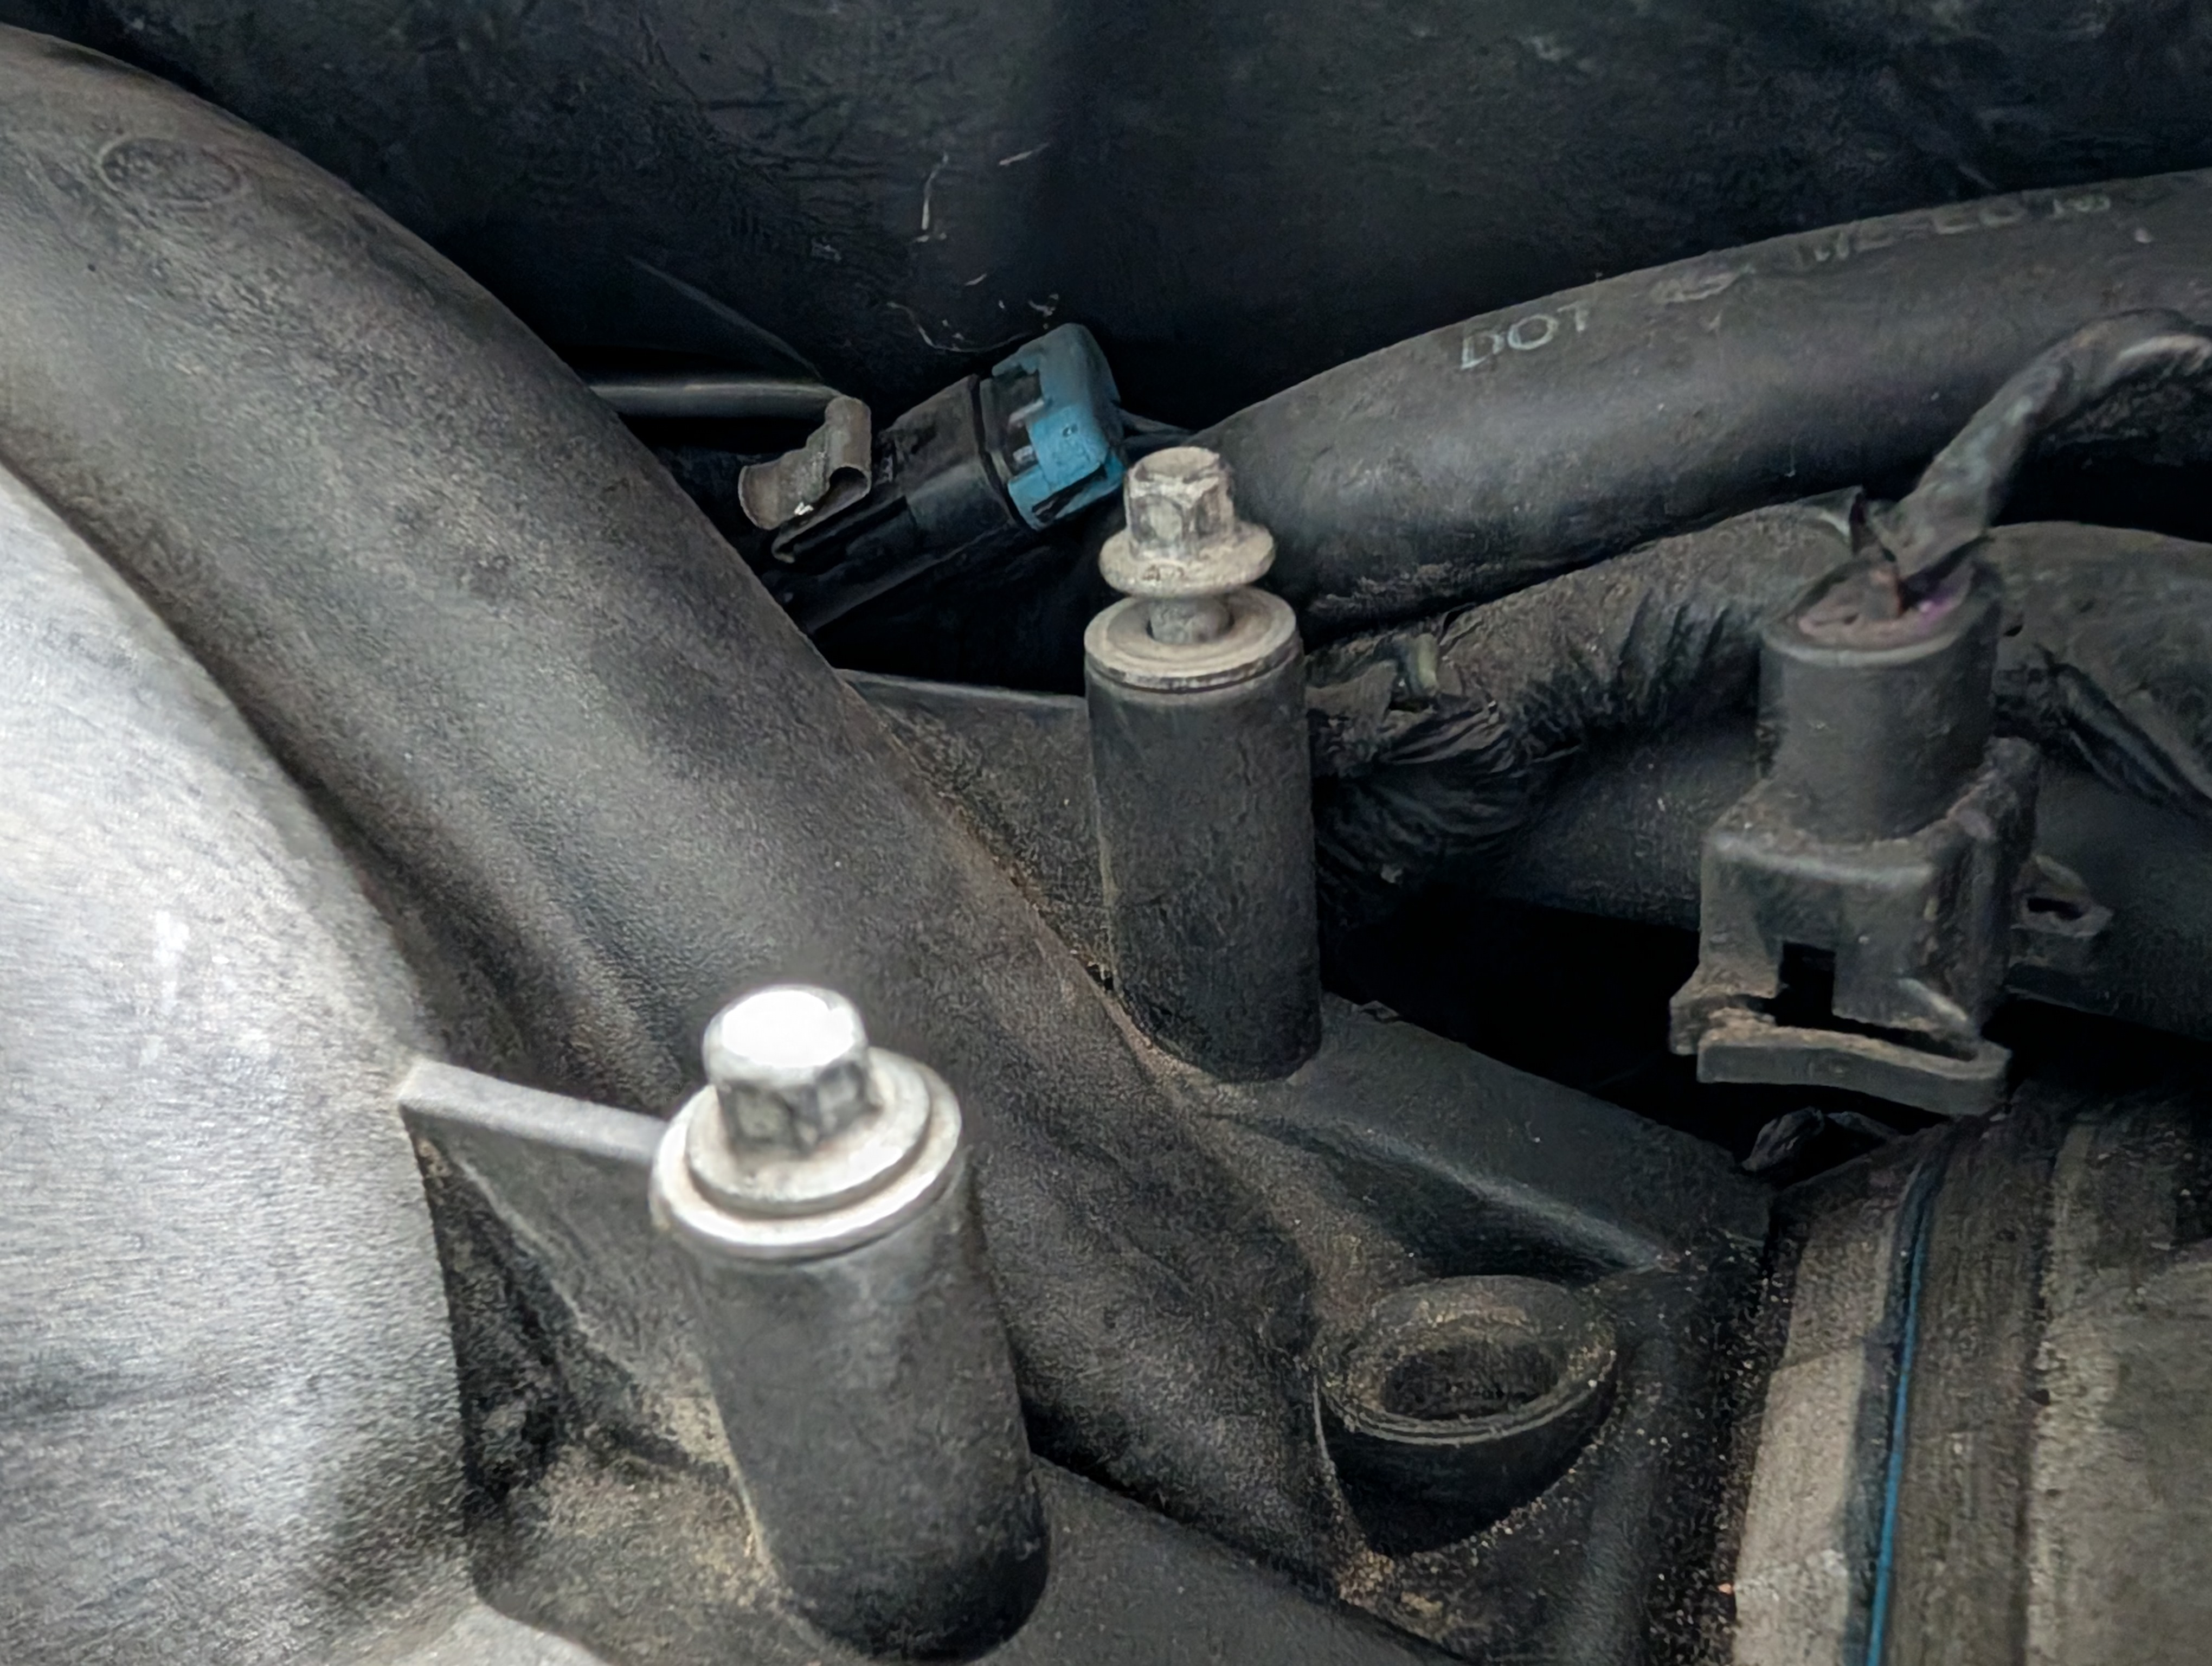
Another smoking gun we found was the intake manifold had an entirely loose bolt. A not fully seated intake manifold can cause some sealing issues potentially that go away as the car warms up, so it was another easy place to proceed. We also took a gander around the back of the intake manifold, and sure enough the vacuum connection that controls the interior HVAC "modes" (feet, air, or defroster etc etc) was entirely loose. A small vacuum opening like that will surely case some engine noise as well.
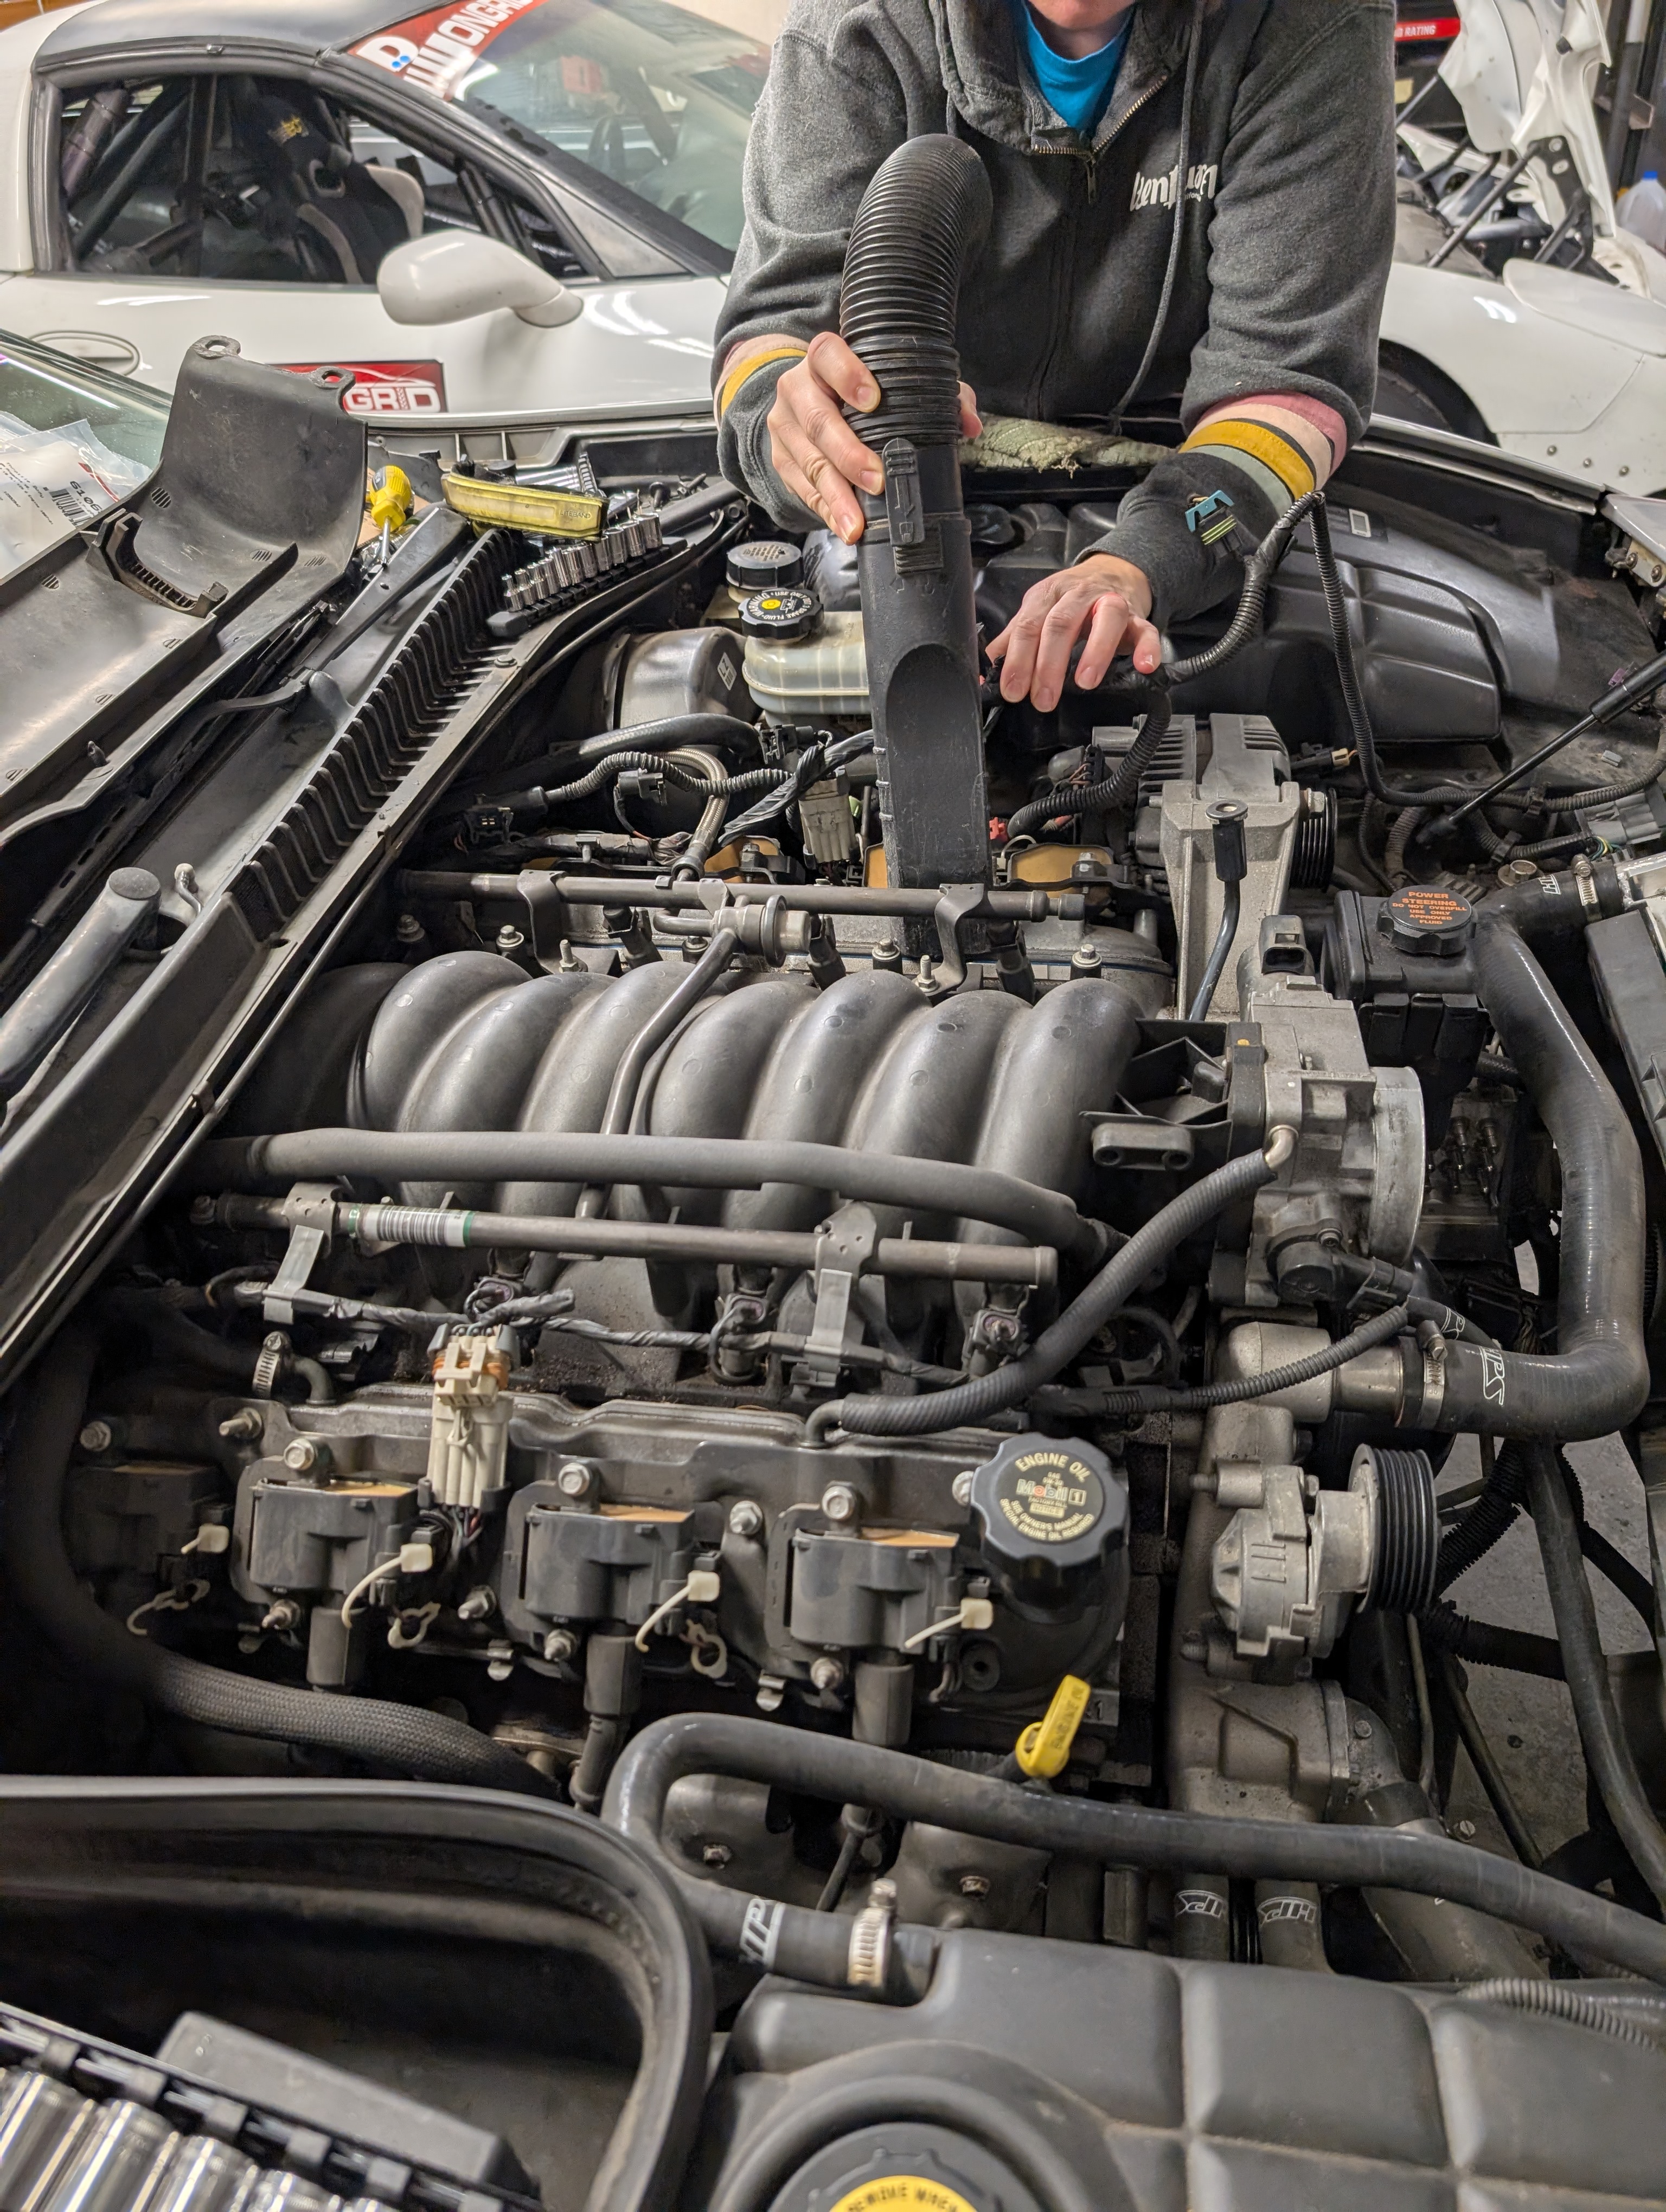
Now, if you're going to pull the intake manifold, you don't want to drop a bunch of crud down into your intake ports on the heads, so we highly recommend a quick vacuum and cleaning around the intake manifold.
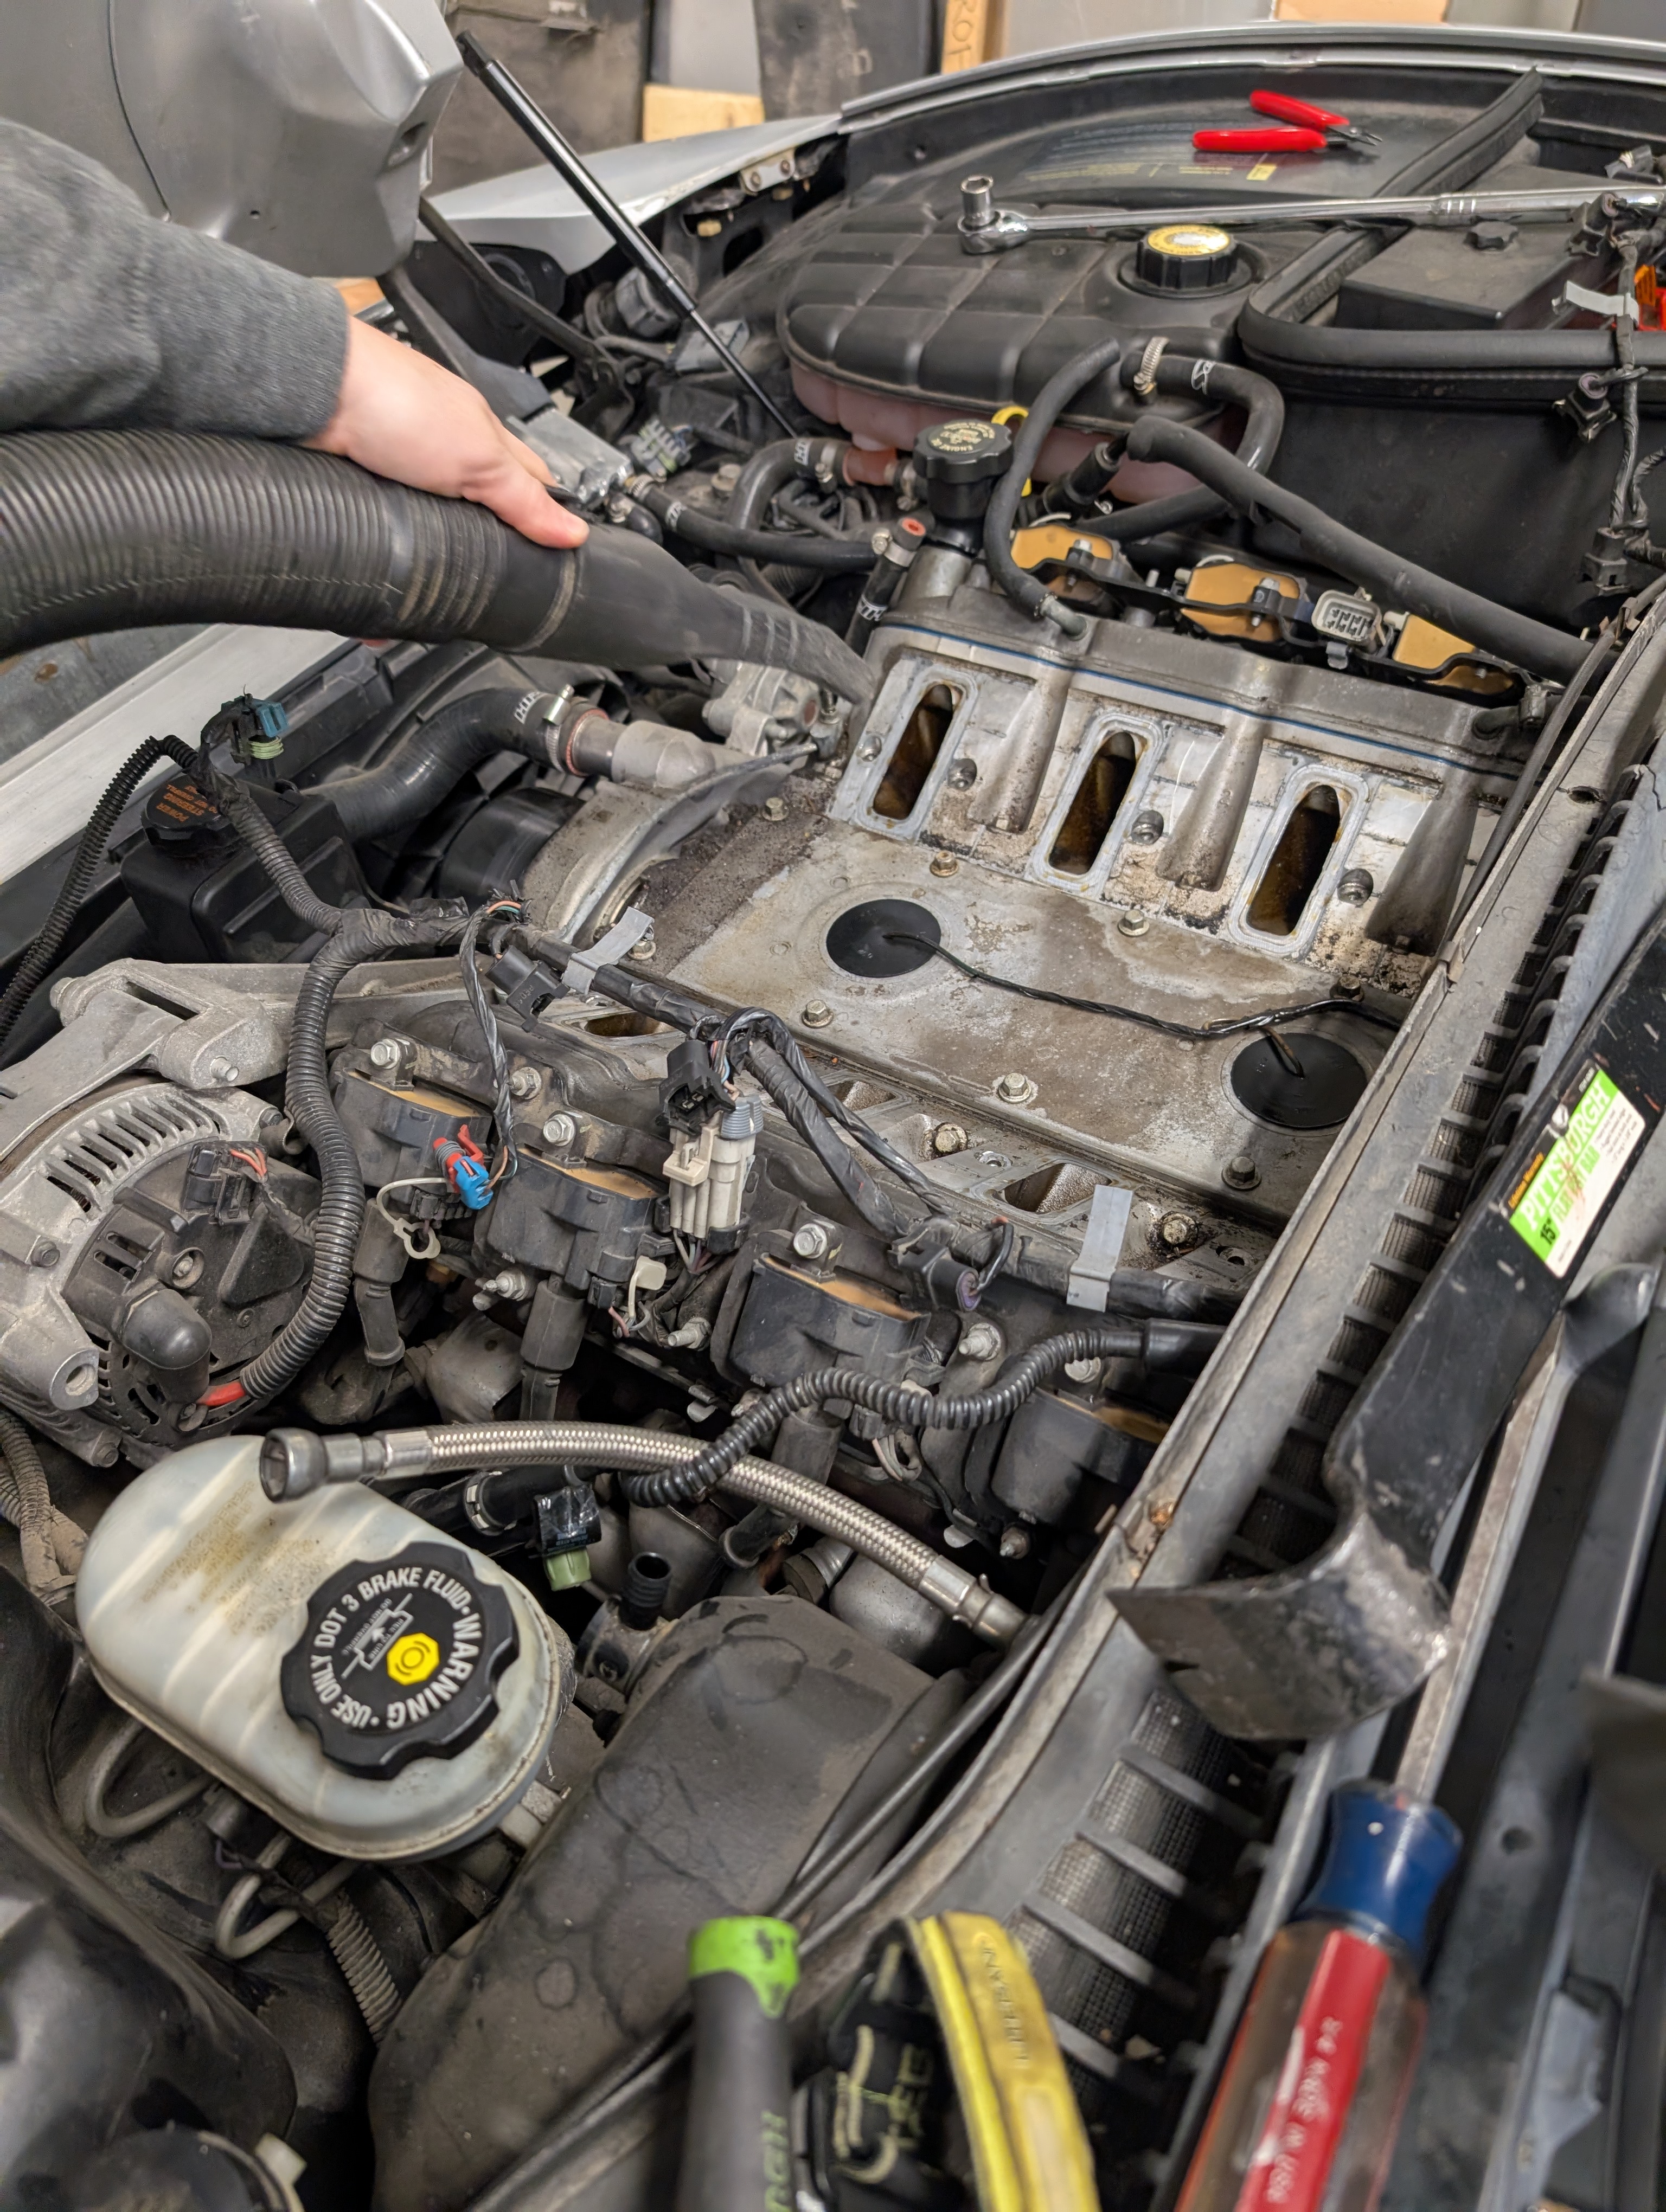
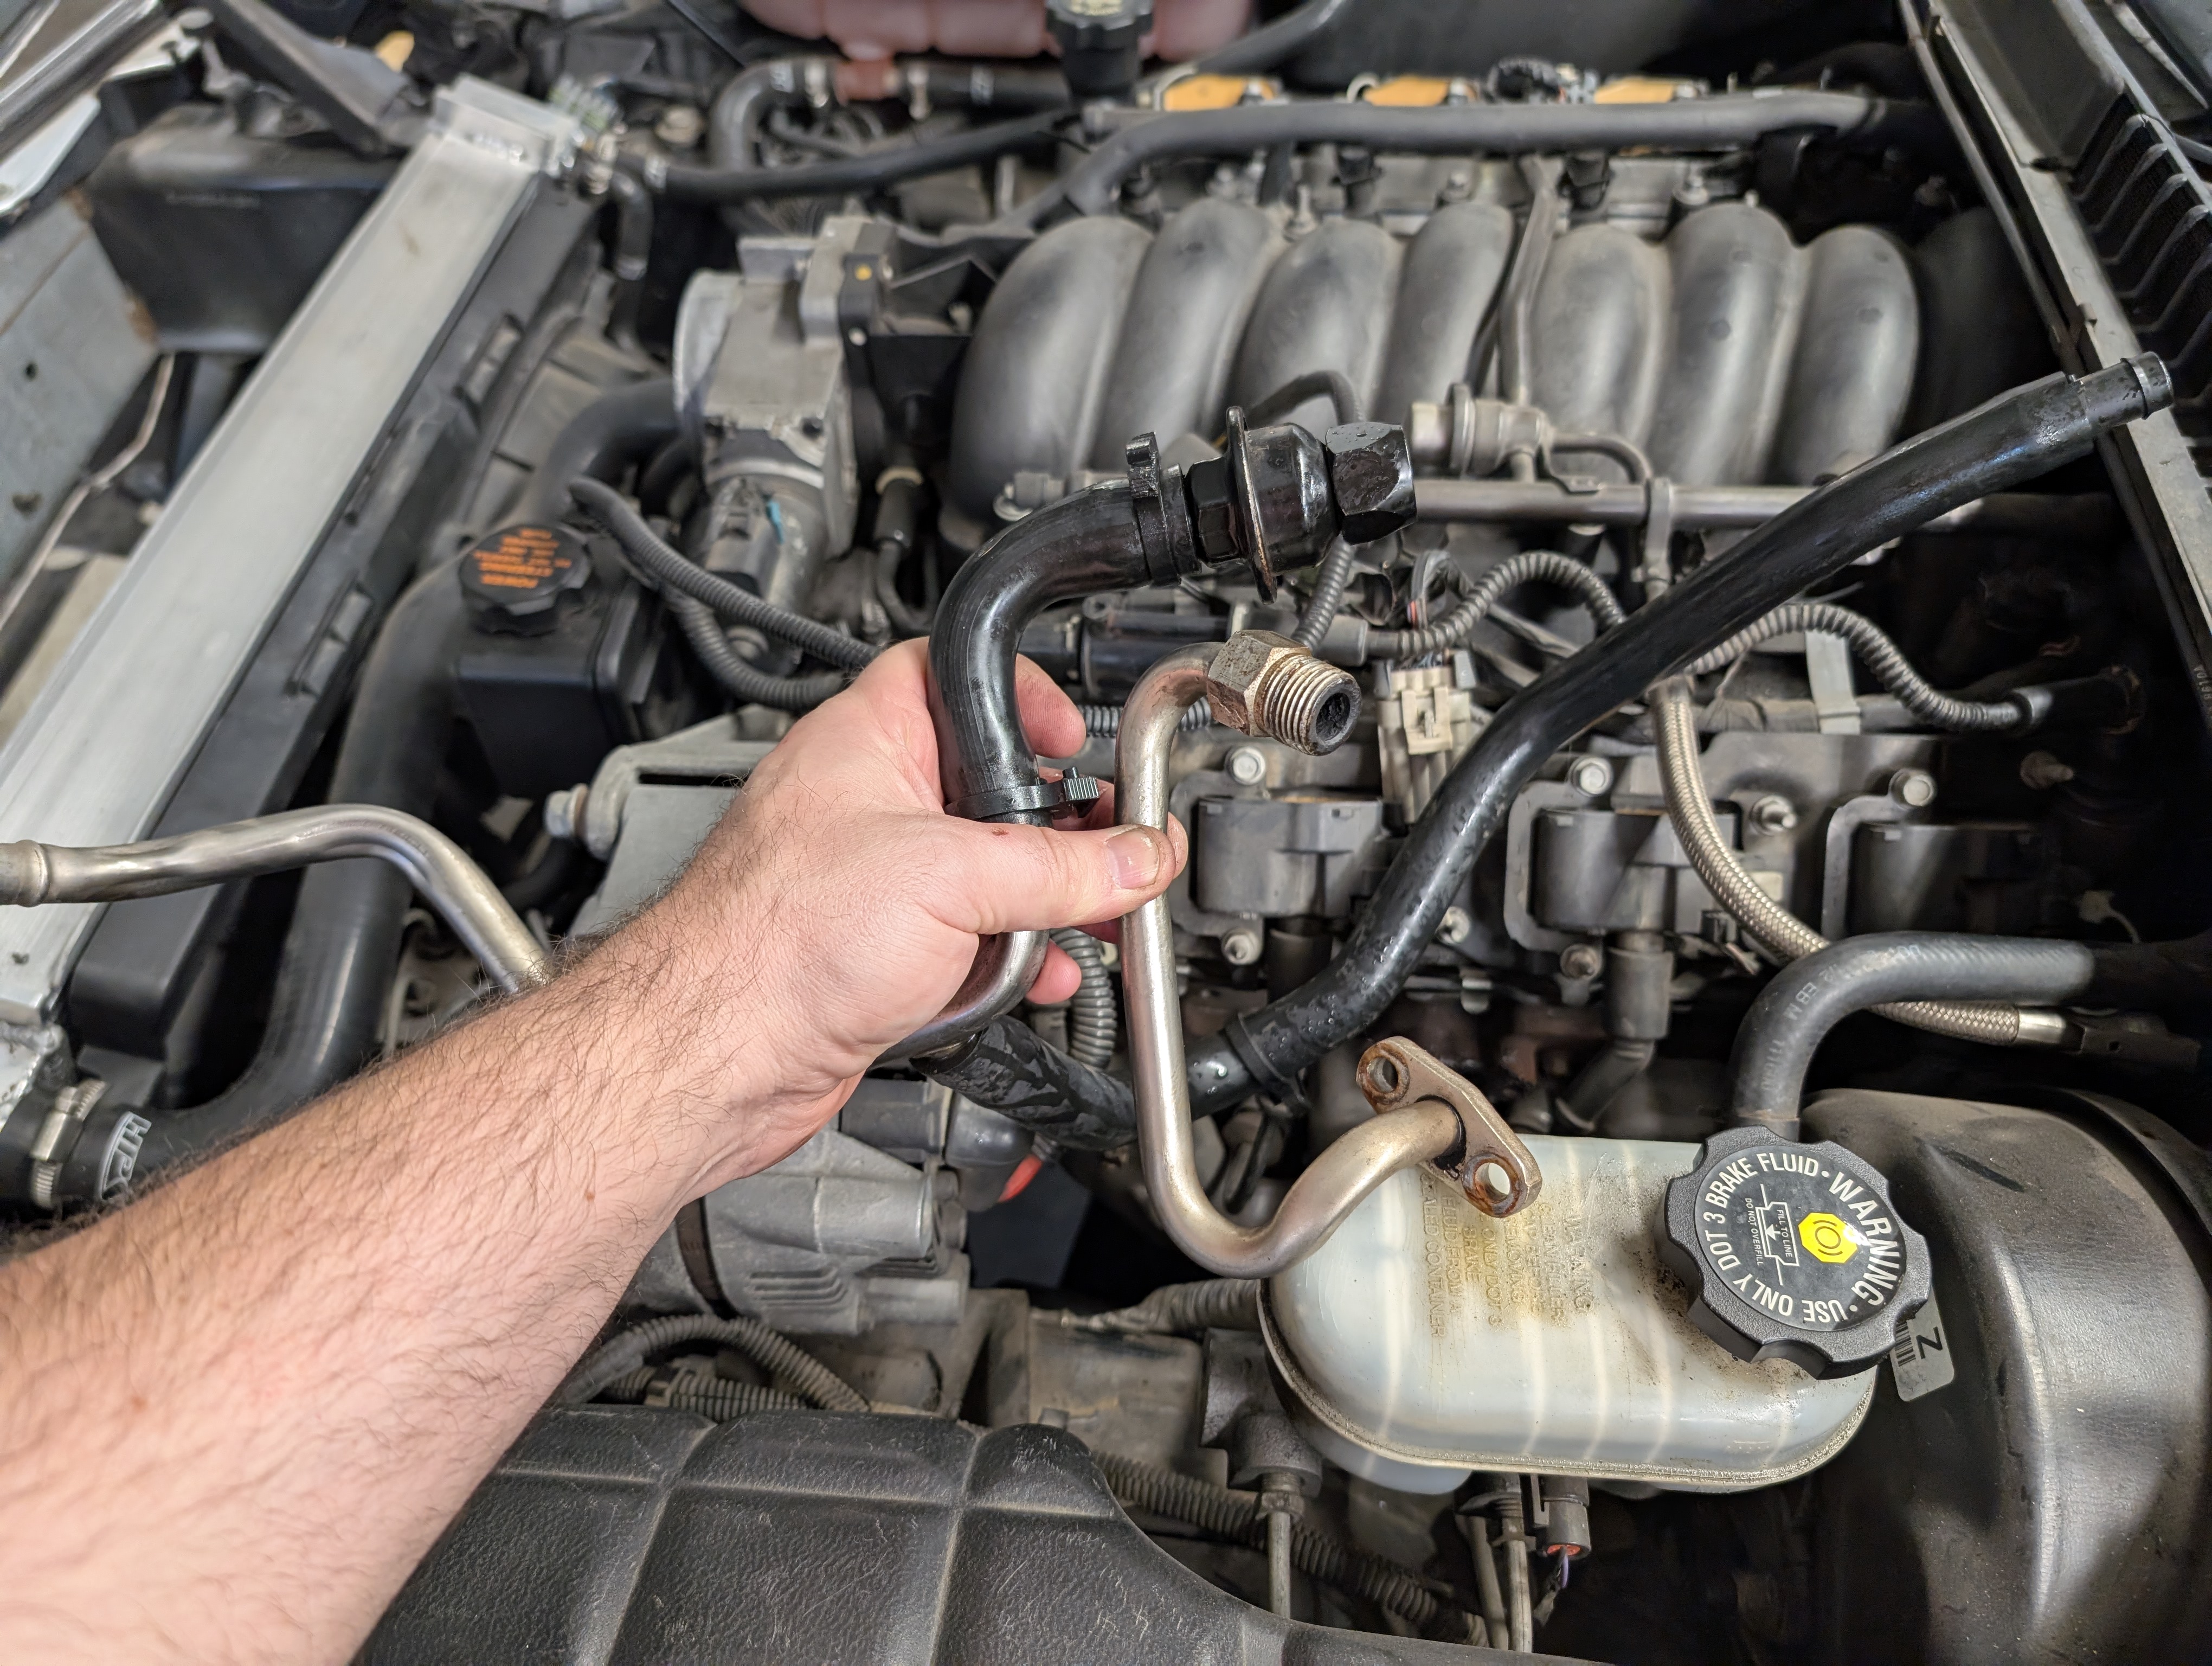
The intake manifold isn't anything special to remove and has been covered in great detail, but the jist is you'll disconnect fuel rail utilizing a 3/8" quick disconnect tool, which may spill some gas so be ready with a rag. Ideally you'll also have a vacuum cap you can put over the fuel rail opening to prevent it from draining gasoline out everywhere.
With the fuel rail disconnected, next unbolt unbolt the fuel rail from the intake manifold with a deep 10mm socket. Next, you'll disconnect all of the fuel injectors electrical connectors, which can be difficult but a three finger technique of pushing on the spring with your thumb and pulling the electrical connector up between your pointer and middle finger makes quick work of the task.
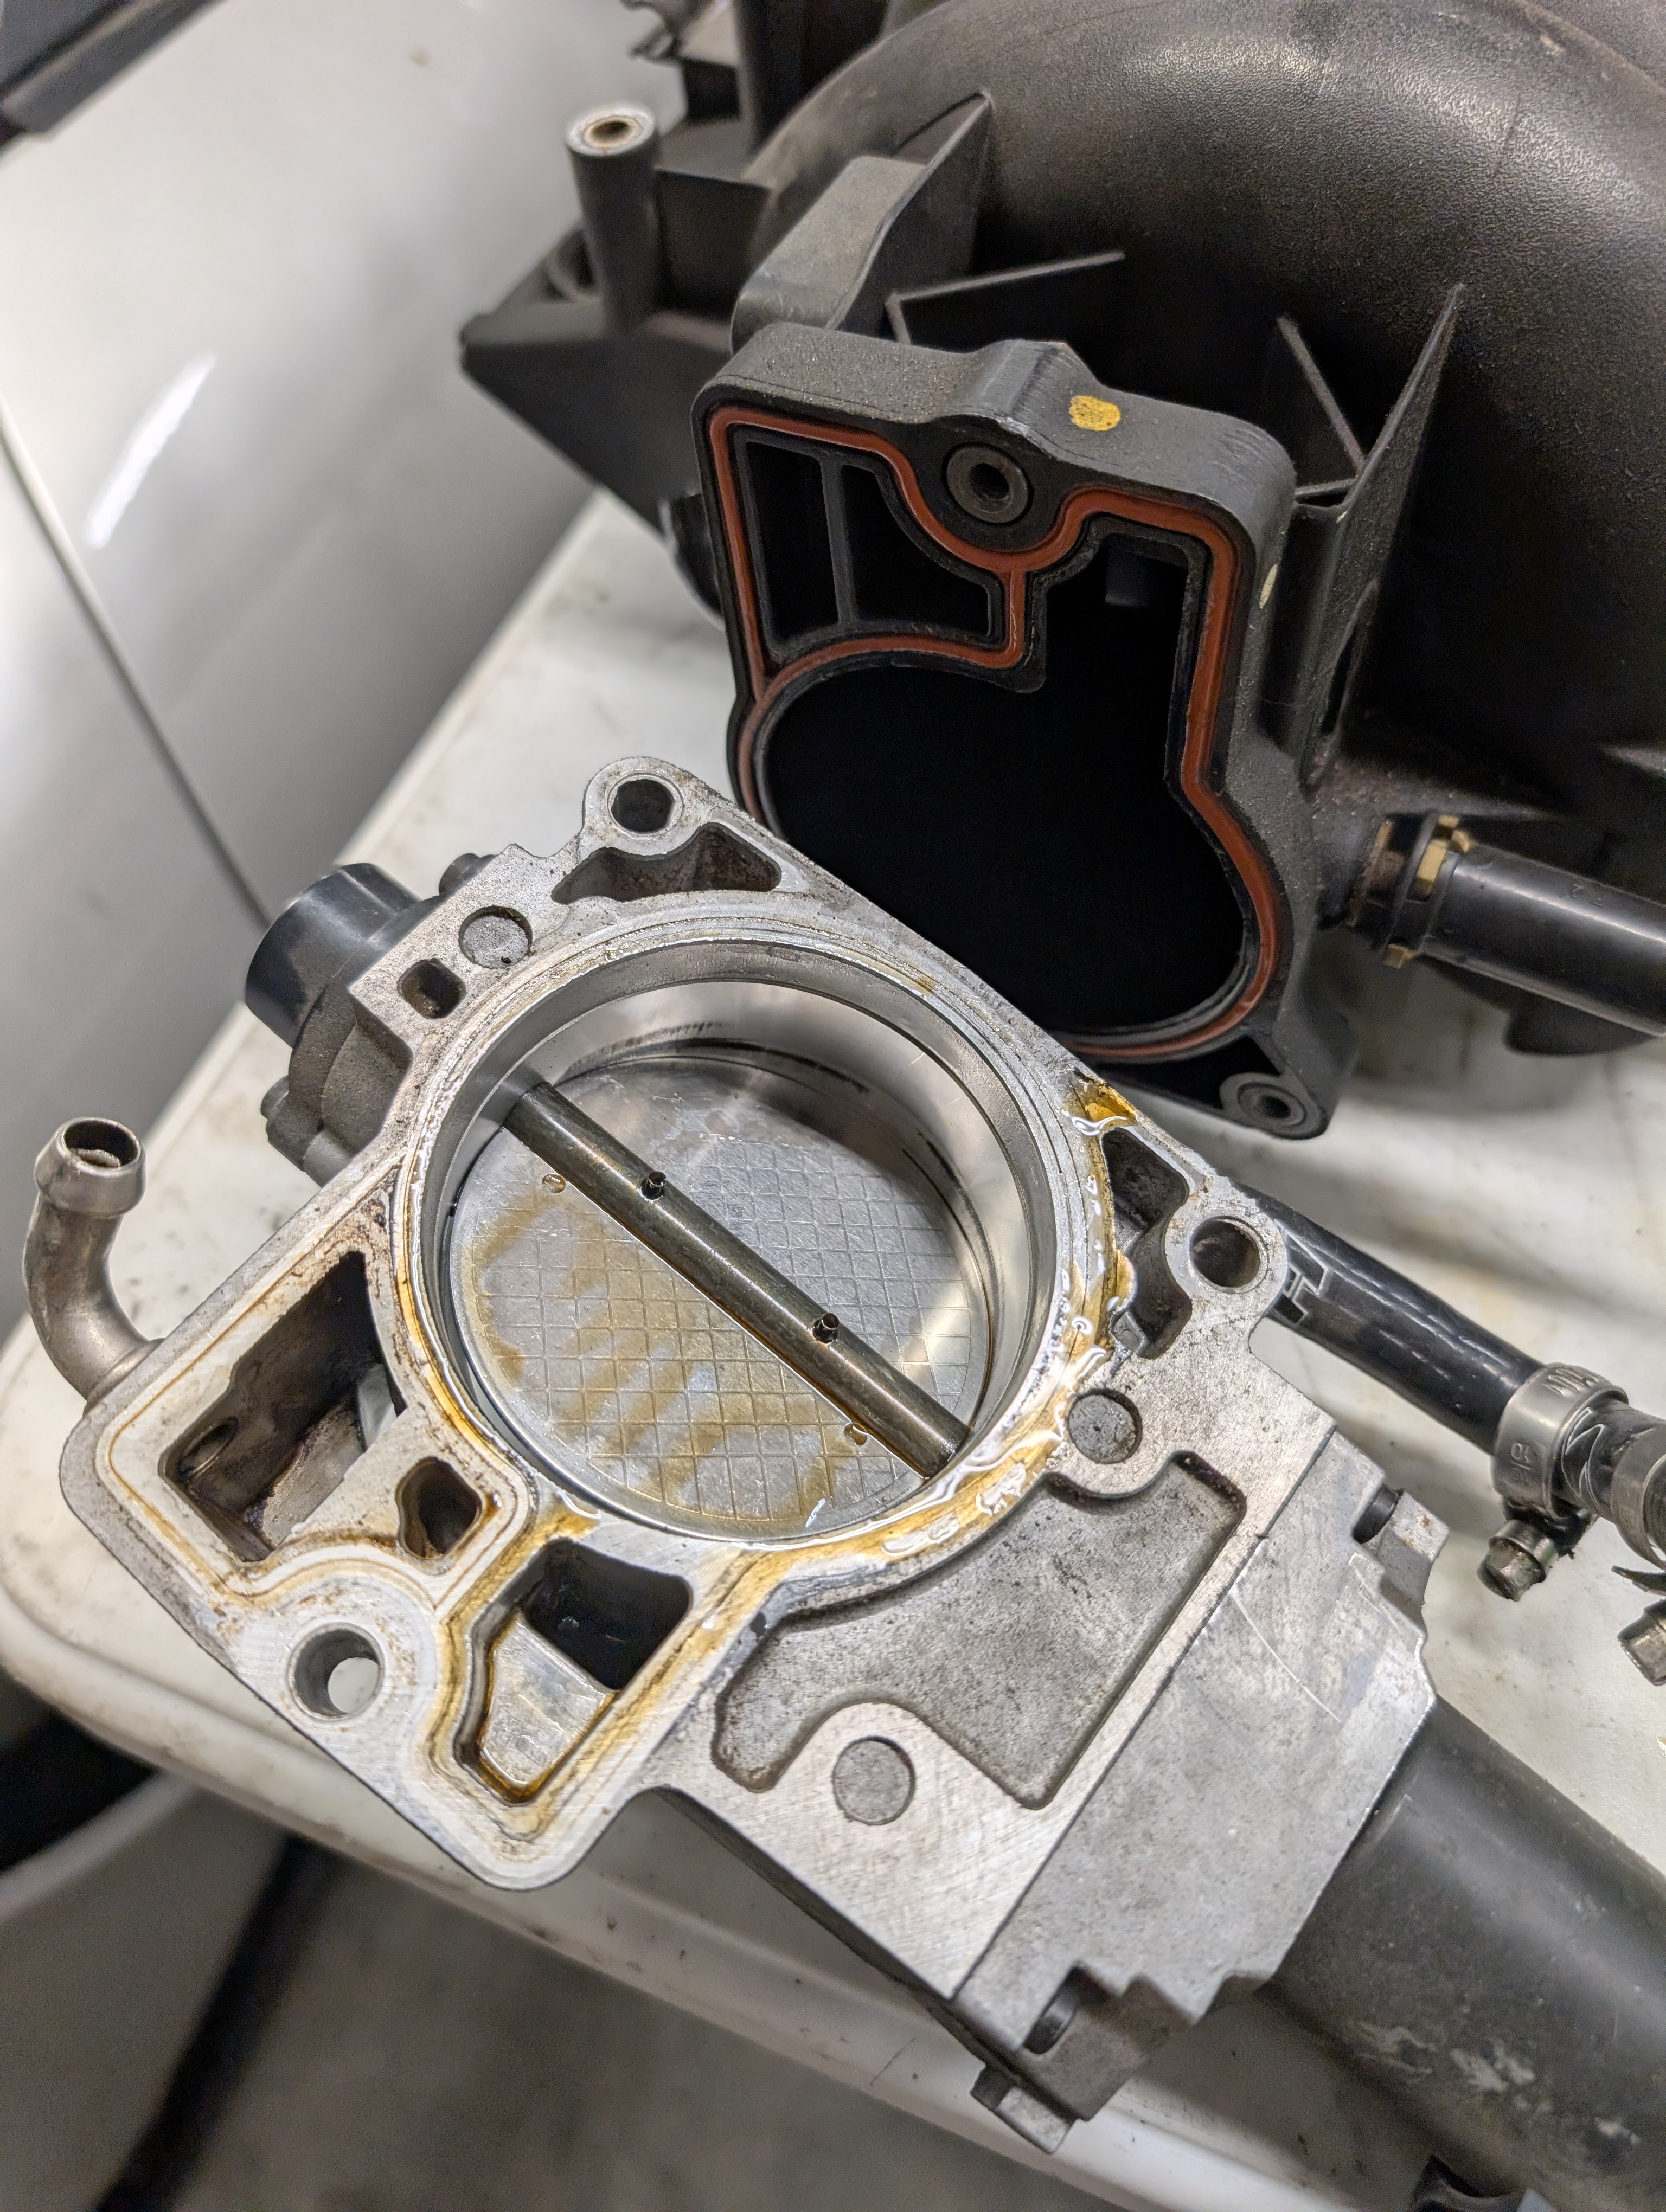
With the injectors electrical connectors all disconnected, you simply remove the fuel rail and injectors together all at once by gentle pulling up on the fuel rail. The fuel injectors should reasonably all pop off, and all that should remain is undoing the three bolts holding the throttle body on. Then you can remove the gasket, be be aware of a sensor and two acuum connection on the back of the intake manifold as you pop it off and gain access to the rear of the intake manifold.
As pictured above, we highly recommend immediately cleaning the vicinity. Odds are good that it hasn't been cleaned in a long time, or in our case... probably ever. A quick vacuum will ensure you reduce your chances of dropping anything down an intake port and possibly suck it into the engine.
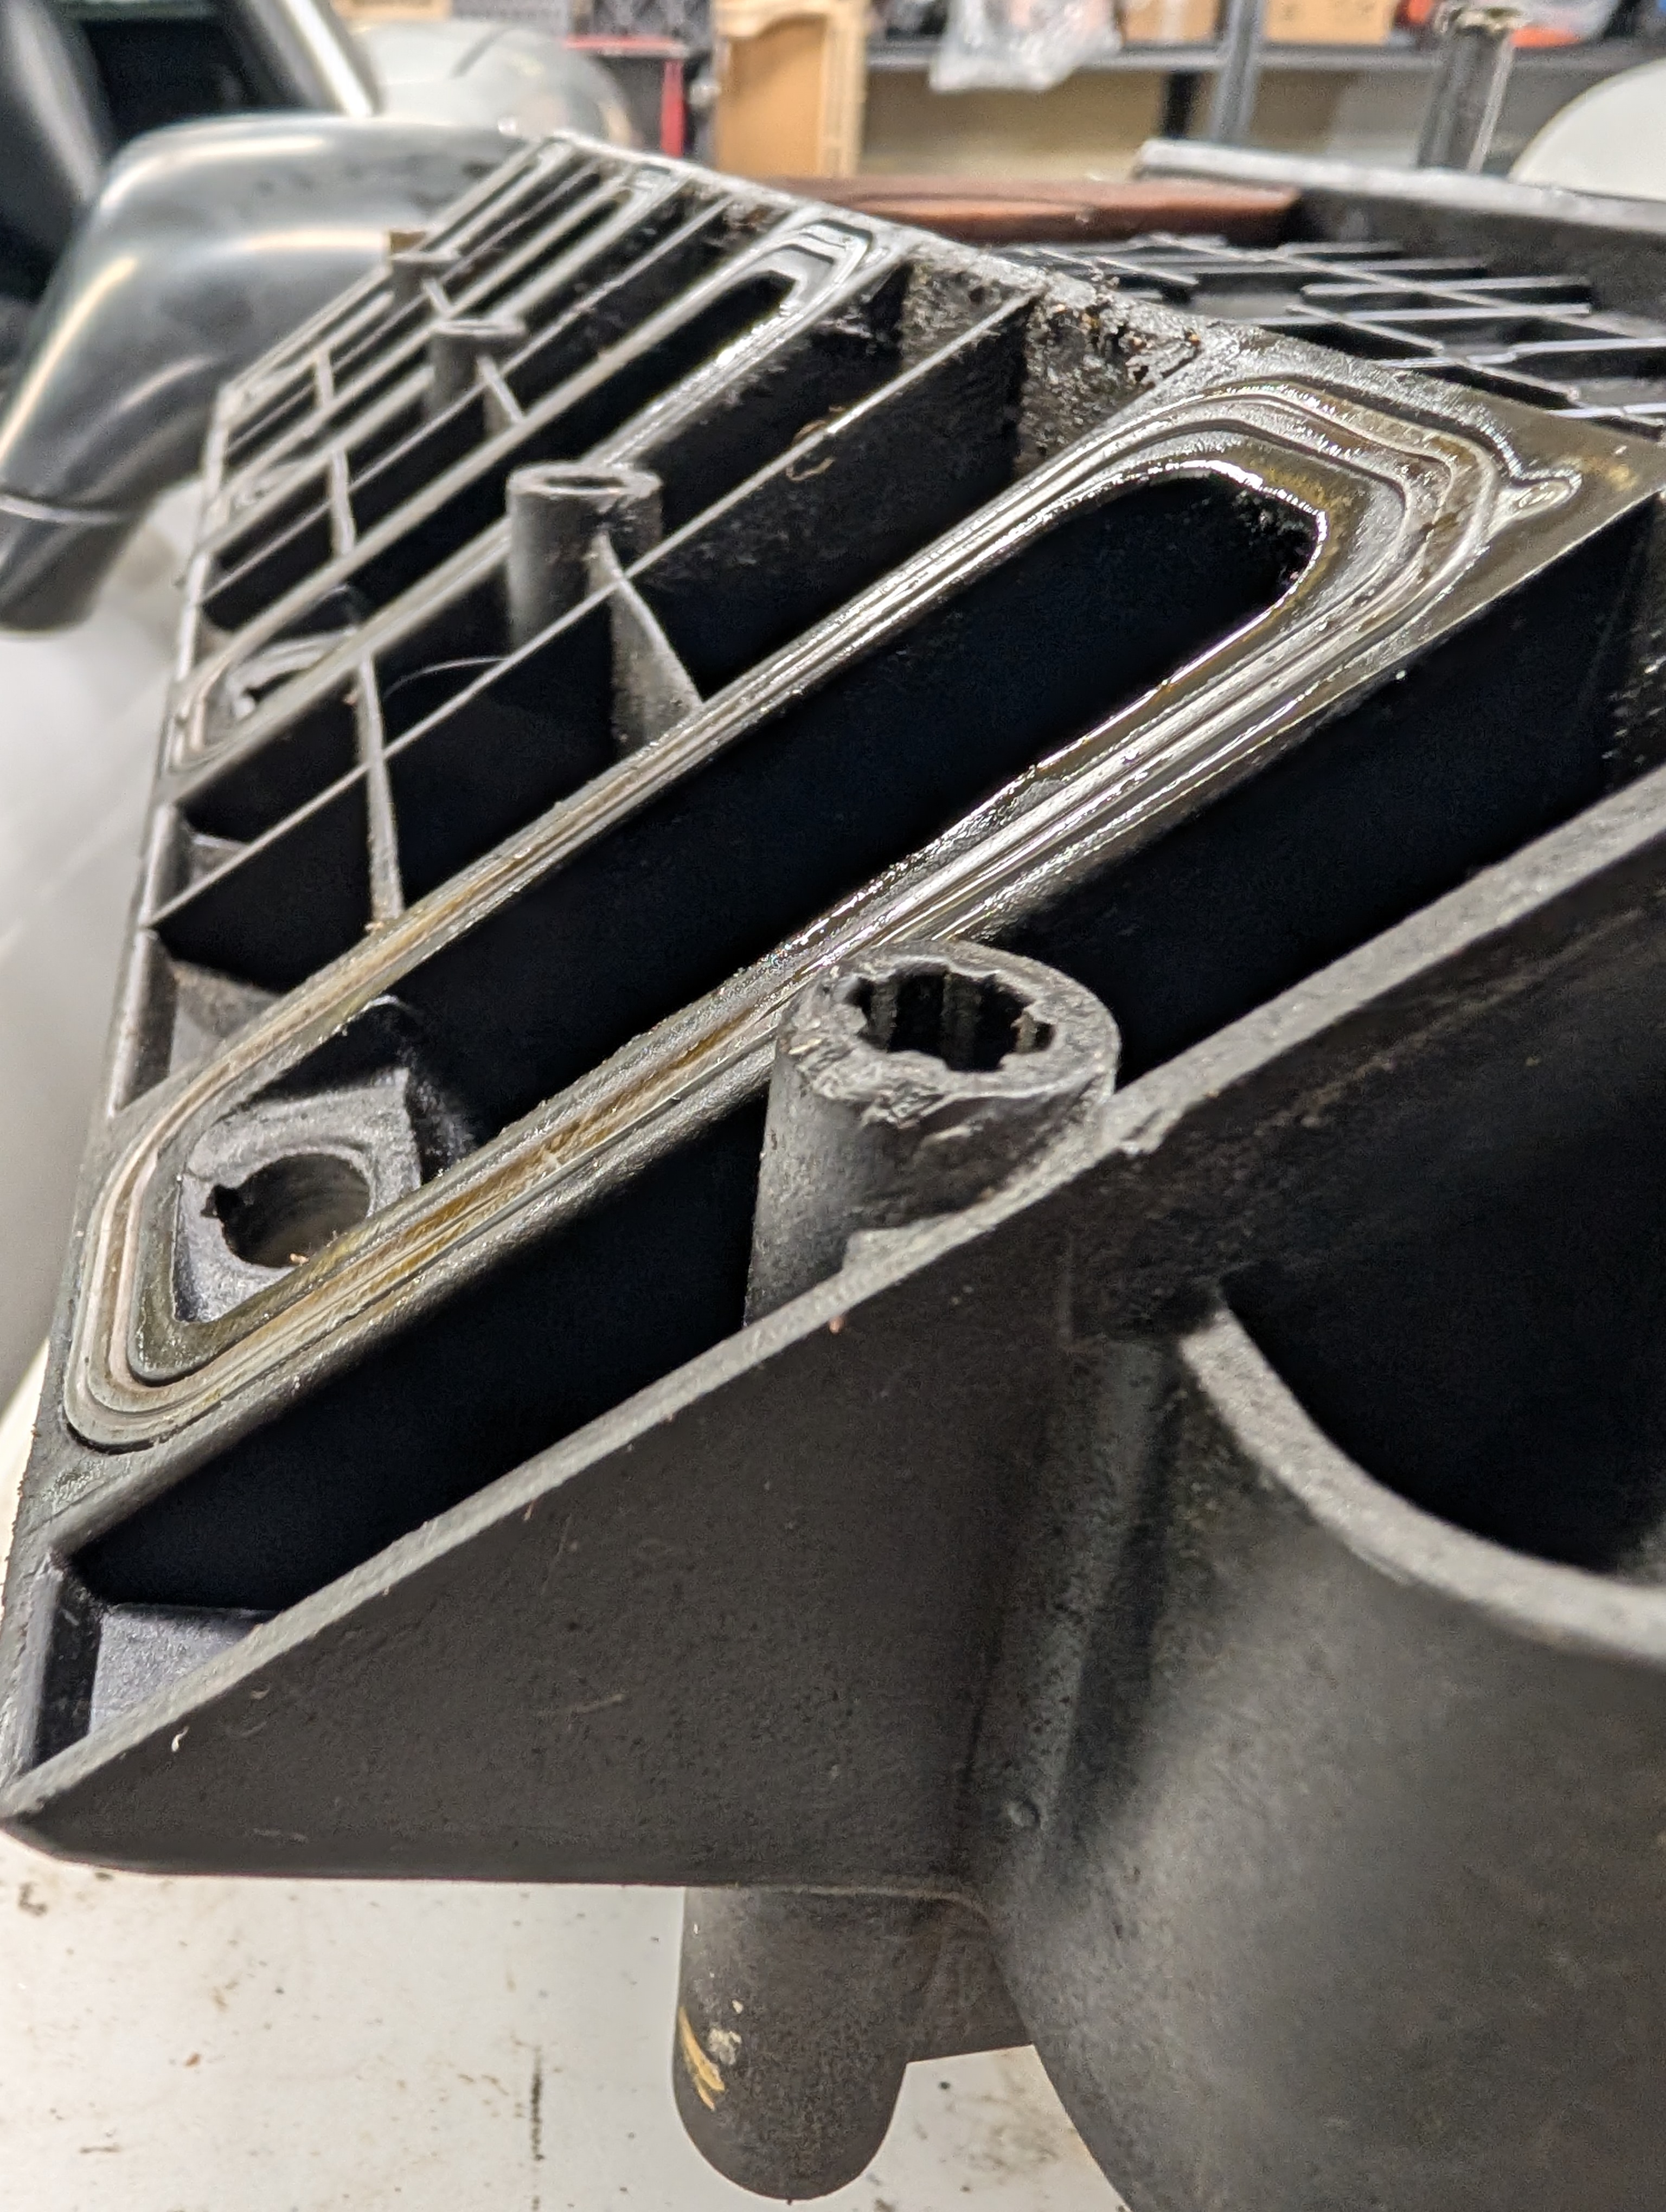
Above you can see the intake manfiold upside down with the gaskets in there. It's quite grody, and you can see the gaskets are squished flat. While it's common for folks to say you can use intake manifold gaskets twice... we don't agree. We're of the opinion you can install an intake manifold with gaskets, and if you need to remove the intake one more time to redo something it's okay... but generally after an event it's best to just replace them if you need to go in there again. Ours had clearly seen years of neglect and were well beyond needing replacement.
Why would a person wind up going back to remove the intake manifold again you might ask? Well, besides the obvious "You didn't do something right in there" you also need to remove the intake manifold to replace the oil pressure sender, which is known to go bad on the C5 corvette.
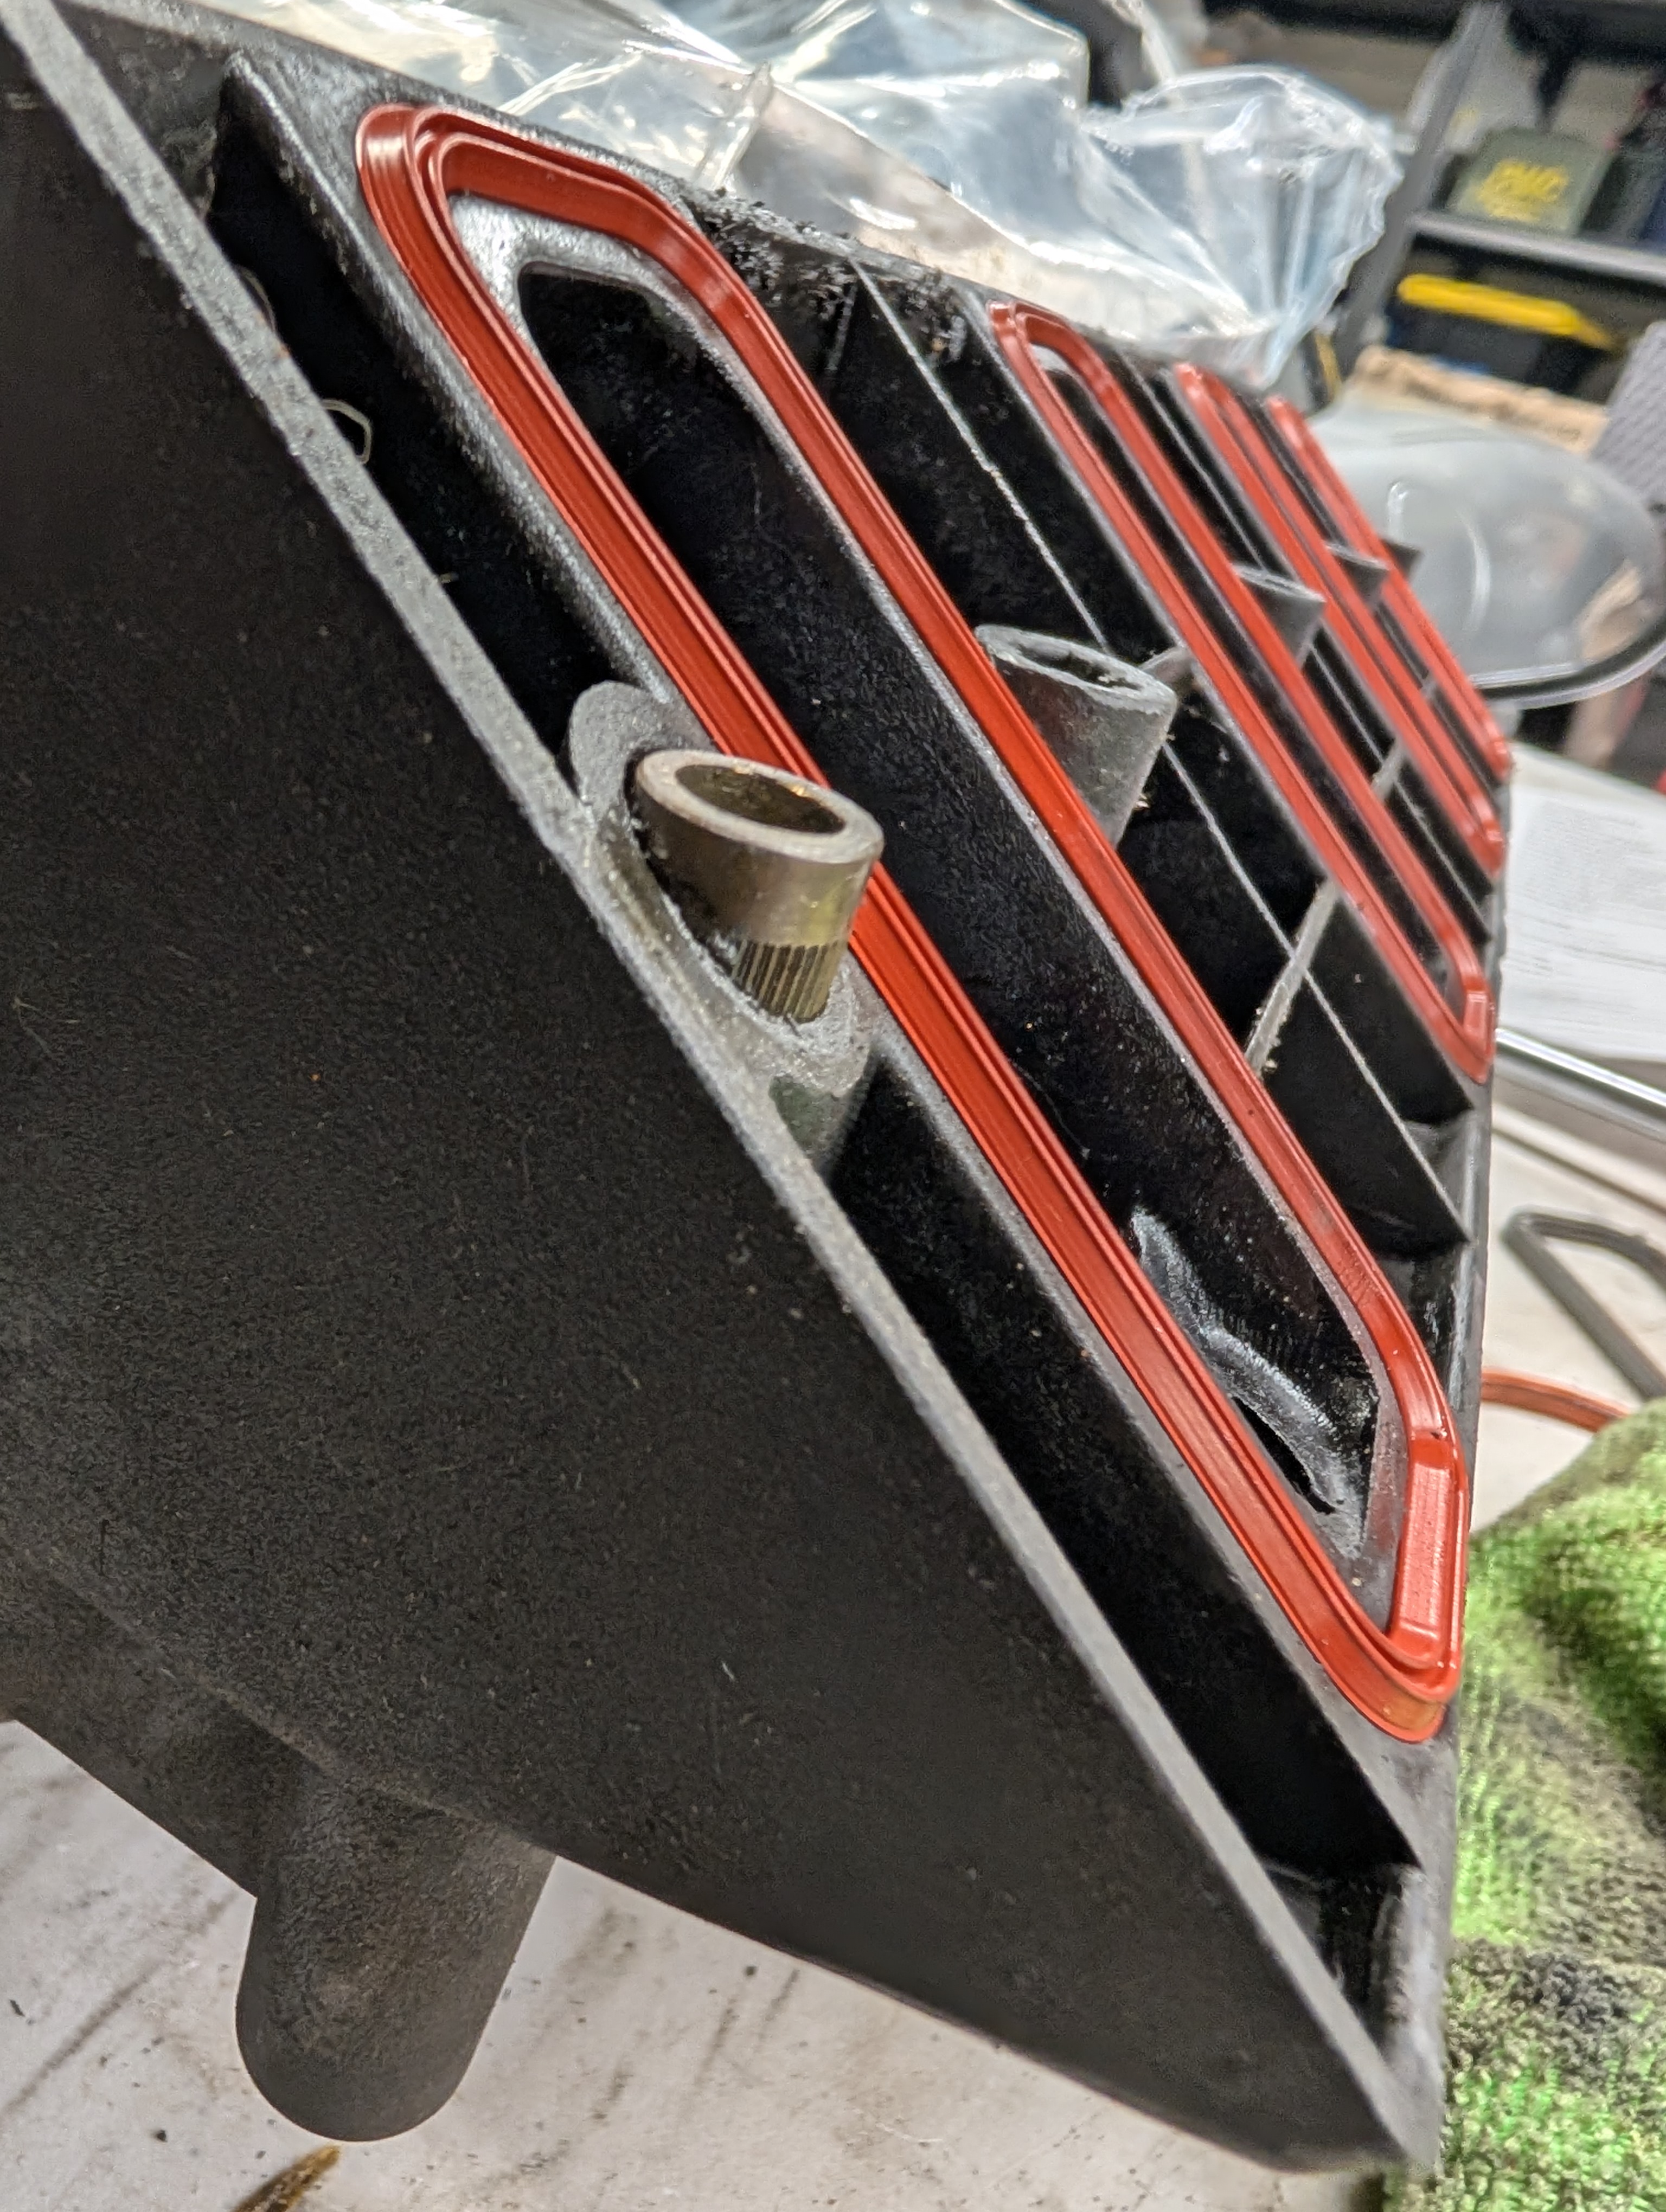
Now while the previous intake manifold gaskets were flush with the surface, these new ones sit proud (aka above) the mating surface, helping ensure once torqued into place they will form an exceptional seal.
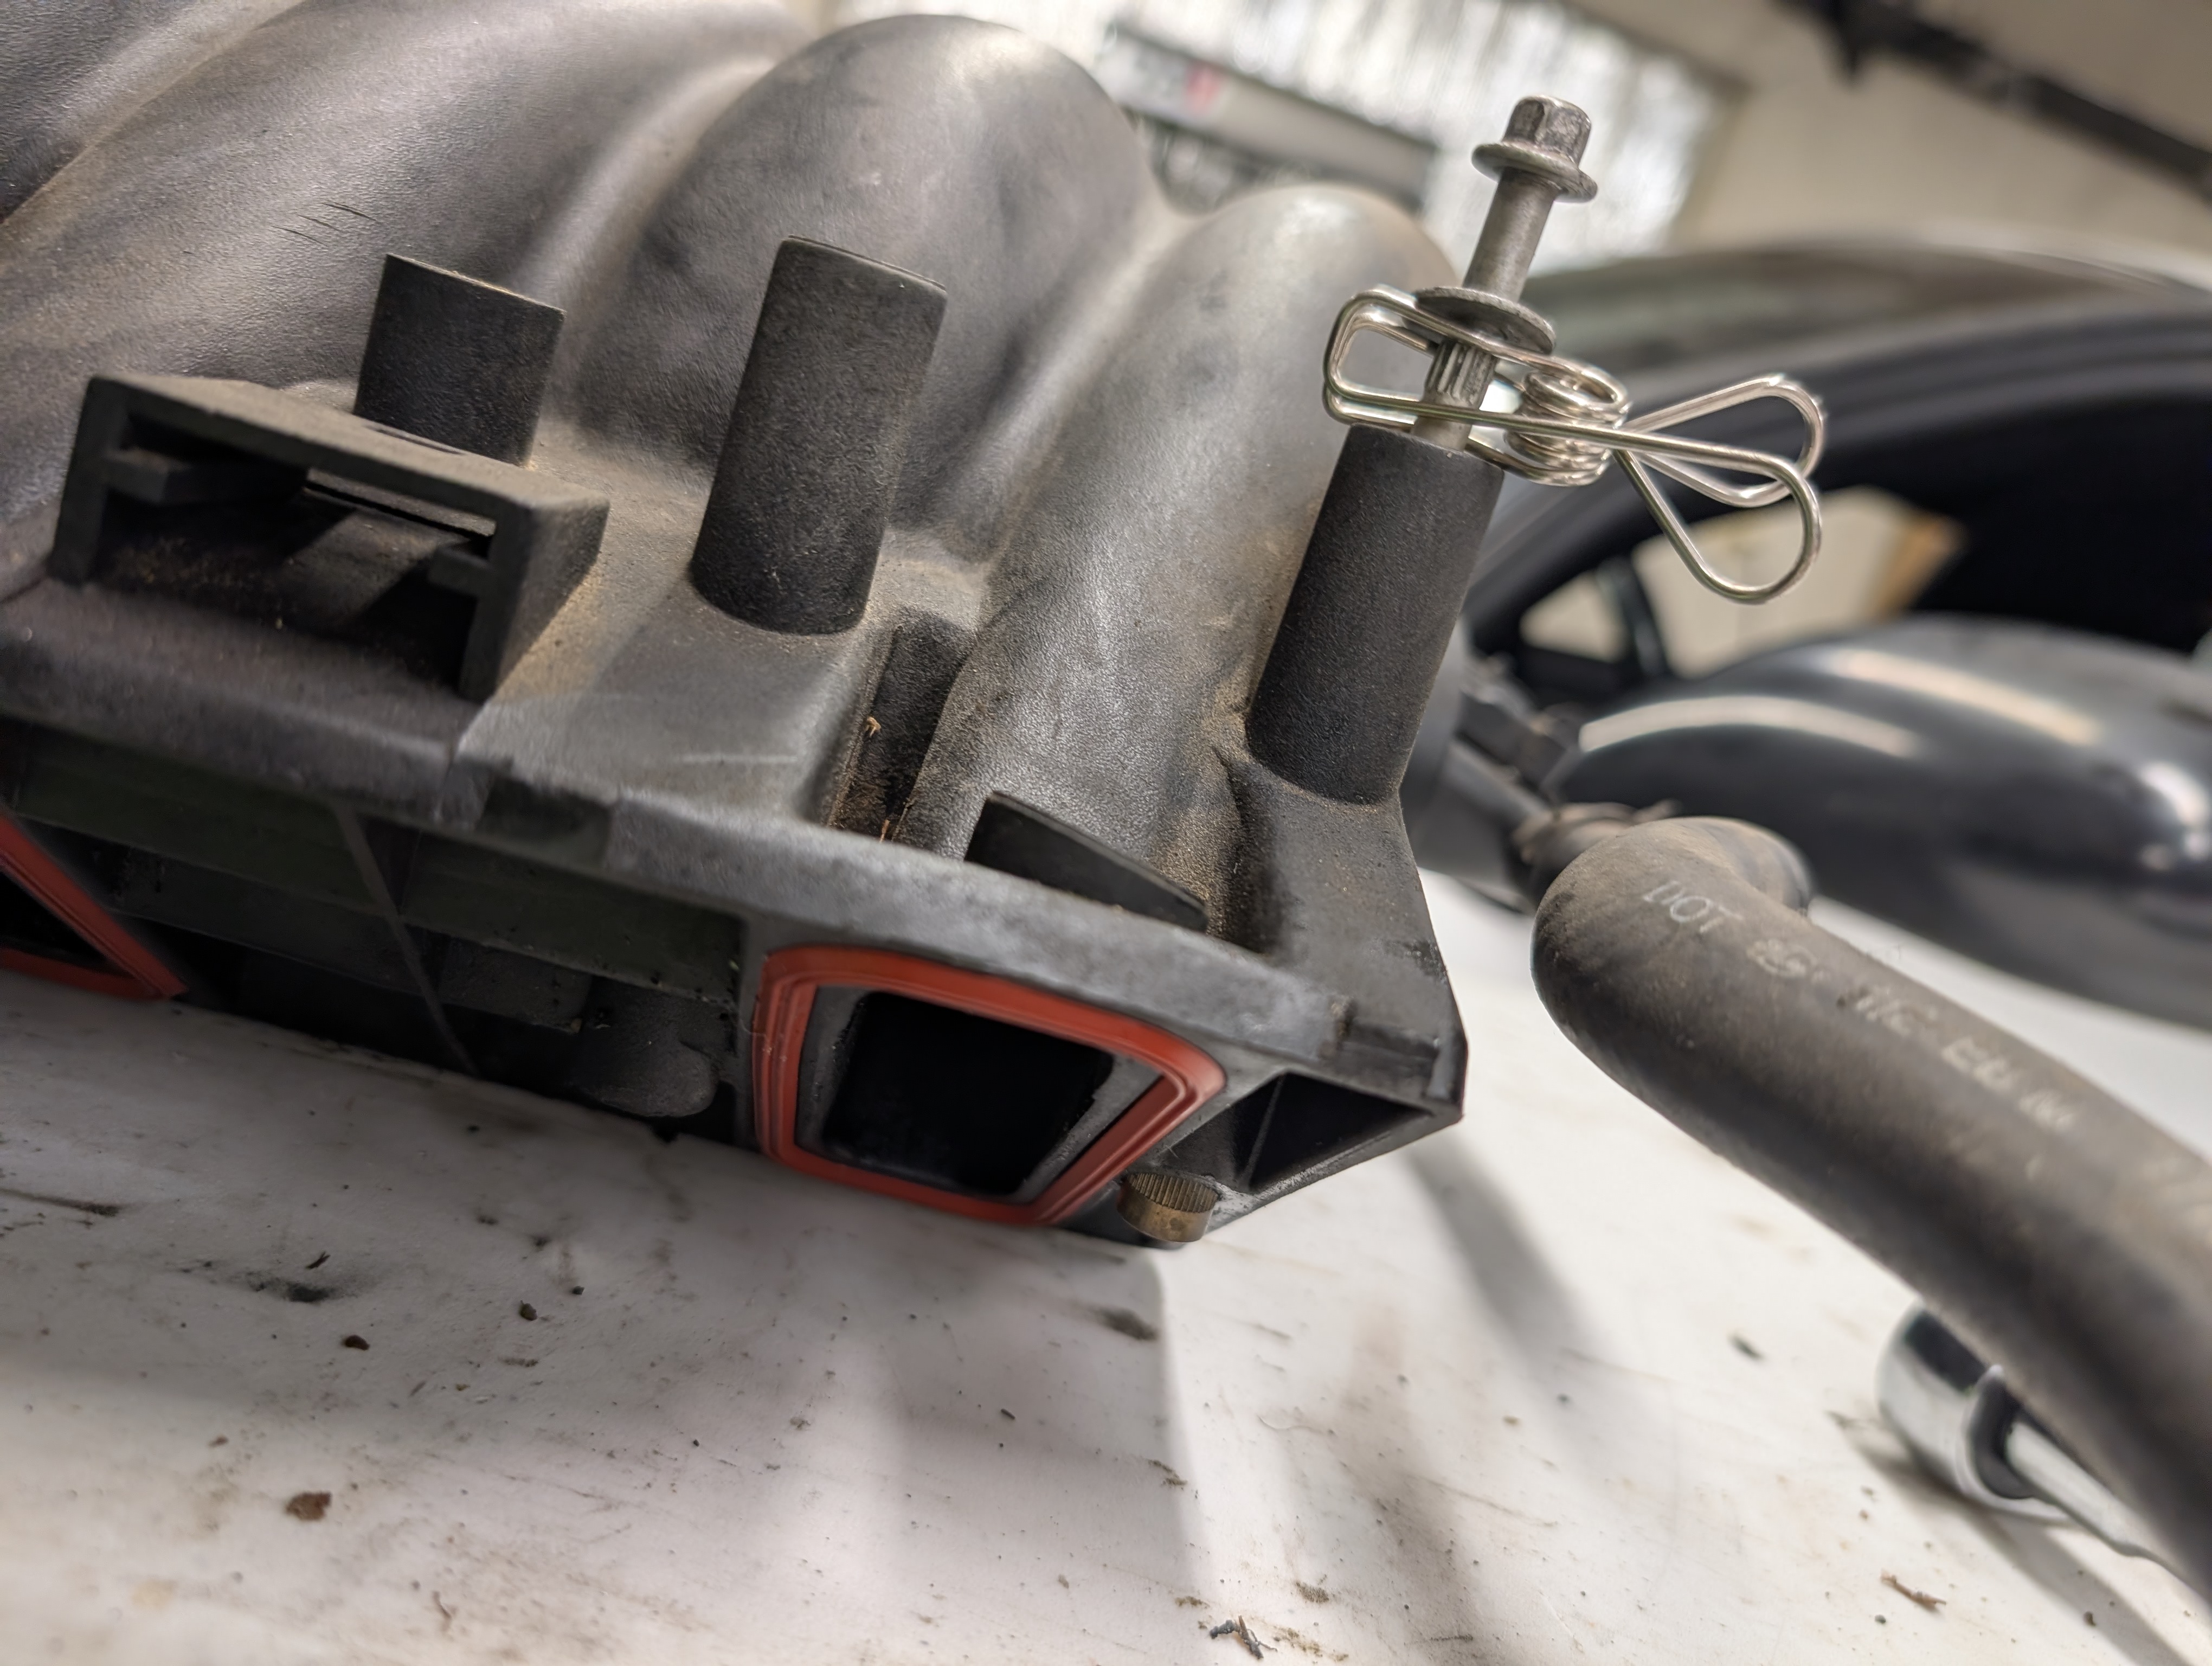
So one complexity of putting the intake manifold back on is that the rearmost bolts must be in the manifold when placed back on the motor... but they hang down and interefer with install. So how do you hold the rear bolts up and slide the intake manifold in as just one person? Turns out the answer is CLOTHES PINS! Simply clip one on your bolts in just the right position and it becomes a very easy one person / two hands kind of job. Bonus points, you can use the clips for all sorts of other things after the fact!
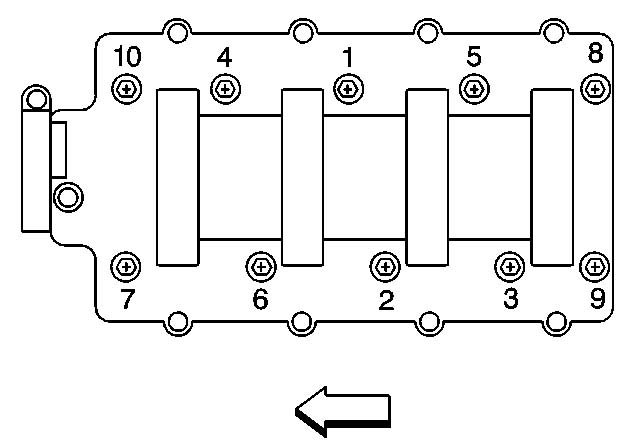
Be sure to follow the above pictured pattern when tightening your intake manifold down, and be extra certain to follow the correct torque sequence. We went barely snug for round 1 (5nm) and then a bit more snug for round 2 (10nm). Yep, that's Newton Meters, as in barely anything. Be sure to consult our document on torque values while doing this work by the way!
It's worth both cleaning the throttle body and replacing the gasket while it's off. It's cheap and easy, and will often result in a cleaner idle as the airflow with the throttle body closed will be much smoother when it's not traveling over build up.
If you haven't already and your climate and car use allows for it... this is a great opportunity to delete the throttle body coolant crossover. This crossover was added by GM engineers to help prevent the throttle body from binding when started in below freezing temperatures. If you're like 98% of Corvette owners and don't fire up your Corvette below 30 degrees farenheight, you can just disconnect the throttle body from the cooling system and route a long piece of hose in it's place. This will vastly simplify future access and keep intake air temperatures down... two critical wins for the vast majority of owners! Also if you've ever heard somebody say "You think you know better than the engineers at GM" well please, this is a perfect example, and you can read about more similar examples in our article debunking that belief!
Parts used to Complete the Intake Manifold Removal and Gasket Renewal:
We've now tackled all of the obvious stuff we could find and a few extra basics.
- We removed the belt to see if that eliminated the noise (it didn't)
- We sorted out the air injection half deletion performed by the previous owner (which didn't change anything)
- We redid the intake manifold as somebody had clearly been in there and not only left a bolt undone, but also didn't redo the gaskets.
- We Replaced the Engine Mounts?
Surely, there's some improvement to be had now right? Well... while the car still idled great and had amazing oil pressure and started without issue... the engine noise persisted... which only means one thing remains... keep digging!
How to Reasonably Determine if your C5 Engine is Hurt Or Not
So you've gone over the basics and addressed everything you could see, eliminated belt noise, and determined that your issue isn't piston slap. Now it's time to really dive into diagnosing the motor. We recommend checking the motor in the following order:
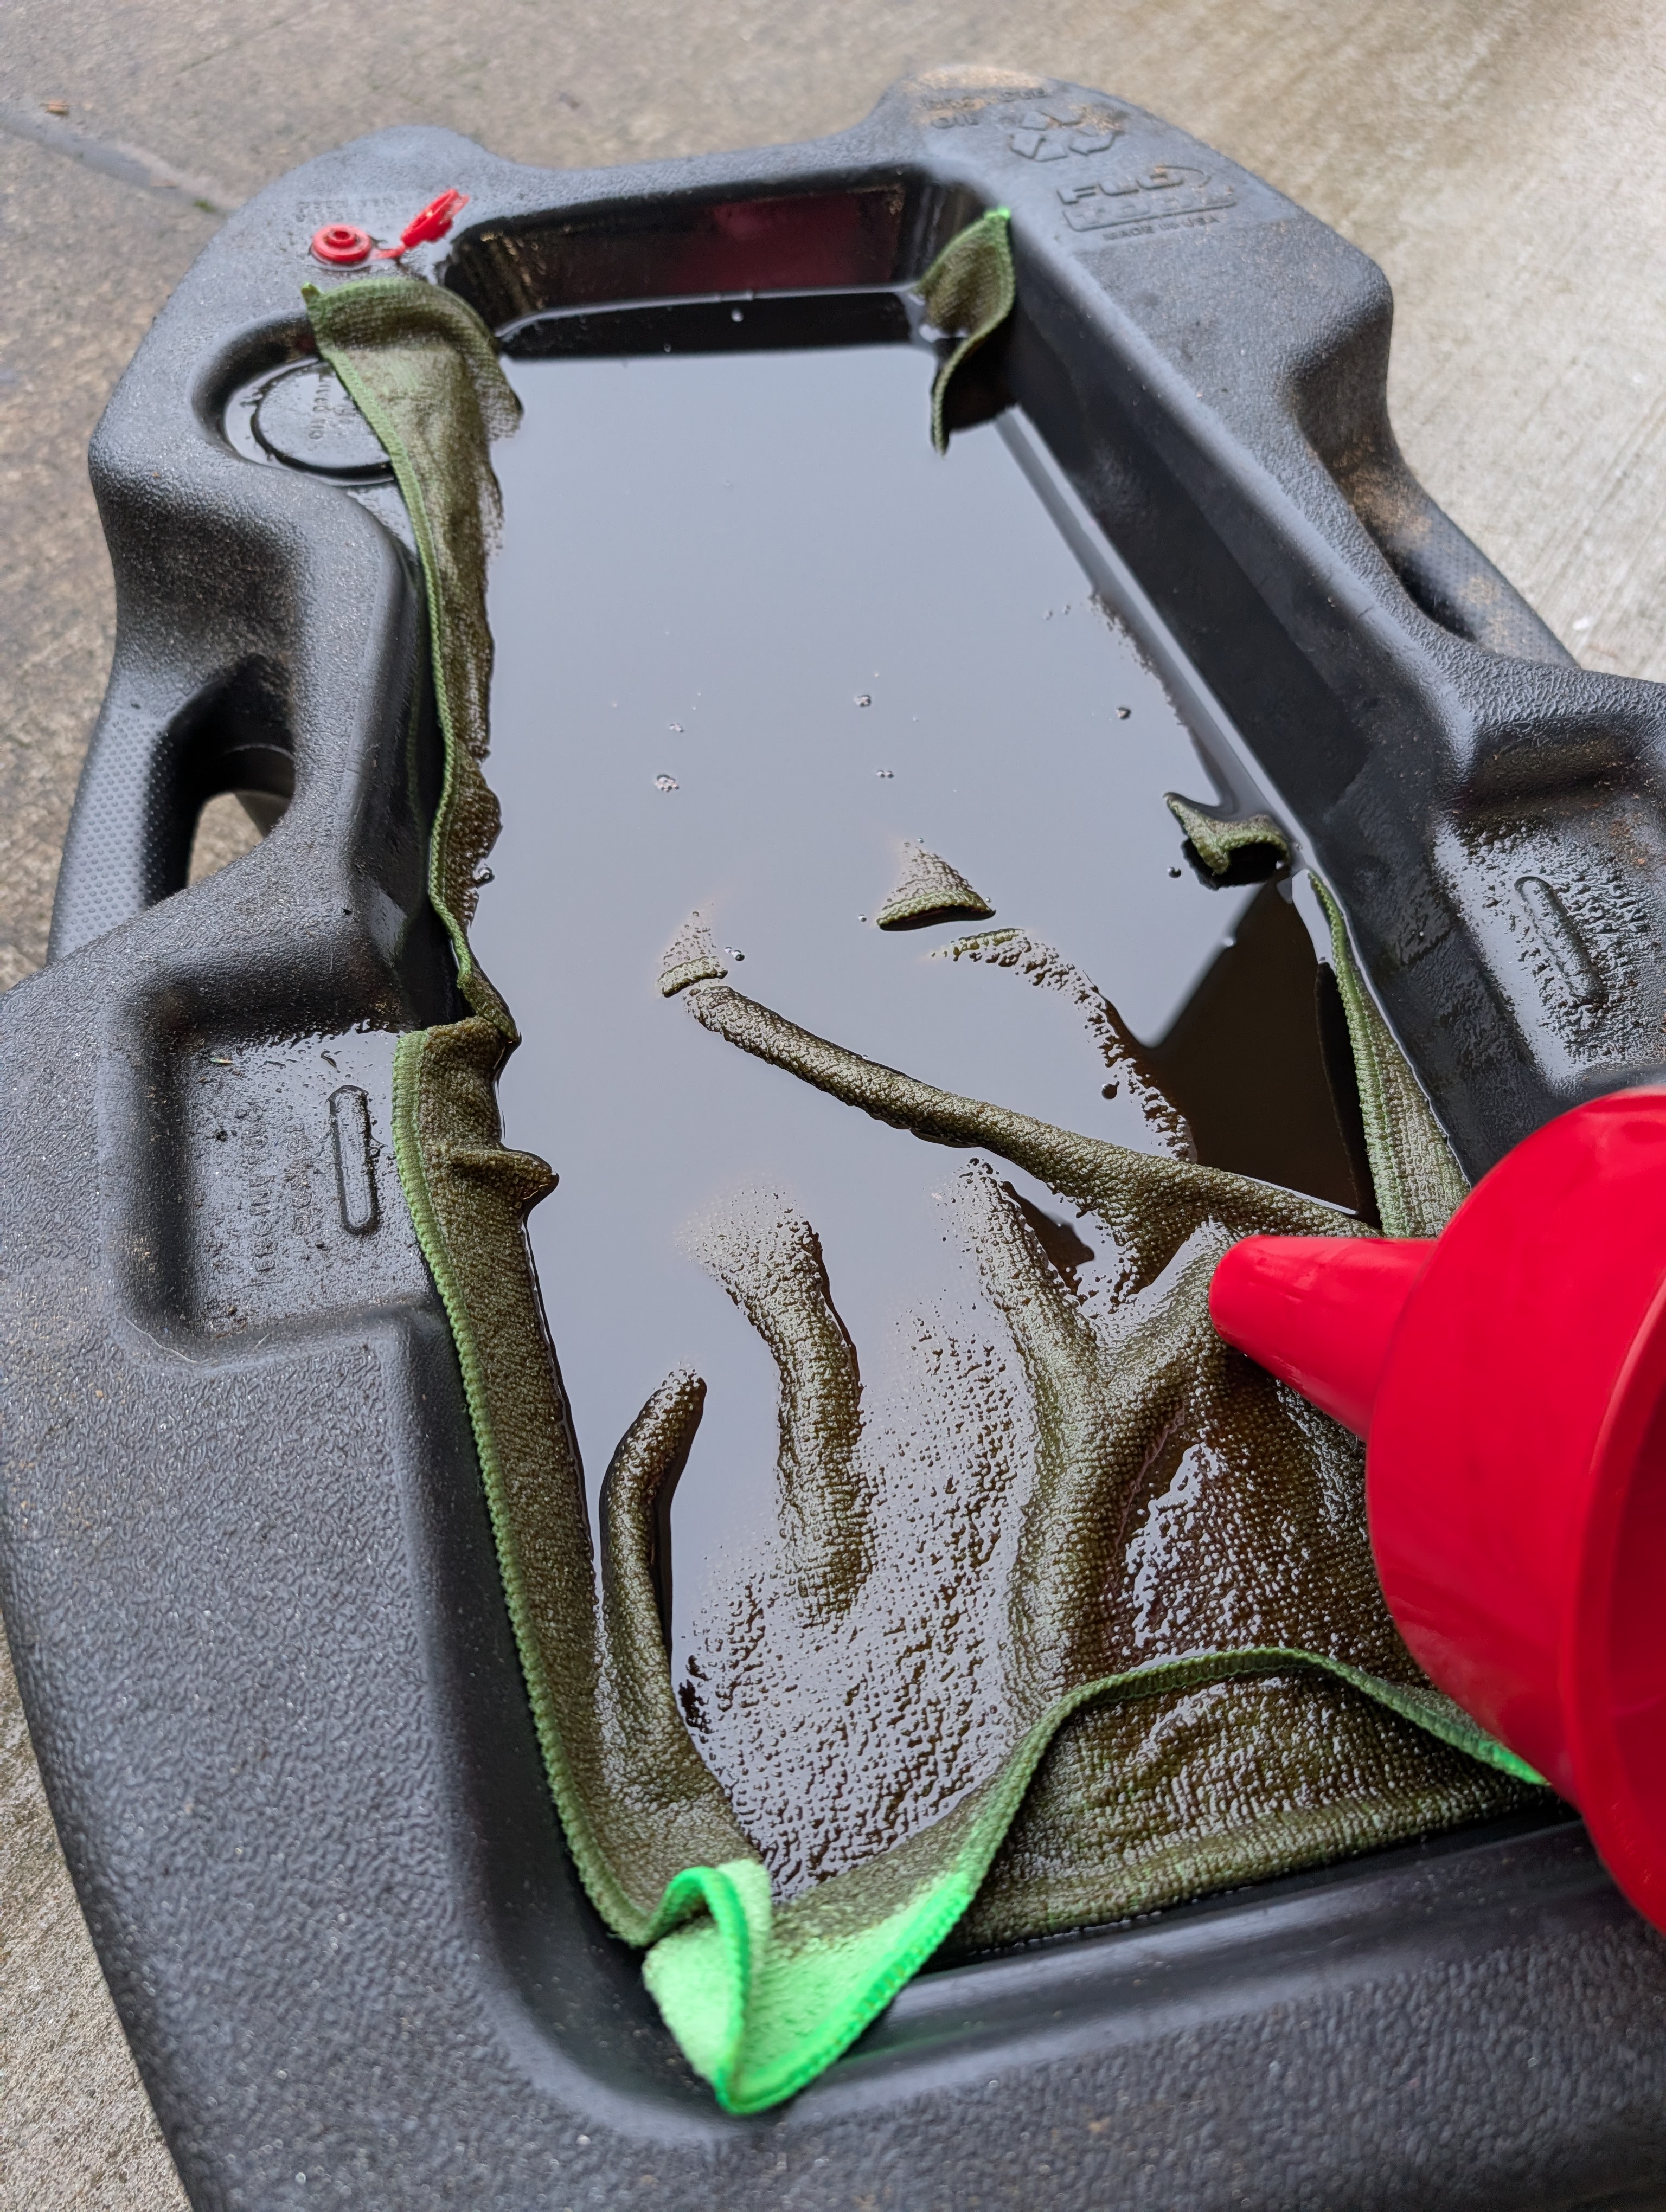
First: Drain check. If there's metal in there, it's bad news bears and you've got a situation that likely necessitates a full engine rebuild. What we did is a very slow going process, but put down two rags and dump our oil into the drain pan over the rags. The oil will slowly filter through the rags, and after a long time draining you should be left with any debris in the rags themselves. Our oil had no debris what-so-ever, so we were feeling pretty confident.
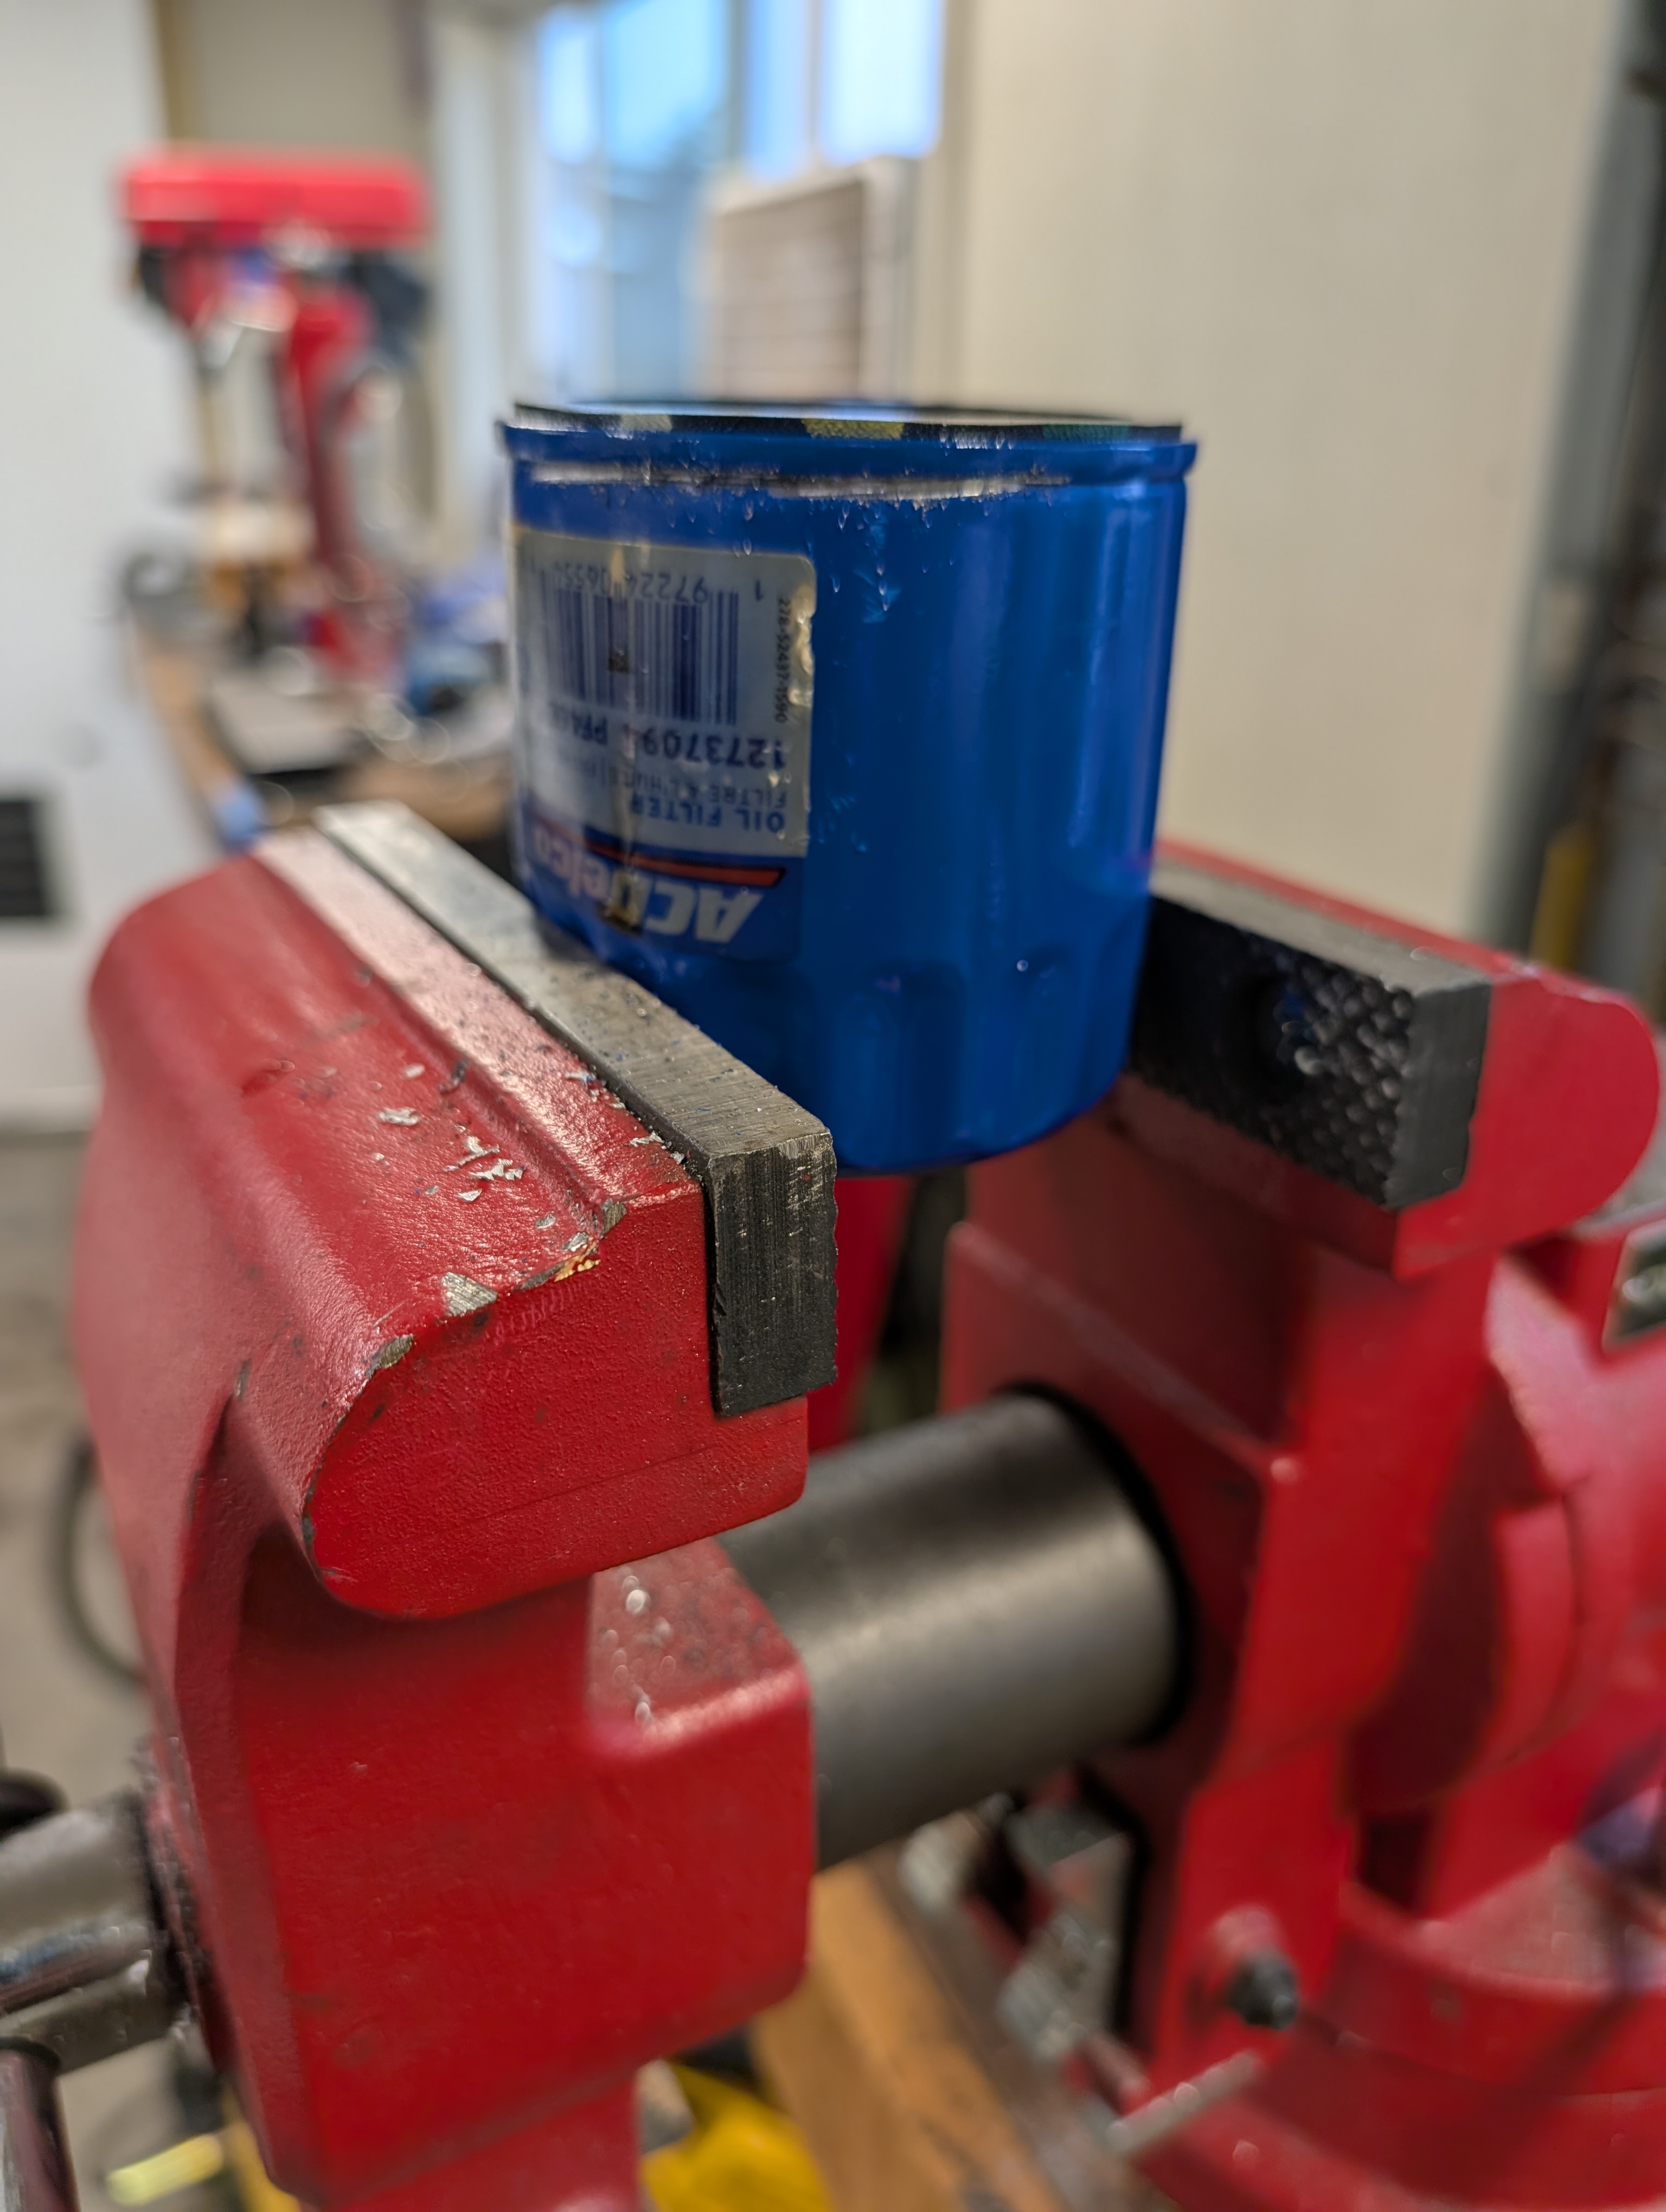
The next place to look is in the oil filter itself. Remove the oil filter from your car and cut the top off to allow access. We recommend a proper dedicated oil filter cutting tool, but a hacksaw can work if you're smart about it.
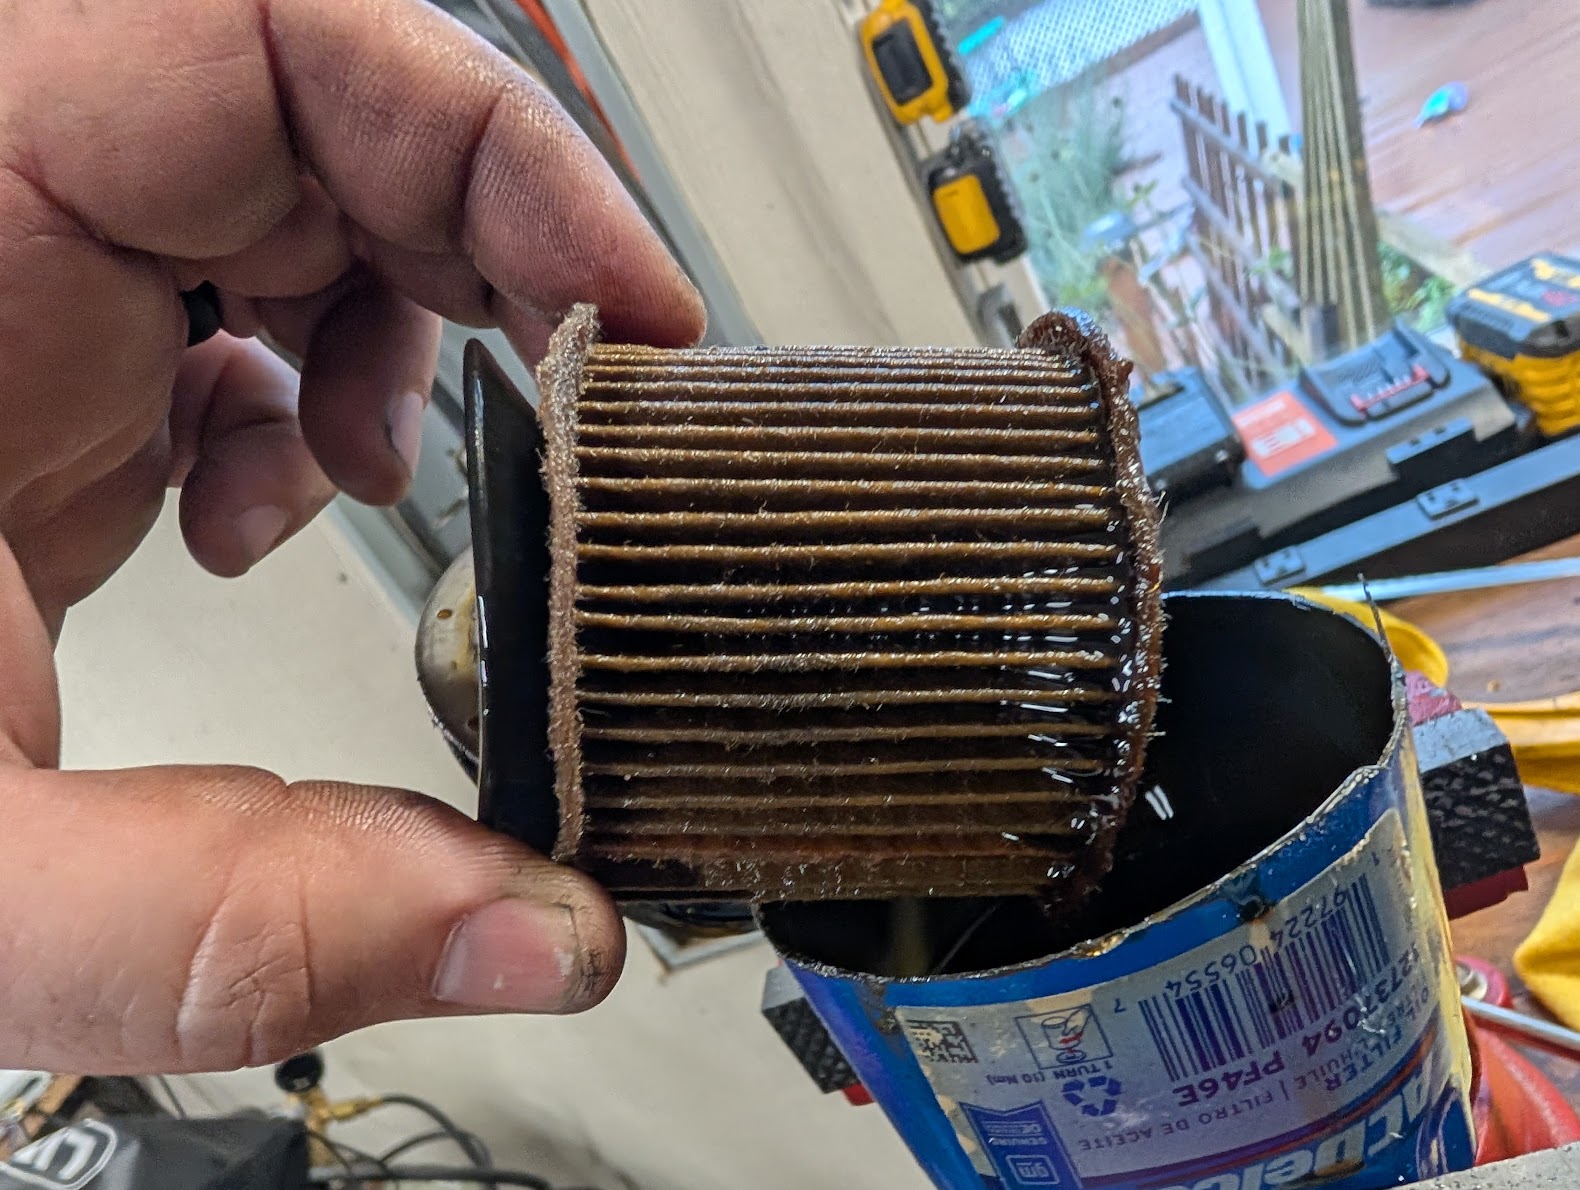
With the top removed from the oil filter, pull out the filter media inside. It's generally a pleated design and you'll look down in between the pleats on the outside to see if there's any metal present. We were totally oil free, so no worries there!
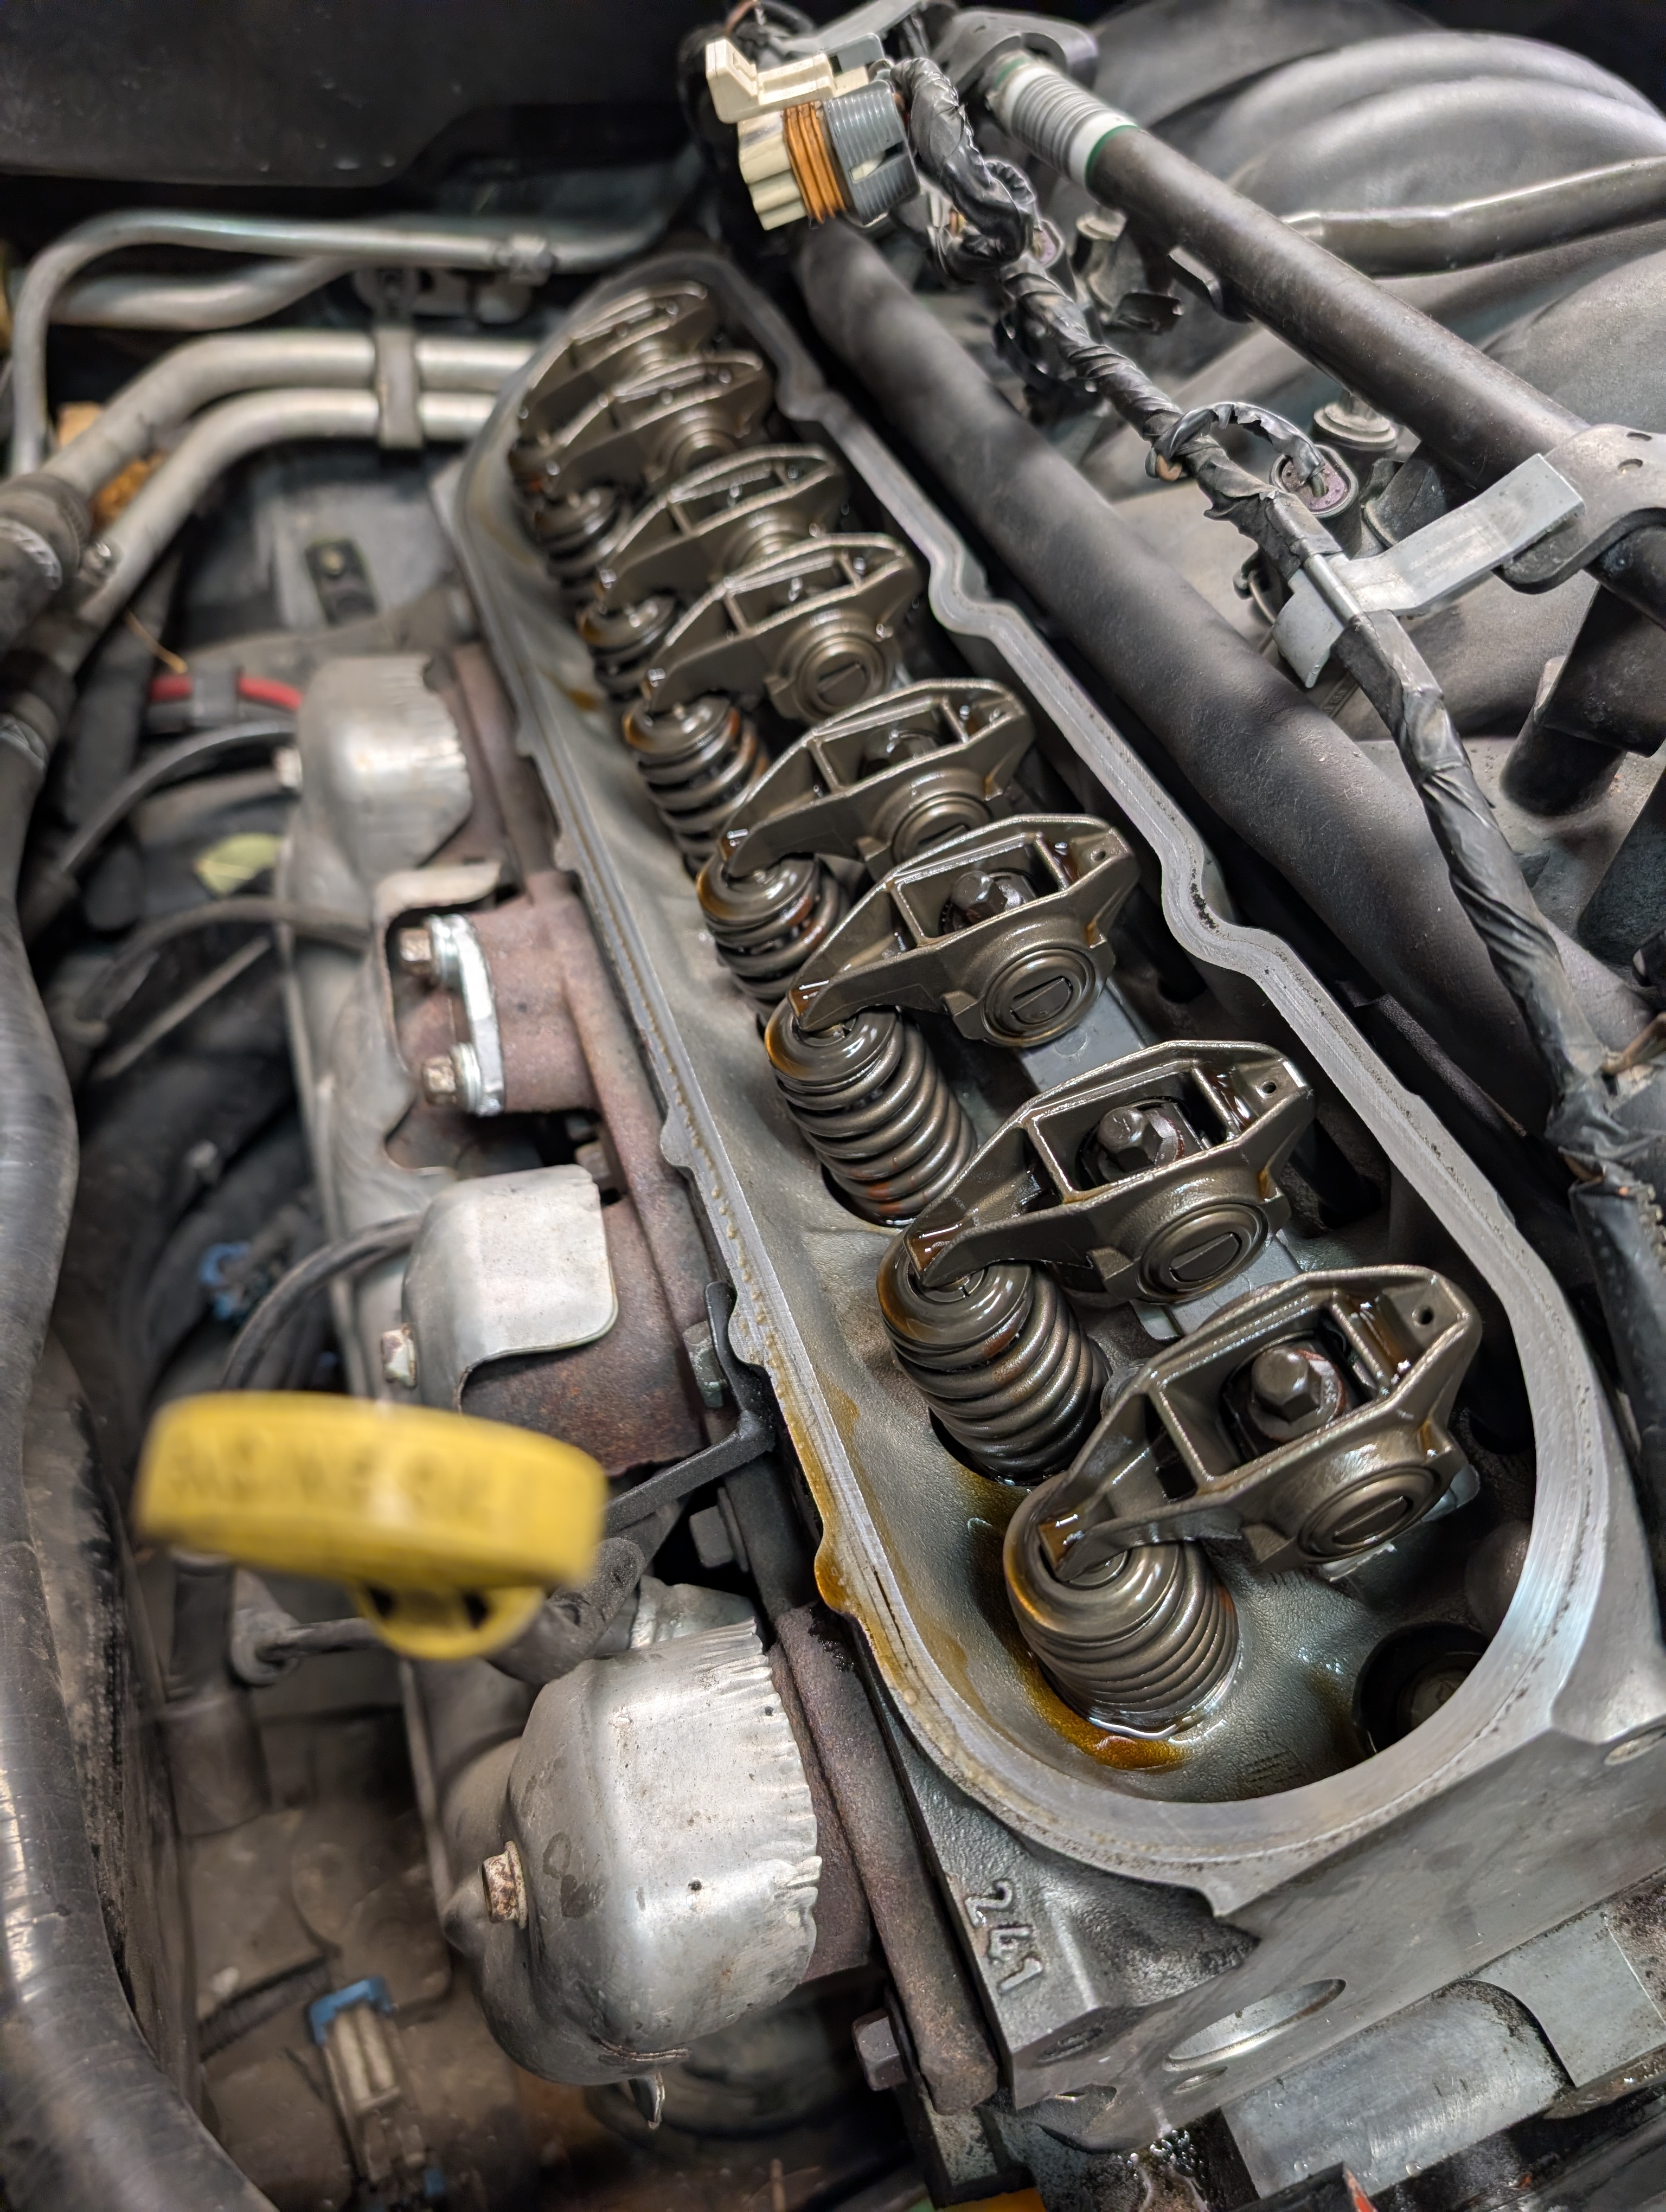
Second, we recommend pulling the valve covers. It's a pretty easy task to do, and you'll be able to take a simple look around to see if there's any major discoloration or anything else. If you can enlist a helper as well, disconnect the fuel injector electrical connections and then have your helper turn the motor over while you watch the valve train. With the fuel disconnected and the spark gone the motor won't try and start so it's pretty safe. Watch for everything to move sooth and free of issue, and you know you're good. We found no issues under our C5's valve covers, so we reinstalled them and got back to diagnosing.
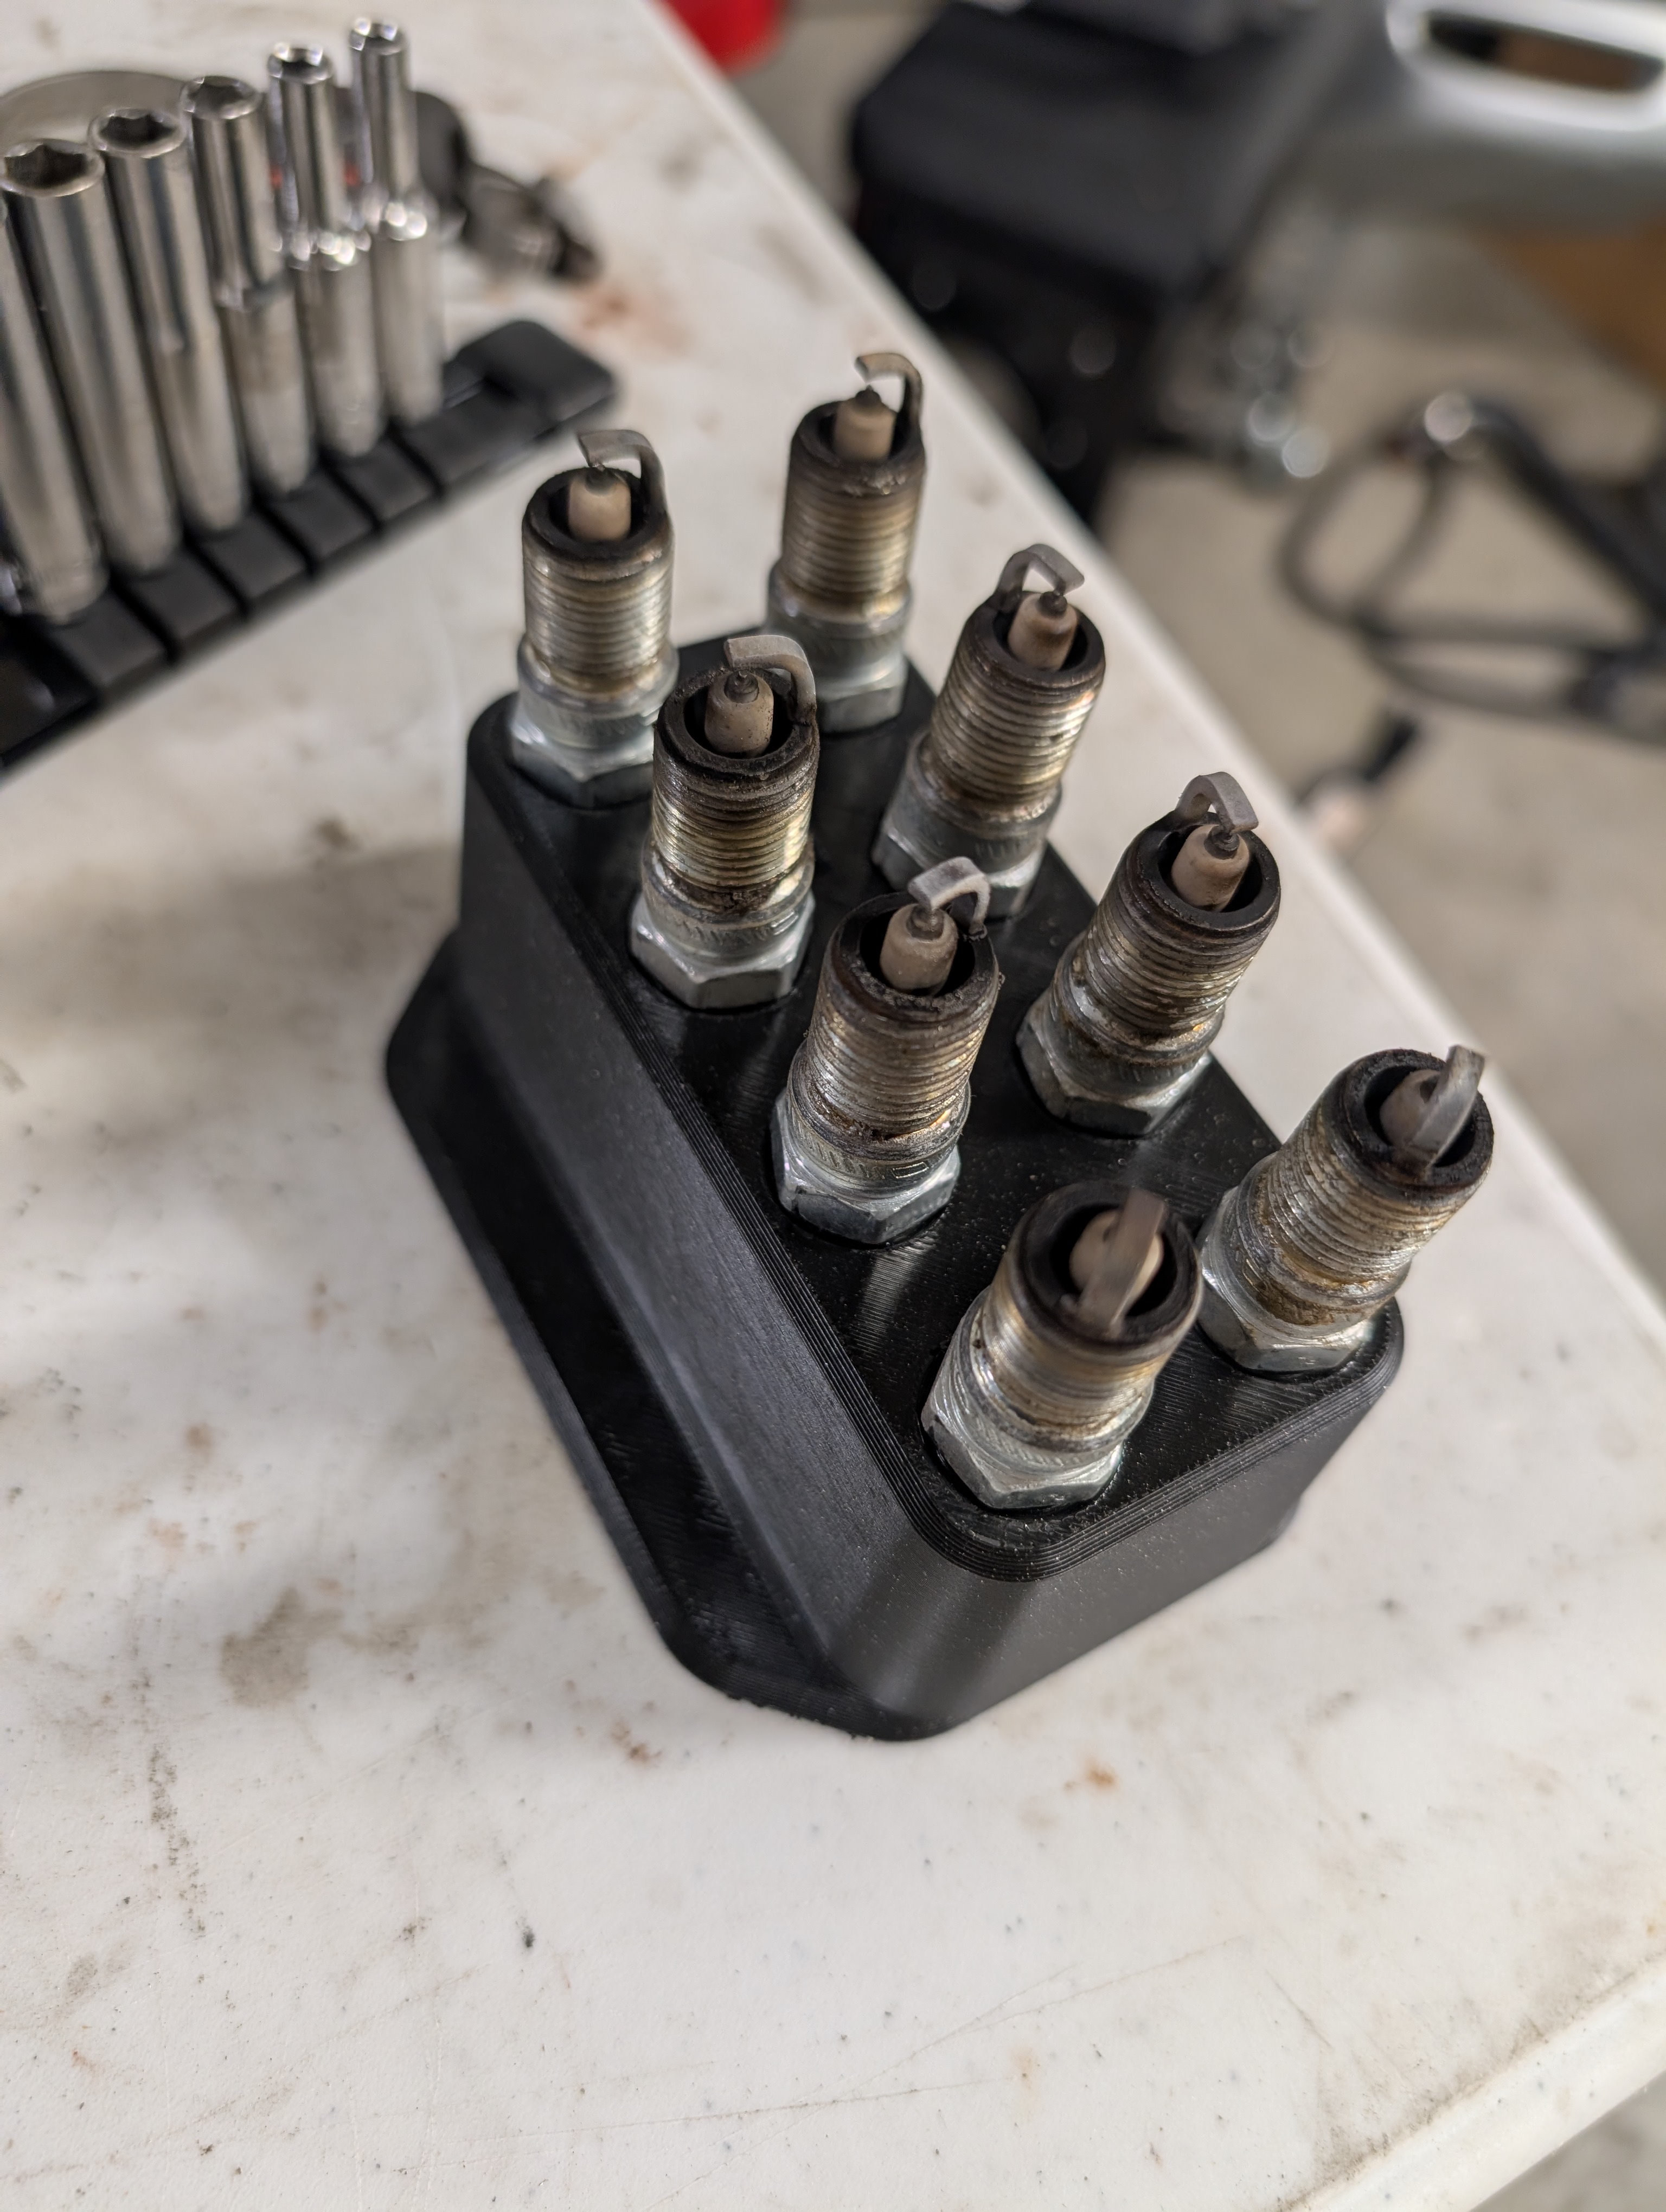
Third in the process of diagnosing a possible engine issue on the C5 Corvette, we recommend removing the spark plugs and checking for cylinder health. The simplest part of checking your engine health is looking at your spark plugs. Are any significantly darker than the other? Are they fairly similar in color? Anything odd in general? If you're in doubt, just post in any old Corvette community you can find (We highly recommend C5 Modified or Trackable Corvettes on Facebook) as there will be more than a dozen people who can answer any doubts you may have.
In our case, the spark plugs were all uniform and free of any damage or any oil looks. All signs were continuing to point towards a healthy engine... but we still hadn't found a smoking gun just yet on the engine, so inwards we go!

Continuing along in the process of checking cylinder health, with the spark plugs removed we recommend taking a bore scope and doing a quick look at your cylinder walls. You can inspect them by sliding the bore scope down the spark plug holes and trying to take a look around in general. You probably won't be able to see a ton, but in general you should find no obvious issues and good cross hatching like we had above. This motor still looks healthy... but there's one more thing to test for cylinder health!

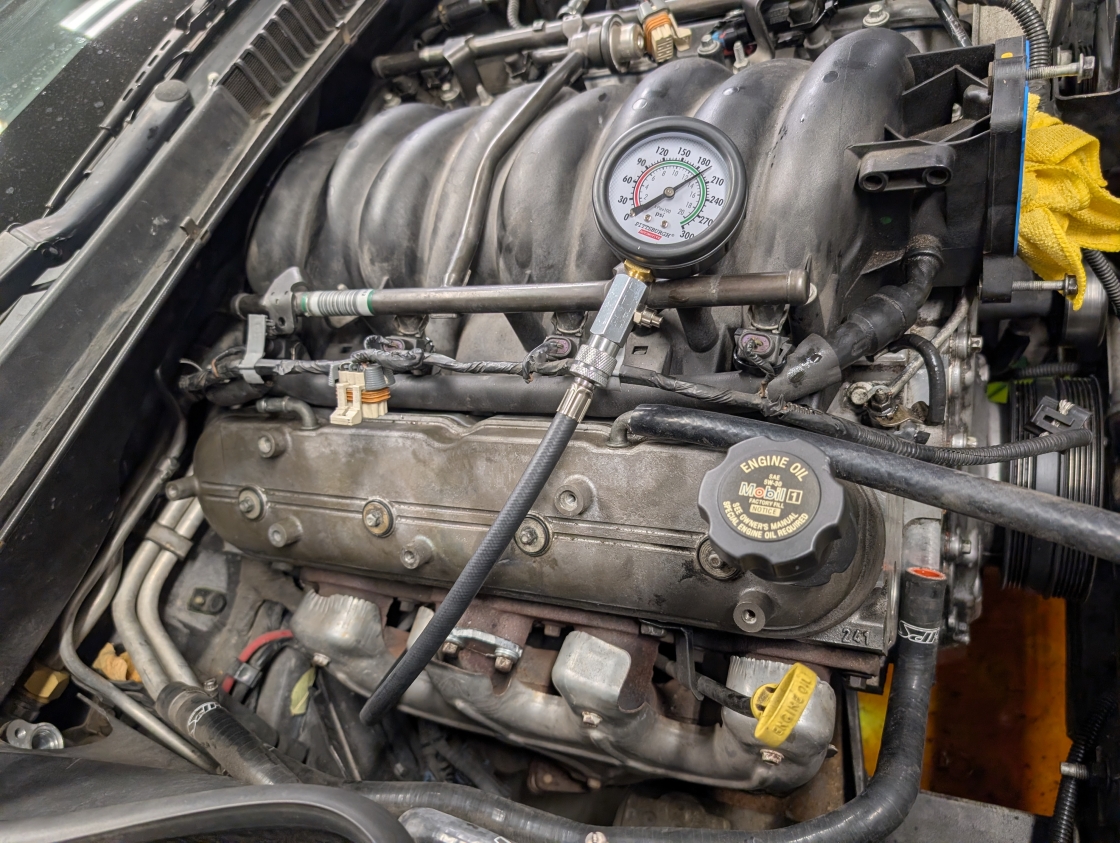
The least reasonable in-car diagnosis for engine health is to do a compression test. There's loads of great compression testers out there and they are dead simple to use. We recommend this very affordable compression tester, as we've used it a few times now with great success.
Be sure all spark plugs are out so it's nice and easy on the car, and be sure your battery is fully charged and if possible connected to a charger to help keep pressures from dropping as the battery gets tired. At this point if you're following what we're doing, your spark plugs are already out, your fuel injectors are disconnected.. this motor isn't going to squirt out gasoline and try and ignite it.
With everything all setup, simply spin the compression tester into a spark plug hole, connect the gauge, and then either turn the motor over yourself or have a helper do it. We highly recommend having a helper work with you to speed things up, but it's quite possible to do this by yourself. Be sure to crank the motor an even amount of times for each cylinder (we recommend 6 motor strokes), and then write down what the gauge registered for your cylinder.
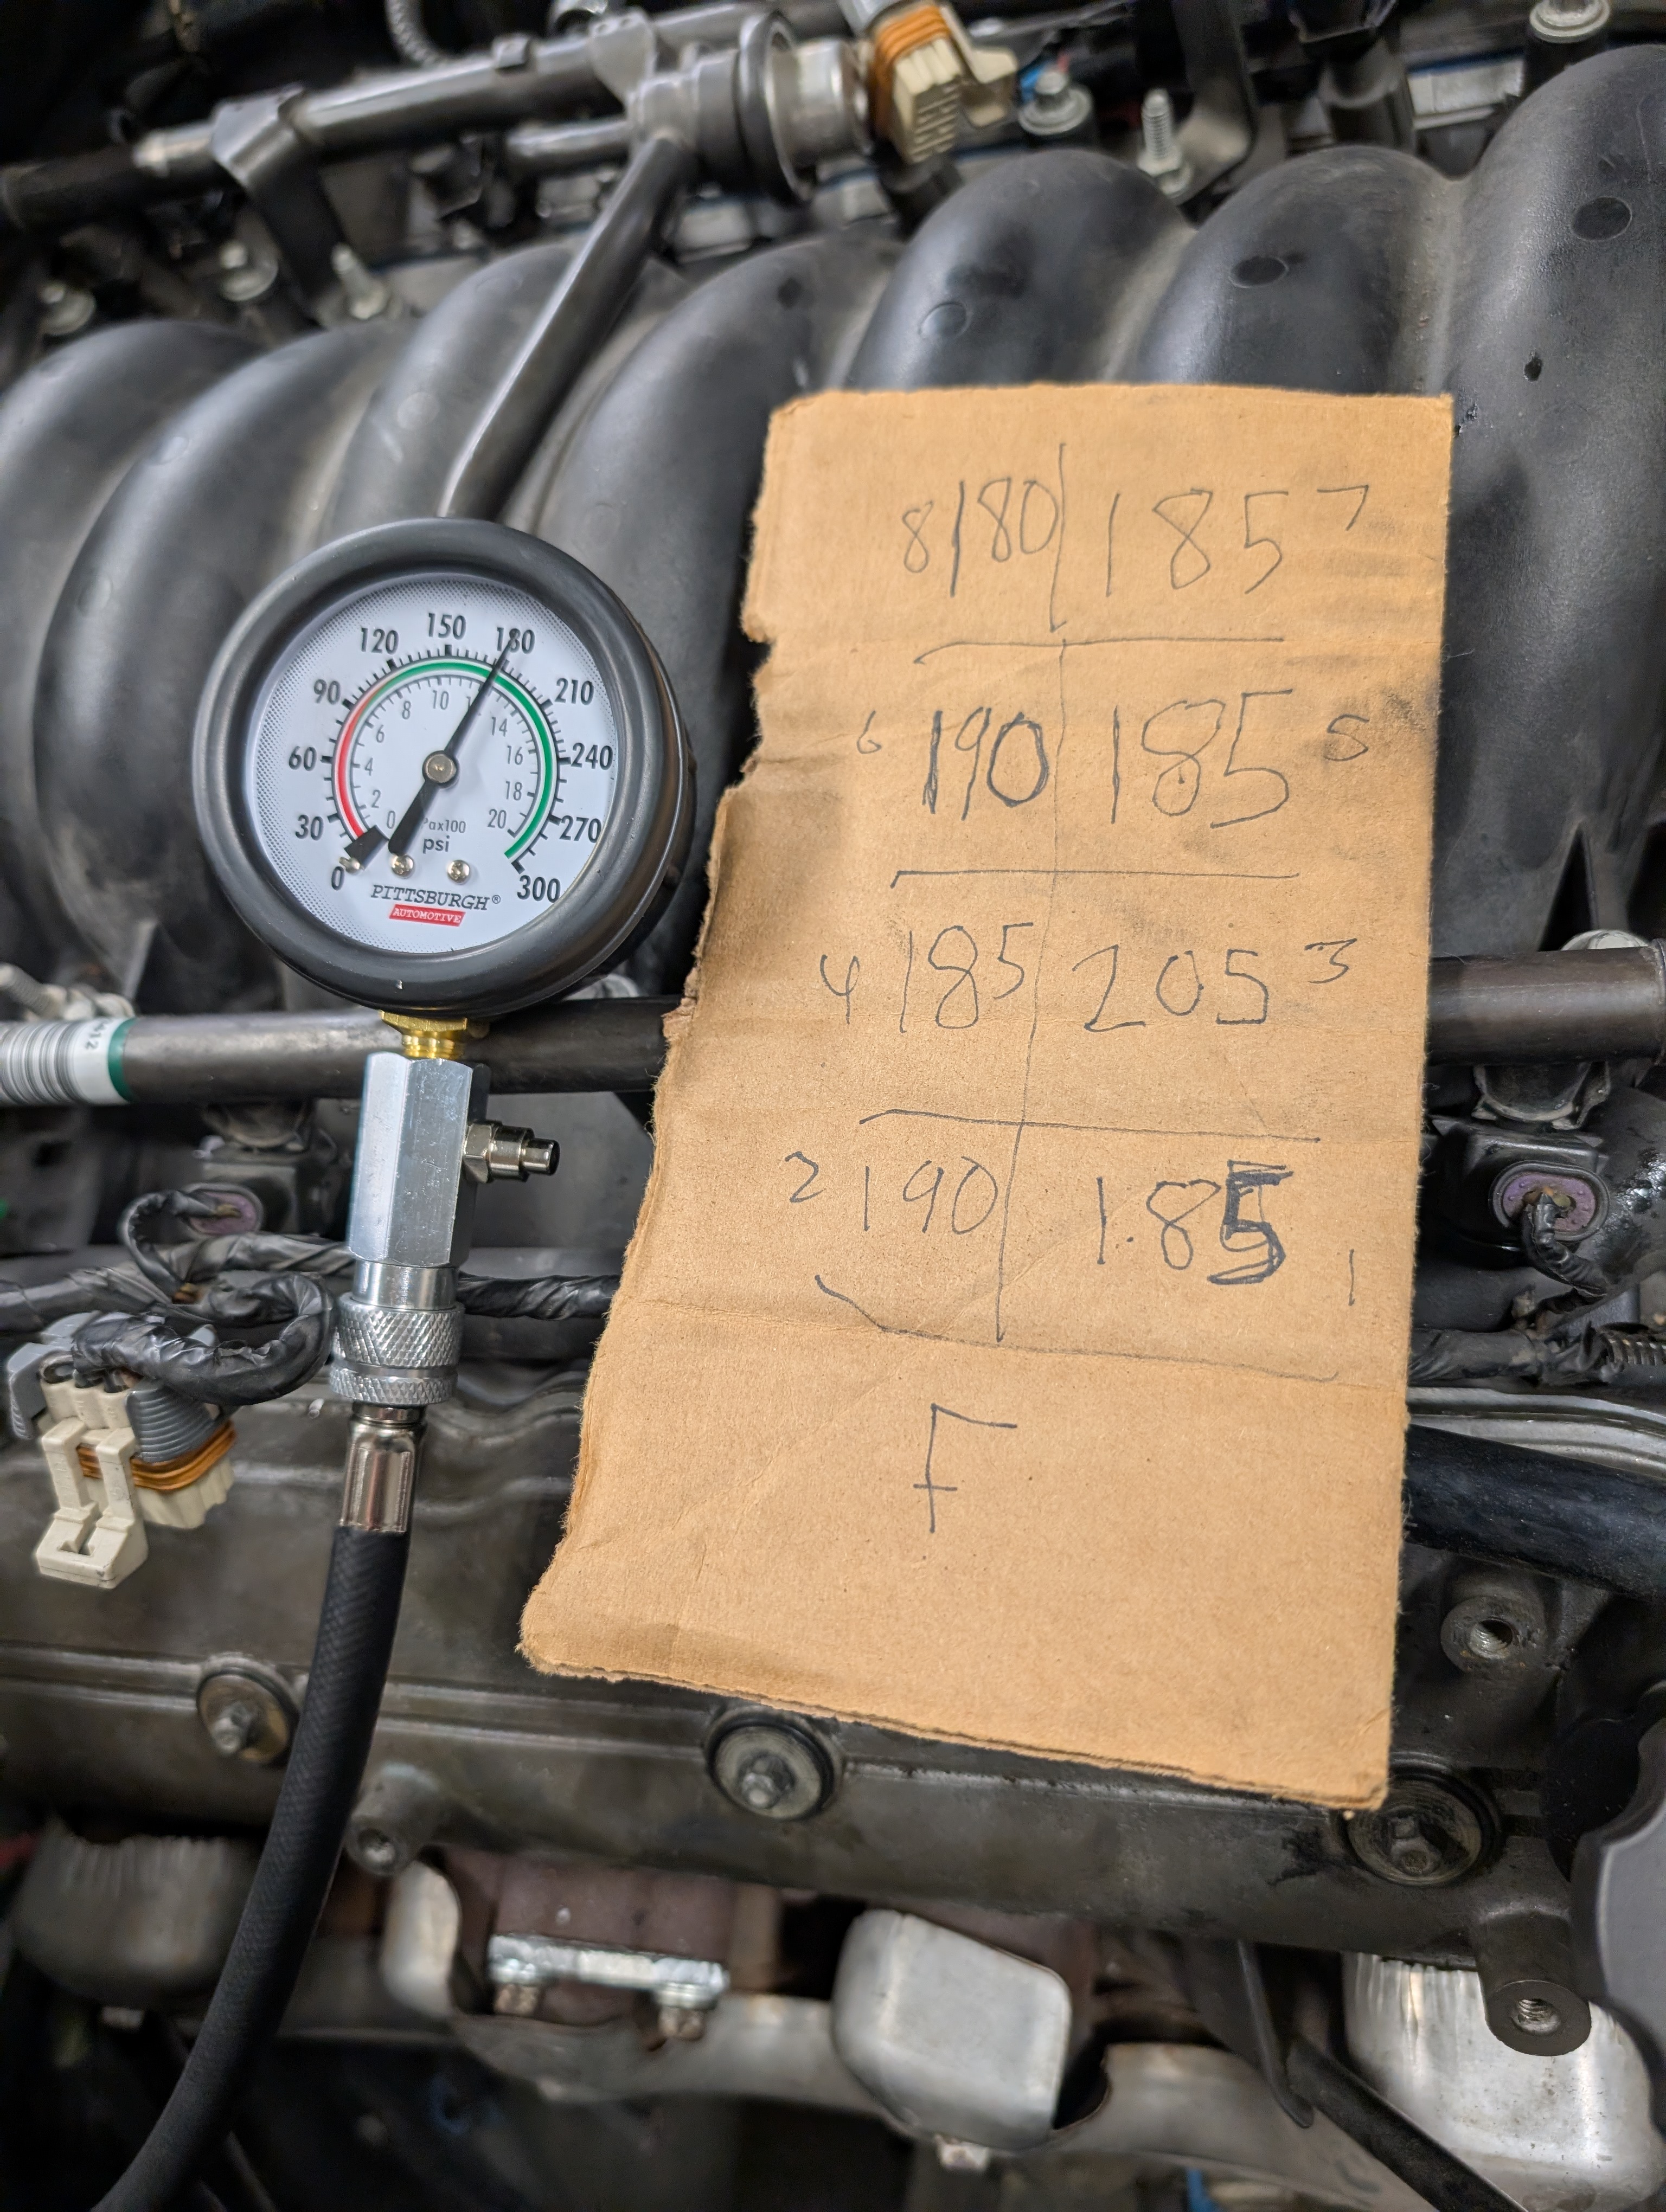
Here you can see our author Shred Jesse's amazing penmanship, and in general what our pressures were. We saw a low of 180 PSI, and a high of 203. Most values though were right around 185 or so, putting the entire set of readings within 10%. Our one high cylinder doesn't mean much, as it possibly got a squirt of gasoline at some point earlier in the process helping the cold rings seal a bit extra. Nothing about our numbers concerned us, and if your numbers are similar you can feel pretty confident that you've got a healthy engine.
Tools & Parts Used Above:
- Compression tester
- 16mm Spark Plug Socket
- Bore Scope
- Oil Filter Cutter
- Spark Plugs (fresh ones to put in for removed ones)
- Oil Drain Pan
- You probably own one, but make sure it's high capacity and has a drain you can put a shop rag over.
- Shop Rags
- FAR more than you need, but man do we endorse having a ton of these around!
So at this point you hopefully have determined that... your cylinders are healthy, the valve train was issues free, and it's unlikely you were having bearing issues as you'd have found metal in your oil. If you also had good oil pressure that was steady before hand (which we did) it's unlikely you've got a bottom end issue.
What's next to do? Well, the last place is the harmonic balancer, and the cam chain!
Swapping in a new Harmonic Balancer, and changing out your cam chain
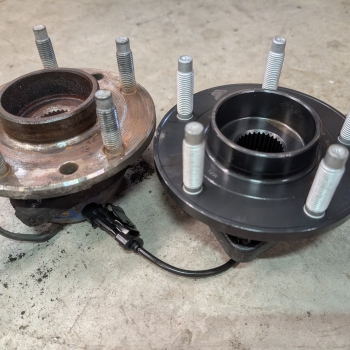
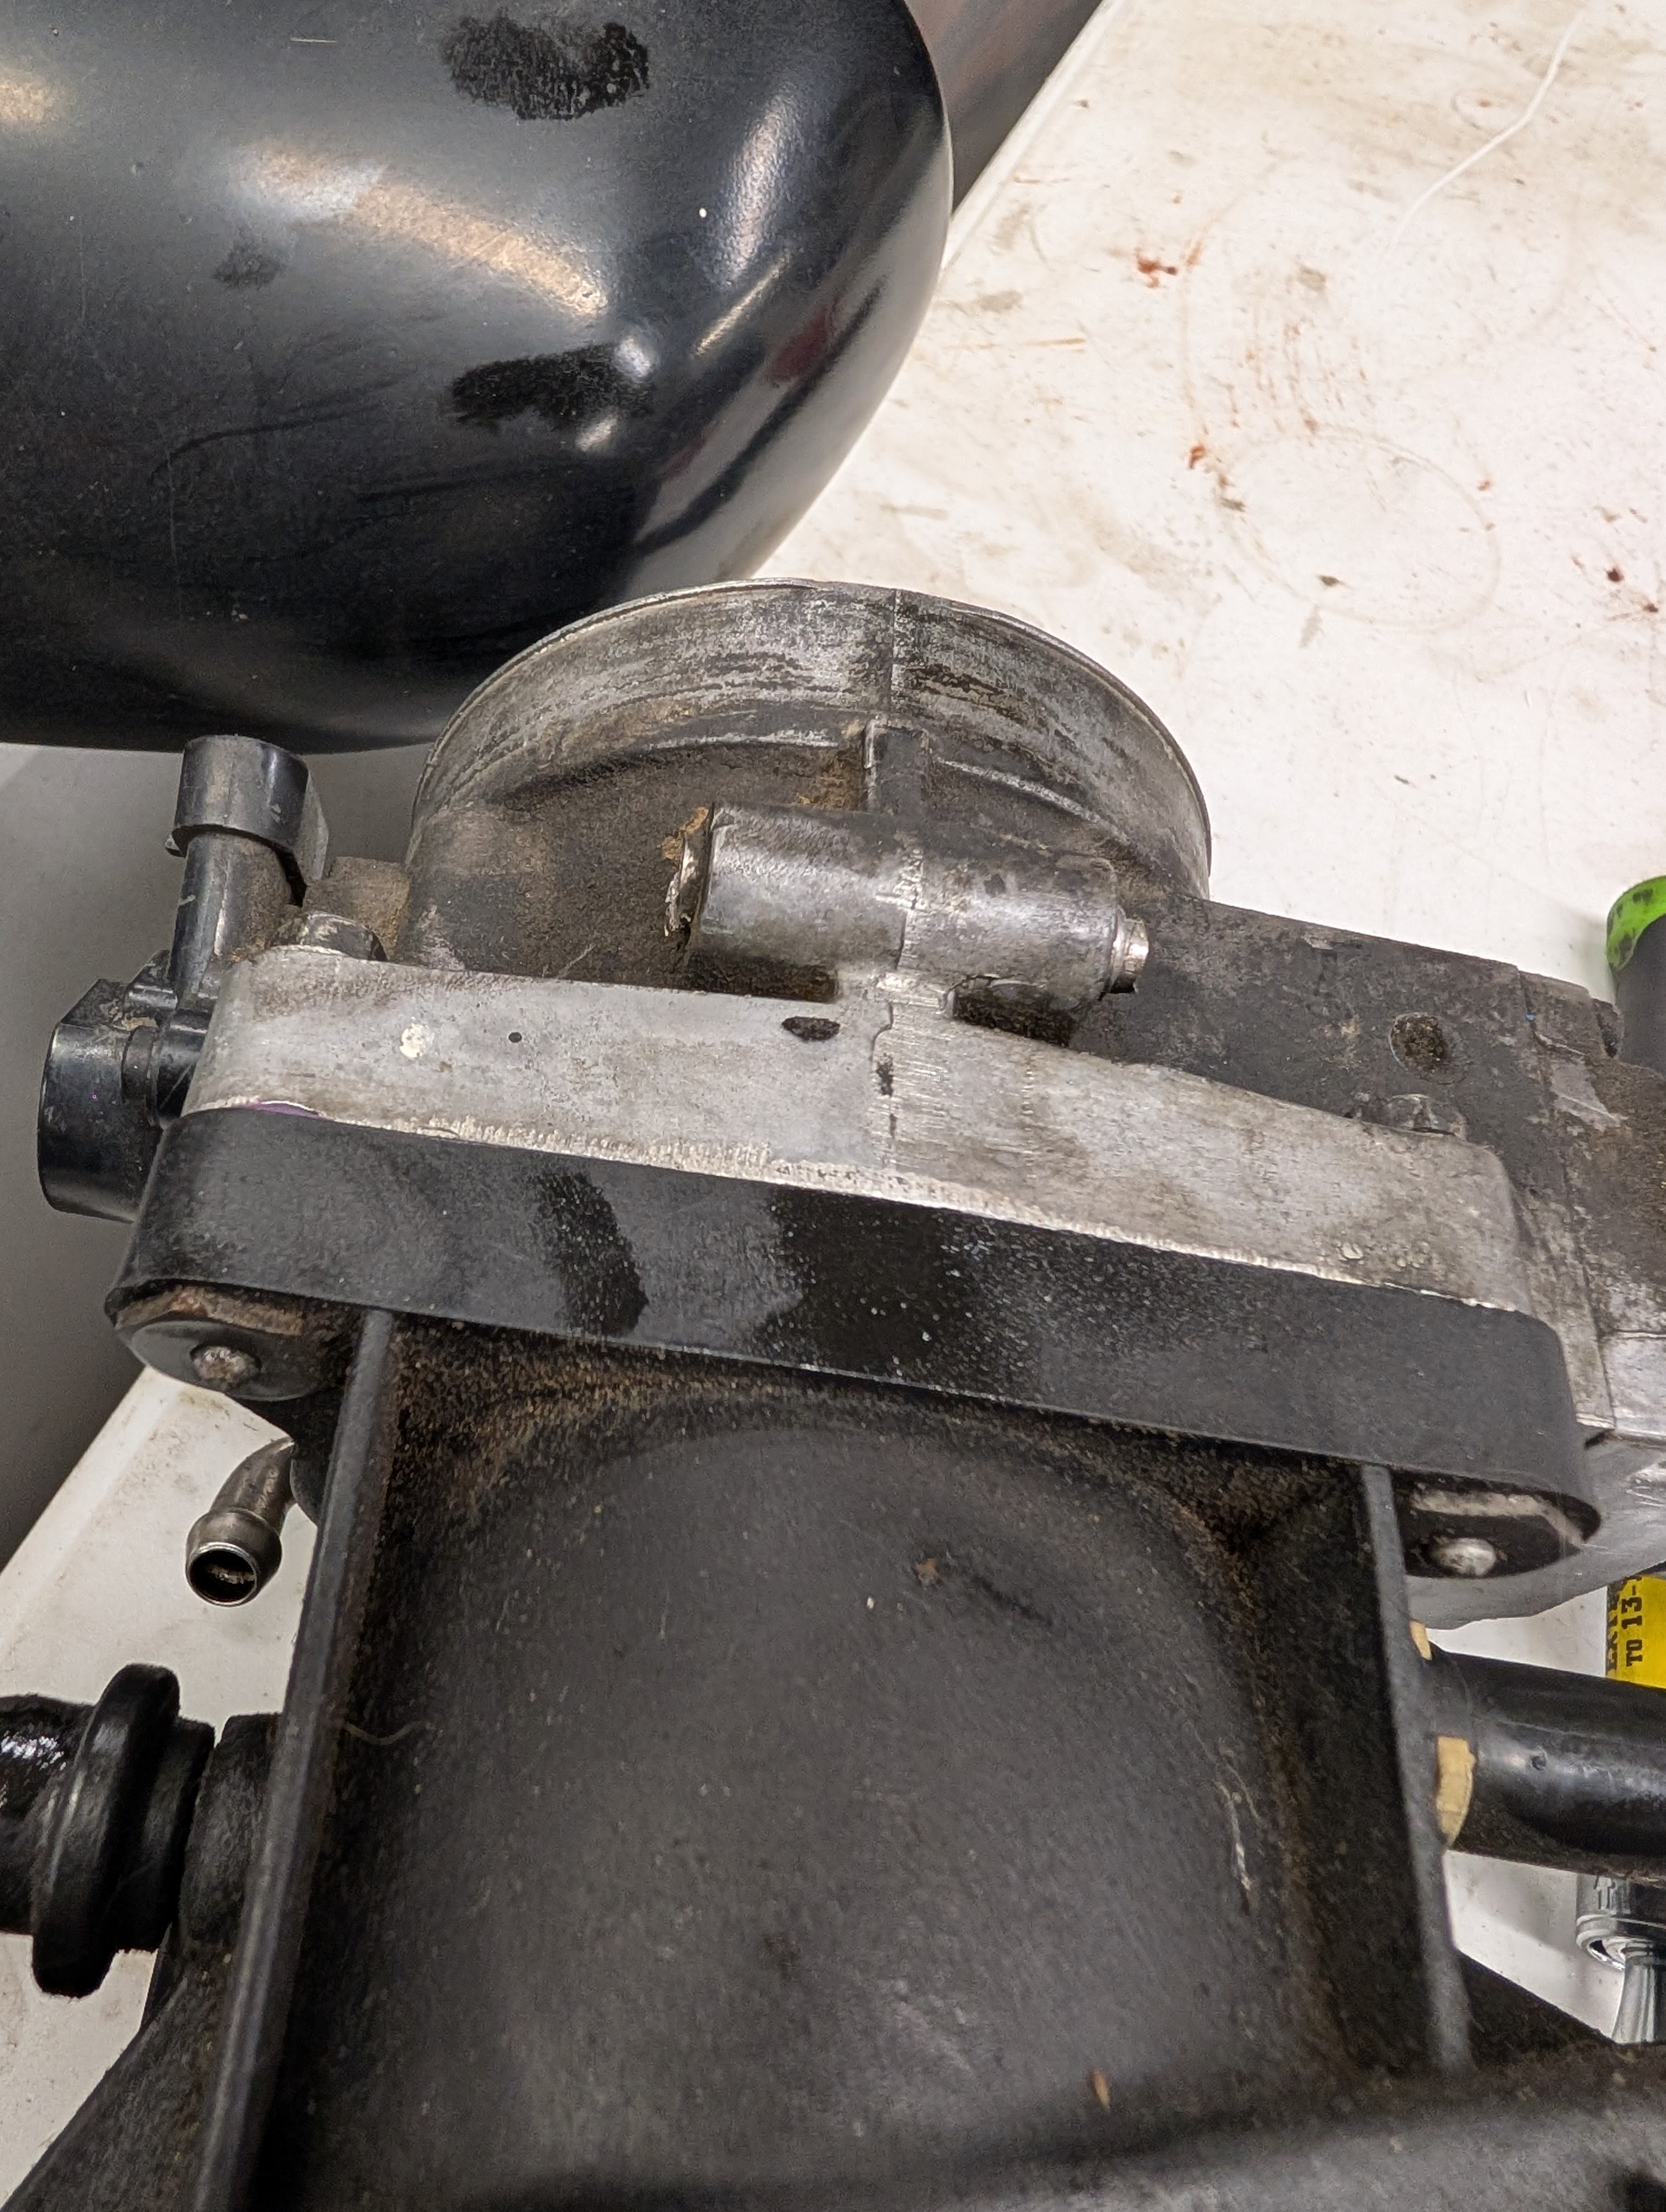
So a very common failure point on a C5 Corvette is the Harmonic Balancer. This piece of metal and rubber sits on the end of the LS crankshaft and helps the engine run smoothly. As these engines get old, the rubber affixed to the harmonic balancer can sepearate and start to cause the harmonic balancer to wobble. This will cause a variety of issues and can eventually entirely fail... so we highly recommend just replacing your harmonic balancer if it hasn't been already.
Now our harmonic balancer had been replaced... but the gentleman who owned the car before us didn't actually know what balancer had put on the car, and based on the rest of the work we'd seen them perform... there was a good chance they'd done the job wrong. An improperly seated harmonic balancer will definitely make noise, and since it takes 240 ft/lbs of torque after you snug the harmonic balancer on your car... there was a pretty good chance this cars previous owner didn't do the job right. Sure enough, when we pulled the bolt off of the harmonic balancer, it wasn't seated fully... things were surely amiss!
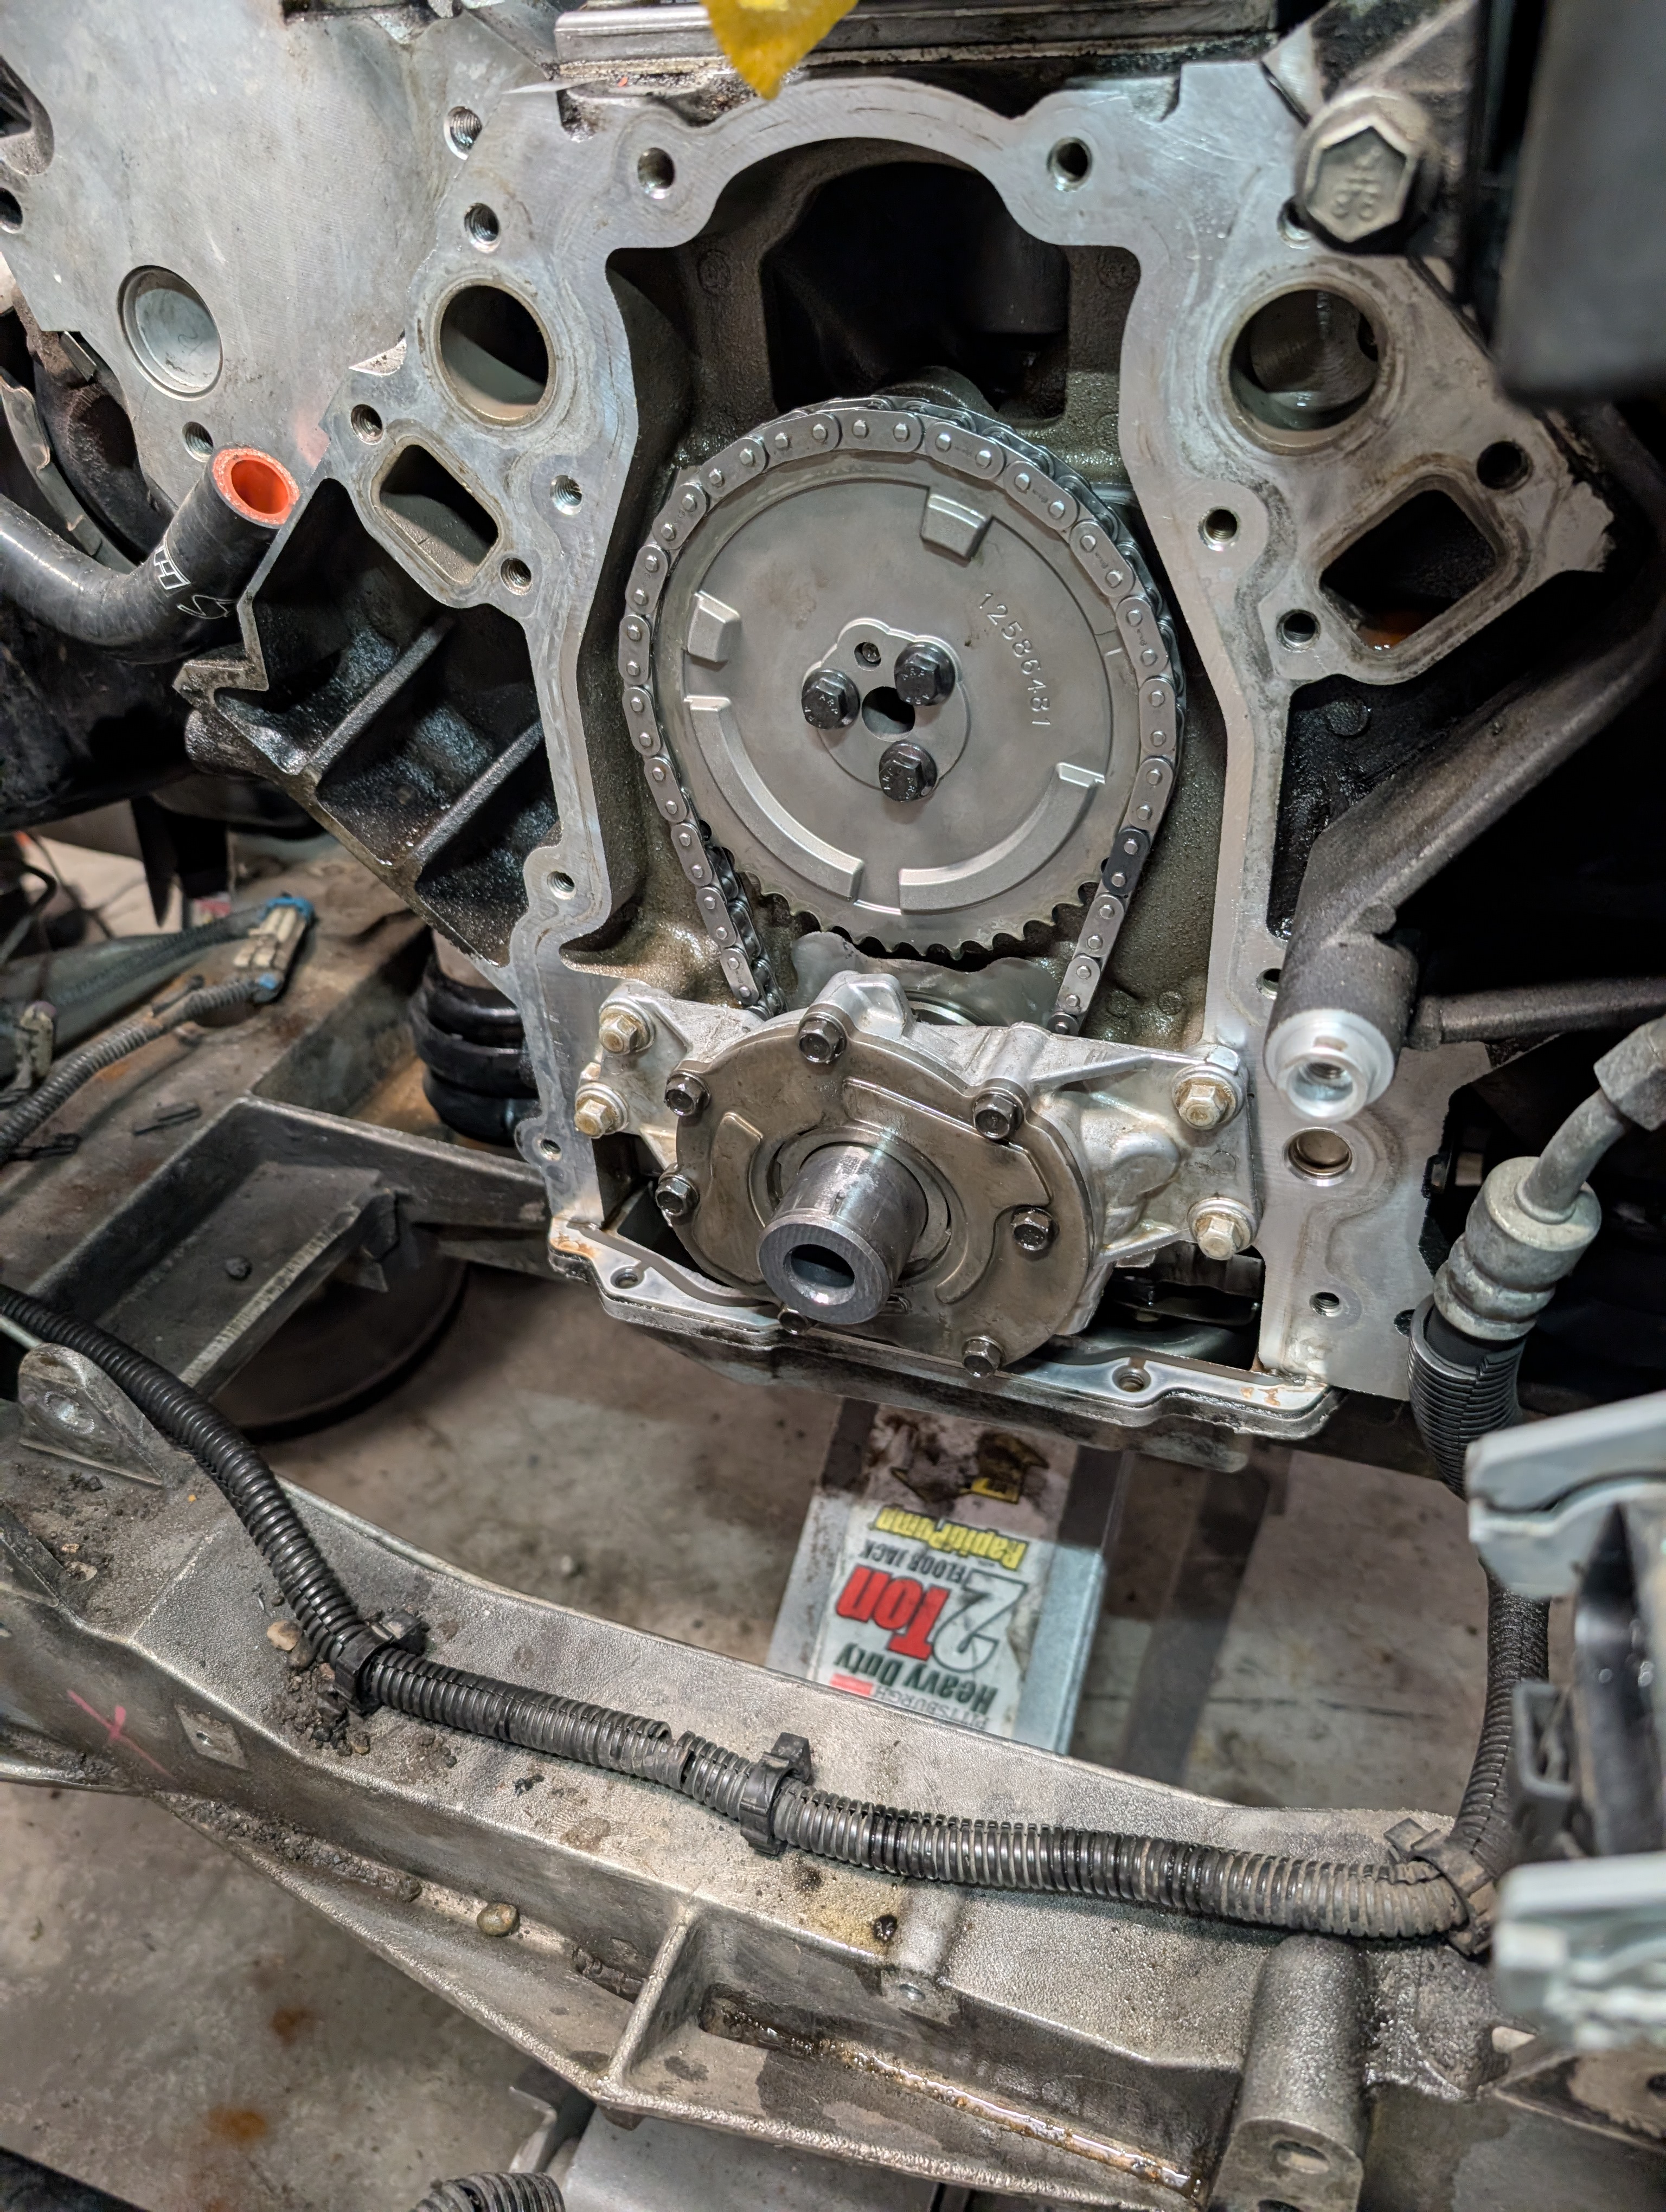
Now, if you're doing the harmonic balancer... you've done 90% of the work to get to the cam chain and some other minor "internals" which all is worth replacing as well. It's a few more reasonable steps, and a particularly worn cam chain can make a bunch of noise, especially on/off throttle. If you're lucky you've got a motor with the provisions for a damper, which will further reduce cam chain noise. We weren't that lucky and for times sake chose not to drill and tap our block to work with the harmonic damper. Many corvettes go decade of racing without it, Shred Jesse's has been crushing it without one and landing on the podium so we felt fine without one ourselves for this cars moderate intended use case.
Our cam chain did have a bit of slop to it, especially compared to the new one, but they all do have a bit of play in them. A new chain is a pretty simple process though like we said, and so a new chain went on with some ARP bolts to hold it all in place.

To give you an idea of just what sort of torque wrench it takes to put down 235 ft/lbs of torque... you need a torque wrench as big as the one pictured above, about 2.5 feet long! That is not the kind of torque wrench your average person owns, and until some of the more recent brand additions at Harbor Freight you couldn't even get something there. We highly recommend the Craftsman 1/2 torque wrench picture above, which just barely handles this need with a maximum setting of 250 ft/lbs.
One minor trick to note when tightening the harmonic balancer back on the car is that you'll want to have the car in sixth gear with the parking brake pulled. If for some reason you can't make it work, you'll need to drop the rear of the car on the ground so the tires can't possibly turn, giving you enough leverage against the motor. You can also add the spark plugs back in for extra compression... but for us, all we needed was sixth gear and the parking brake!
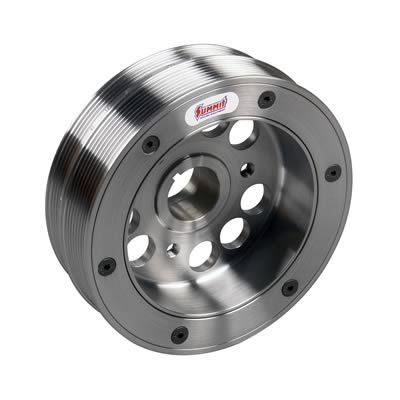
It's also worth mentioning at this time we highly recommend the Summit brand harmonic balancer. It's the best bang for the buck and is proven to last, plus it has an SFI safety rating... so it's hard to beat.
Parts And Tools We Used For this Job:
- Torque wrench (BIG)
- Cam Chain Set
- Note: Includes damper, which you may or may not be able to install. Price difference without damper is $8, so we say it's worth the chance. Here's the no damper version.
- 3 arm puller set
- Harmonic Balancer Install Tool
- Gasket Set
- Cam Retainer Plate
- You're there, it's 5 extra minutes to replace it and put in upgraded ARP bolts as well.
- Harmonic Balancer
- Summit Brand Harmonic Balancer - Cheapest of most aftermarket options, SFI rated, will outlast the car.
- EM Harmonic Balancer - half the price and for street cars will last 15-20 years.
- Harmonic Balancer Bolt
- Dorman Bolt - Cheap and Single use.
- ARP Harmonic Balancer Bolt - Not that expensive, re-usable, ARP tough.
- O-Rings (for power steering connections)
- Power Steering Cooler (Z06)
- If you don't already have one you'd be crazy to not install one at this time since you've completed 95% of the work involved up until this point.
- Permatex Ultra Grey - For Sealing corner of front cover to block and oil pan.
- Oil Pump O-rings
- Another "replace it because you're there" task.
- Use black O-ring for OEM, green is for Aftermarket oil pumps (Meiling) OR trucks.
What If You've Still got a Noise After ALL that?

So what if you're unlucky enough that after all that work... you've still got an inexplicable sound? In our case, we had a pretty prevalant RPM linked "Whirring / whoosh" sound that was also loudest when the motor was cold... what should you do?
If you did everything above, we can confidently say... you don't NEED to do anything else. If you inspected the oil and found not contaminates, all the cylinders are good and you've got good compression everywhere... the motor is overwhelmingly likely fine, you can just chalk it up to something post engine; IE: Not catastrophic engine failure related.
We didn't get into this build to do things halfway though! So, in the second part of the "What's that Engine Noise", we'll dive all the way deep into the motor to show you just what going as far as a person reasonably should go into the motor is like! Stay tuned soon for the article!